GB6
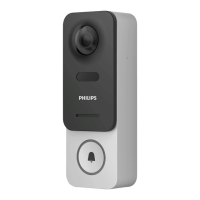
WelcomeEye Connect 2 / Touch / V4
4. Swipe the red badge, one long beep conrms that the administration badges have been
programmed.
2) Add one or more user badges:
1. Swipe the blue badge, four long beeps conrm the activation of the programming mode.
2. Swipe all user badges (grey) to be activated; one short beep conrms the programming
of every badge presented.
3. Once all of the badges have been programmed, wait 10 seconds. One long beep conrms
the end of the programming process.
3) Remove one or more user badges:
1. Swipe the badge (red); 4 long beeps conrm the activation of the programming mode.
2. Swipe all user badges (grey) to be deactivated; one short beep conrms the deactivation
of every badge presented.
3. Once all badges have been deactivated, wait 10 seconds. One long beep conrms the
end of the programming process.
4) Remove all user badges:
1. Swipe the administrator badge (blue); 4 short beeps conrm the activation of the
administration mode.
2. Swipe 1 user badge (grey) that has already been added; one short beep indicates that all
user badges have been deactivated.
5) Using the badges:
To open the electric strike plate, quickly swipe your pre-programmed grey user badge on
the RFID reading eld. One short beep conrms the opening of the electric strike plate.
To open the gate motor, hold the badge in front of the RFID scan area for 3 seconds. Two
short beeps indicate that the gate is opening.
6) Replacing a badge
RFID badges do not have predened functions. It is the programming step that sets the
badge’s function. Badge colours simply enable users to recognize their functions. If a badge
is lost, it can be replaced by any other badge by repeating the programming step.
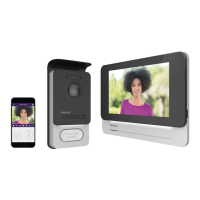
6. SMARTPHONE APPLICATION
Connecting a monitor to the WiFi network
1. Download the Philips WelcomeEye application onto your smartphone. From the Apple
store or Play store
2. From the monitor, go to then and activate the WiFi:
3. Go to , and the following menu appears:
 Loading...