FL SWITCH 2000 / FL NAT 2000
50 / 226
PHOENIX CONTACT 108997_en_04
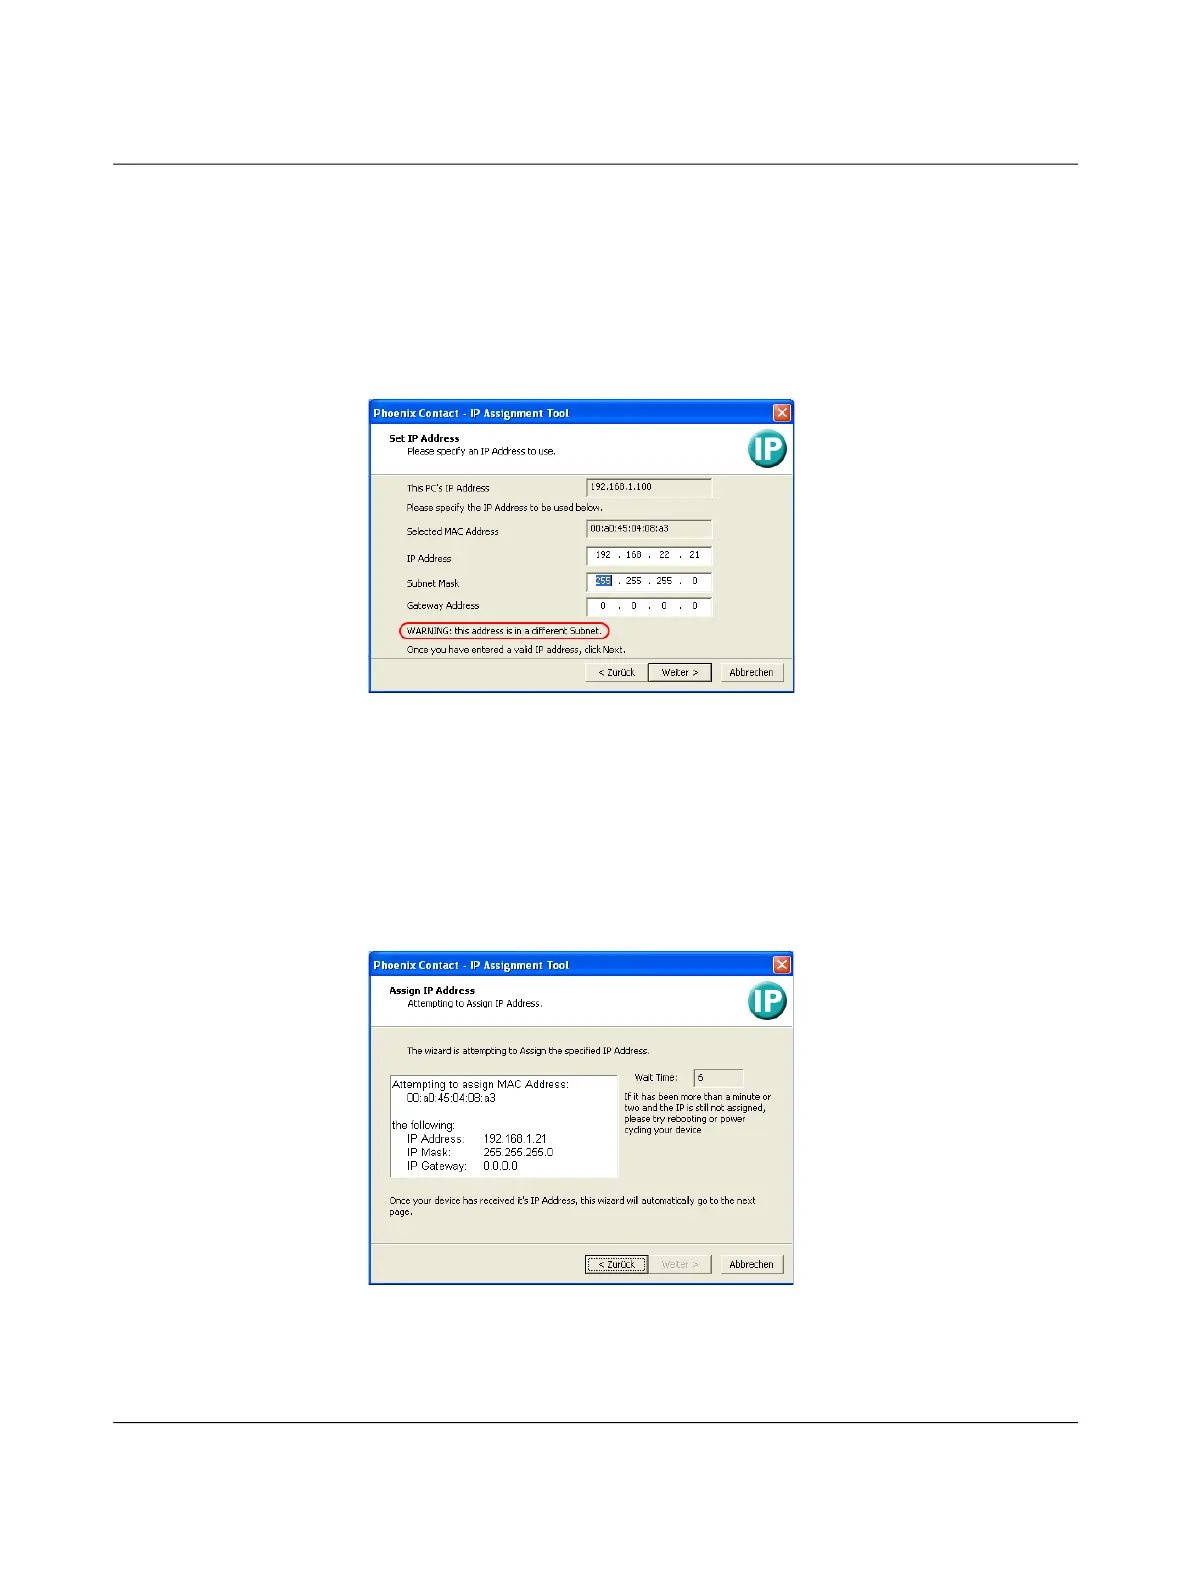
Step 4: “Set IP Address”
The following information is displayed in the window that opens:
– IP address of the PC
– MAC address of the selected device
– IP parameters of the selected device
(IP address, subnet mask, and gateway address)
– Any incorrect settings
Figure 45 “Set IP Address” window with incorrect settings
• Adjust the IP parameters according to your requirements.
If inconsistencies are no longer detected, a message appears indicating that a valid
IP address has been set.
• Click on the “Weiter” (Next) button.
Step 5: “Assign IP Address”
The program attempts to transfer the set IP parameters to the device.
Figure 46 “Assign IP Address” window
Following successful transfer, the next window opens.