3. Connect the output channel of your audio device to the PAA6, ensuring that the device’s faders, gain
controls, etc are all set to 0 dB/unity. Also ensure any equalizers in the audio path are centered.
4. Send a +4 dBu sine wave through your audio system, routing it through to the PAA6. This can be
done using an external signal generator or the PAA6’s internal signal generator. The frequency of
the sine wave at this point is not too important, however for accurate results a number of results
should be taken from a number of frequencies (preferably between 100 Hz and 10 kHz, at least)
and the average of these results calculated.
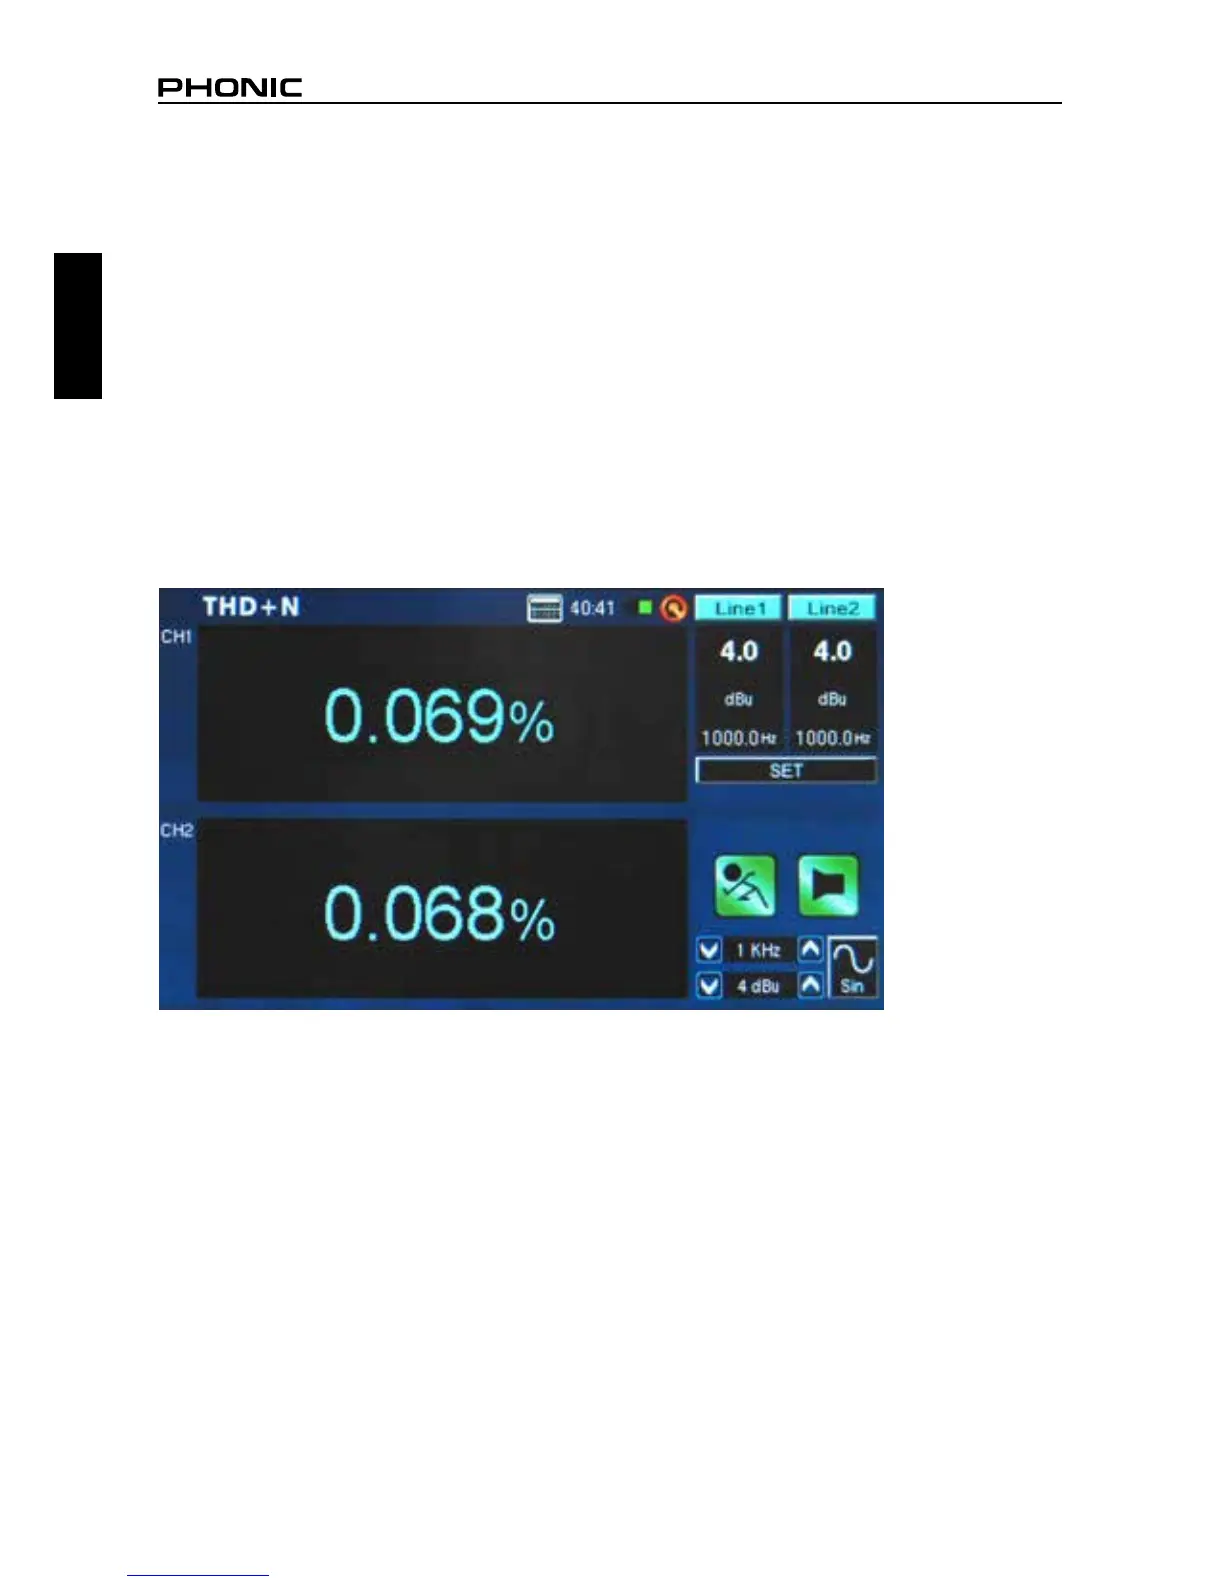
5. Select the “RUN/STOP” icon (or push the RUN/STOP button to the left of the PAA6).
6. To the right of the display you should nd the PAA6 is receiving a 4 dBu signal of whatever frequency
you are sending through it (1000.0 Hz, for example). Provided the values listed here are exactly
what you sent out from your signal generator, the THD+N results given on screen will be accurate
(gure 45).
Tip: When giving THD+N results, they should be written with the THD+N percentage rst, followed by
the signal level (+4 dBu for professional application), then the frequency range tested, and nally a
clarication that the device was set to ‘unity gain’. For example: “<0.015%, +4 dBu, 20 Hz to 20 kHz,
unit gain.”
figure 45