8. Connecting the FASTCAM SA-X2 / SA-Z to the PC
29 GigabitEthernet Interface Connected Manual
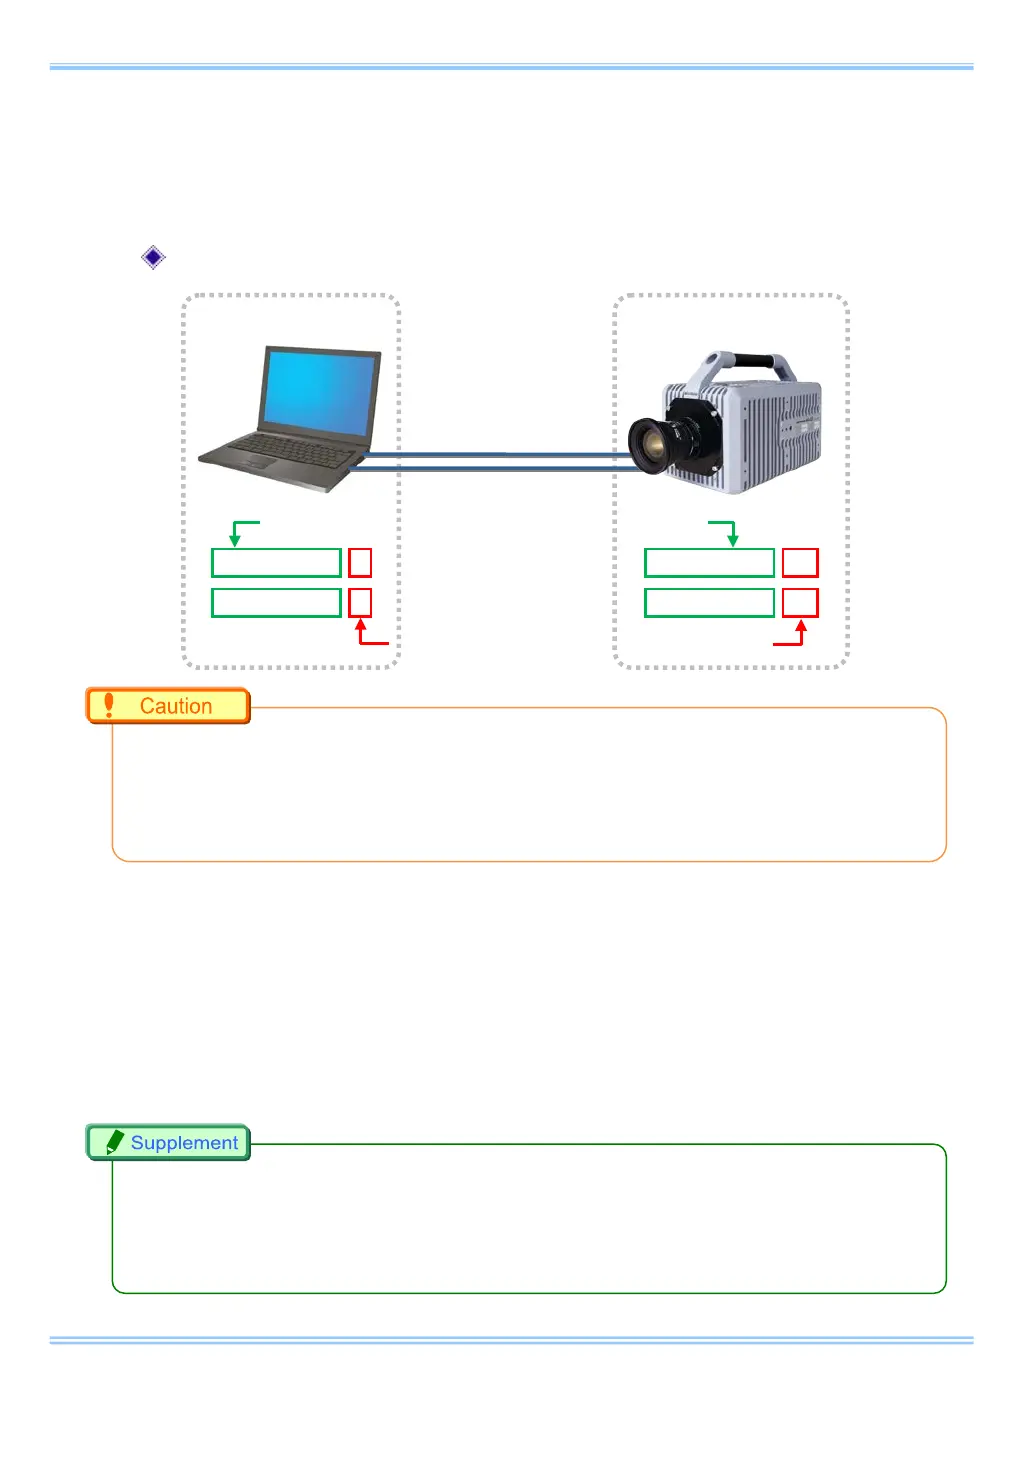
ii Insert two LAN cables into the Gigabit Ethernet interface connectors to
connect the camera and the PC. The connectors on the rear of the SA-X
are labeled “GIGABIT ETHER1” and “GIGABIT ETHER2”.
IP address setting example
•
Refer to the FASTCAM SA-X2/SA-Z hardware manual for details about how to connect the
camera.
•
Different PCs cannot be connected to “GIGABIT ETHER1” and “GIGABIT ETHER2” and
operated.
iii Turn on the camera's power supply. Confirm that the SA-X2/SA-Z LINK
LED and the PC (Ethernet) LINK LED are lit up. The “GIGABIT ETHER1”
Link LED on the SA-X2/SA-Z corresponds to “IF1 LINK/TRANS” and the
“GIGABIT ETHER2” to “IF2 LINK/TRANS”.
iv Start the PFV.
•
When high-speed downloading using both Gigabit Ethernet connections is enabled, the LEDs
for “IF1 LINK/TRANS” and “IF2 LINK/TRANS” flash during downloads. If one of the LEDs is not
flashing, then high-speed downloading may not be enabled. Refer to “10. Troubleshooting” for
more details.
Use the same numbers up to the third segment.
Set a different number for the fourth Segment.
 Loading...