=
mevqb`=jÉëëíÉÅÜåáâ=dãÄe=
=
«=mevqb`=jÉëëíÉÅÜåáâ=dãÄe=OMOM= = P=L=NU=
pìééçêí=eçíäáåÉ=bìêçéÉWW=HQV=ESNPNF=VOONJ ●PN==ÜííéWLLïïïKéÜóíÉÅKÇÉ=
pìééçêí=eçíäáåÉ=kçêíÜ=^ãÉêáÅ~W==NJUMMJOTUJ ●VVNP==ÜííéWLLïïïKéÜóíÉÅKÅçã=
If you have ordered the corresponding kit as an Embedded Imaging Kit, all hardware components required for installation are already included.
As a rule, both the extension of an existing kit by one camera and the extension of an existing video kit by additional cameras is possible without problems with an
existing phyCAM interface.
Before connecting and starting up the camera, carry out the first steps of the "Quick Start Instructions" of the respective kit. To start the scripts on the module, follow
the steps to establish a serial connection with the module. You can use the terminal program suggested in the manual or your own terminal program.
To transfer saved image files to a PC (host) via Ethernet, follow the steps to establish an FTP connection. You can use the FTP server suggested in the manual or
your own FTP server.
3 Overview
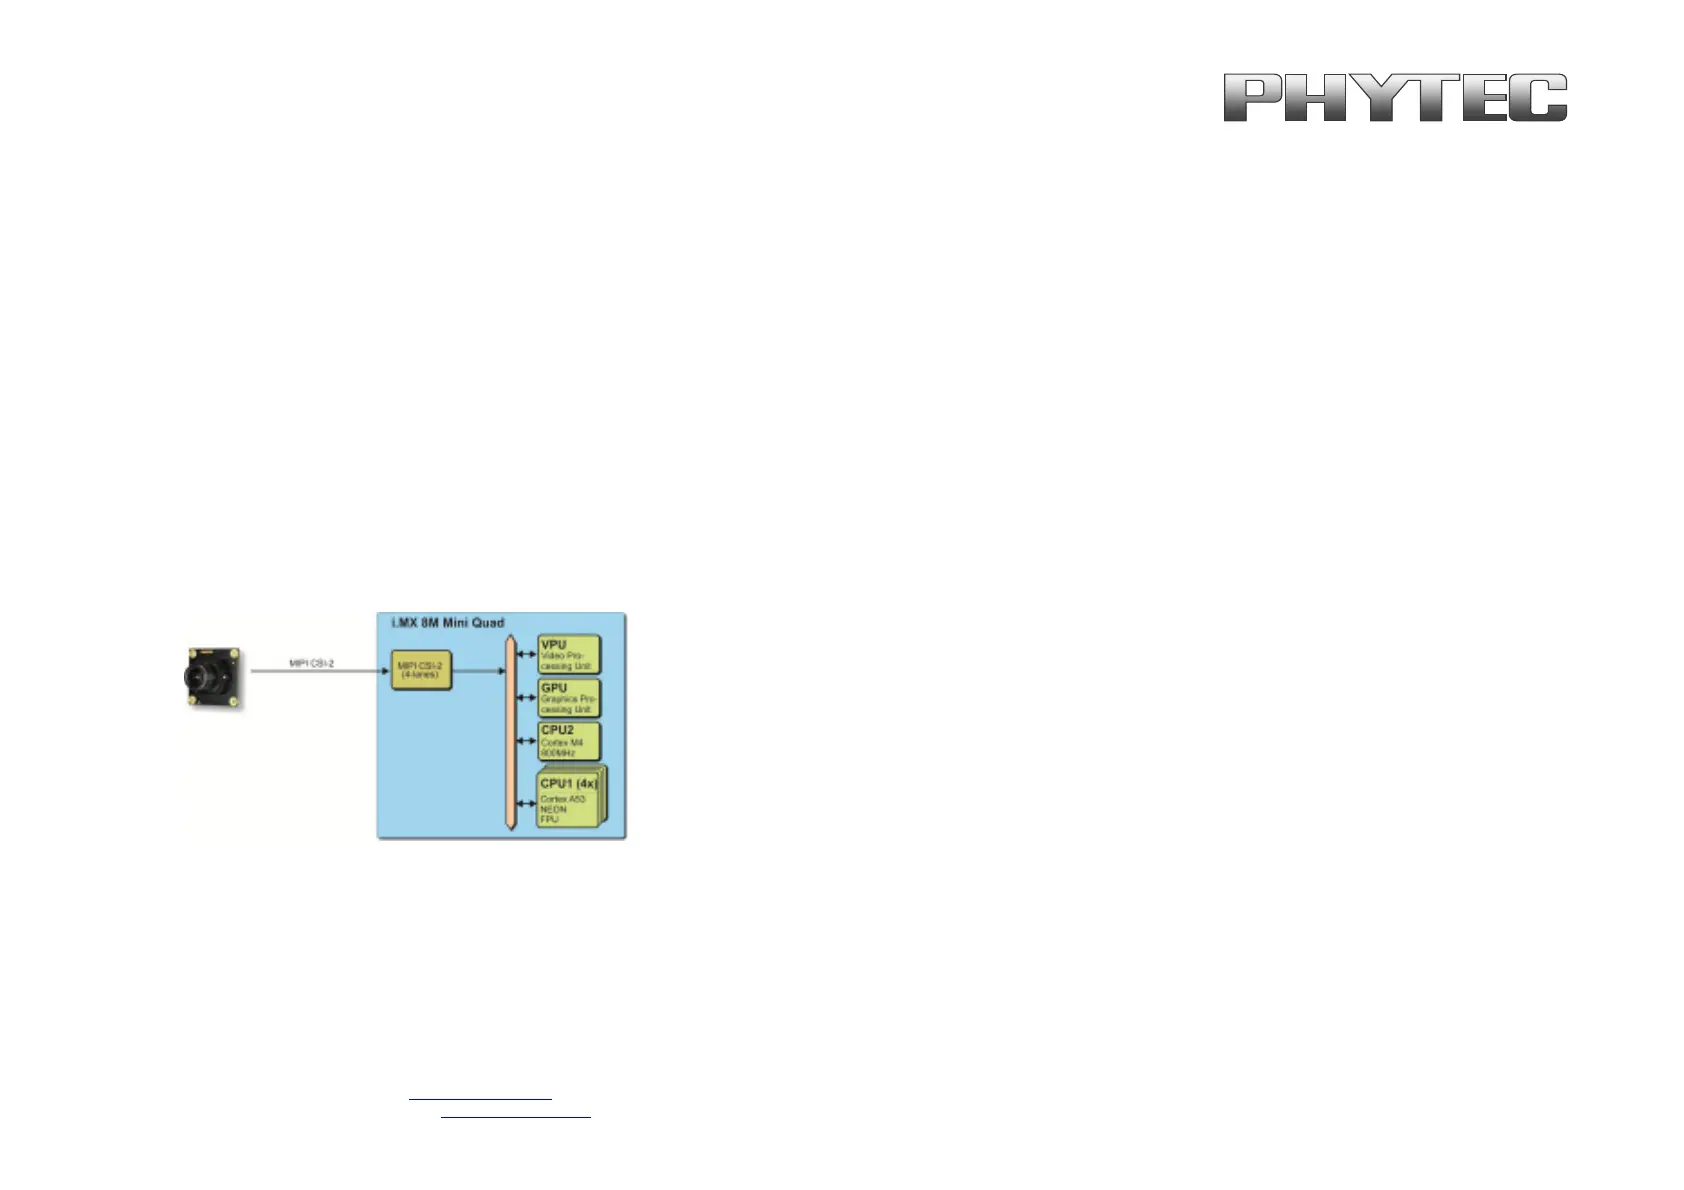
The i.MX 8M Mini Microcontroller supported one MIPI CSI-2 camera interfaces (see figure 1 ).
figure 1: Block Diagram Camera Interfaces of i.MX 8M Mini Controller (Quad)
On the phyCORE-i.MX 8M Mini the CSI1/CAM1 camera path go out as CSI-2 MIPI signal.