5 - 3
5
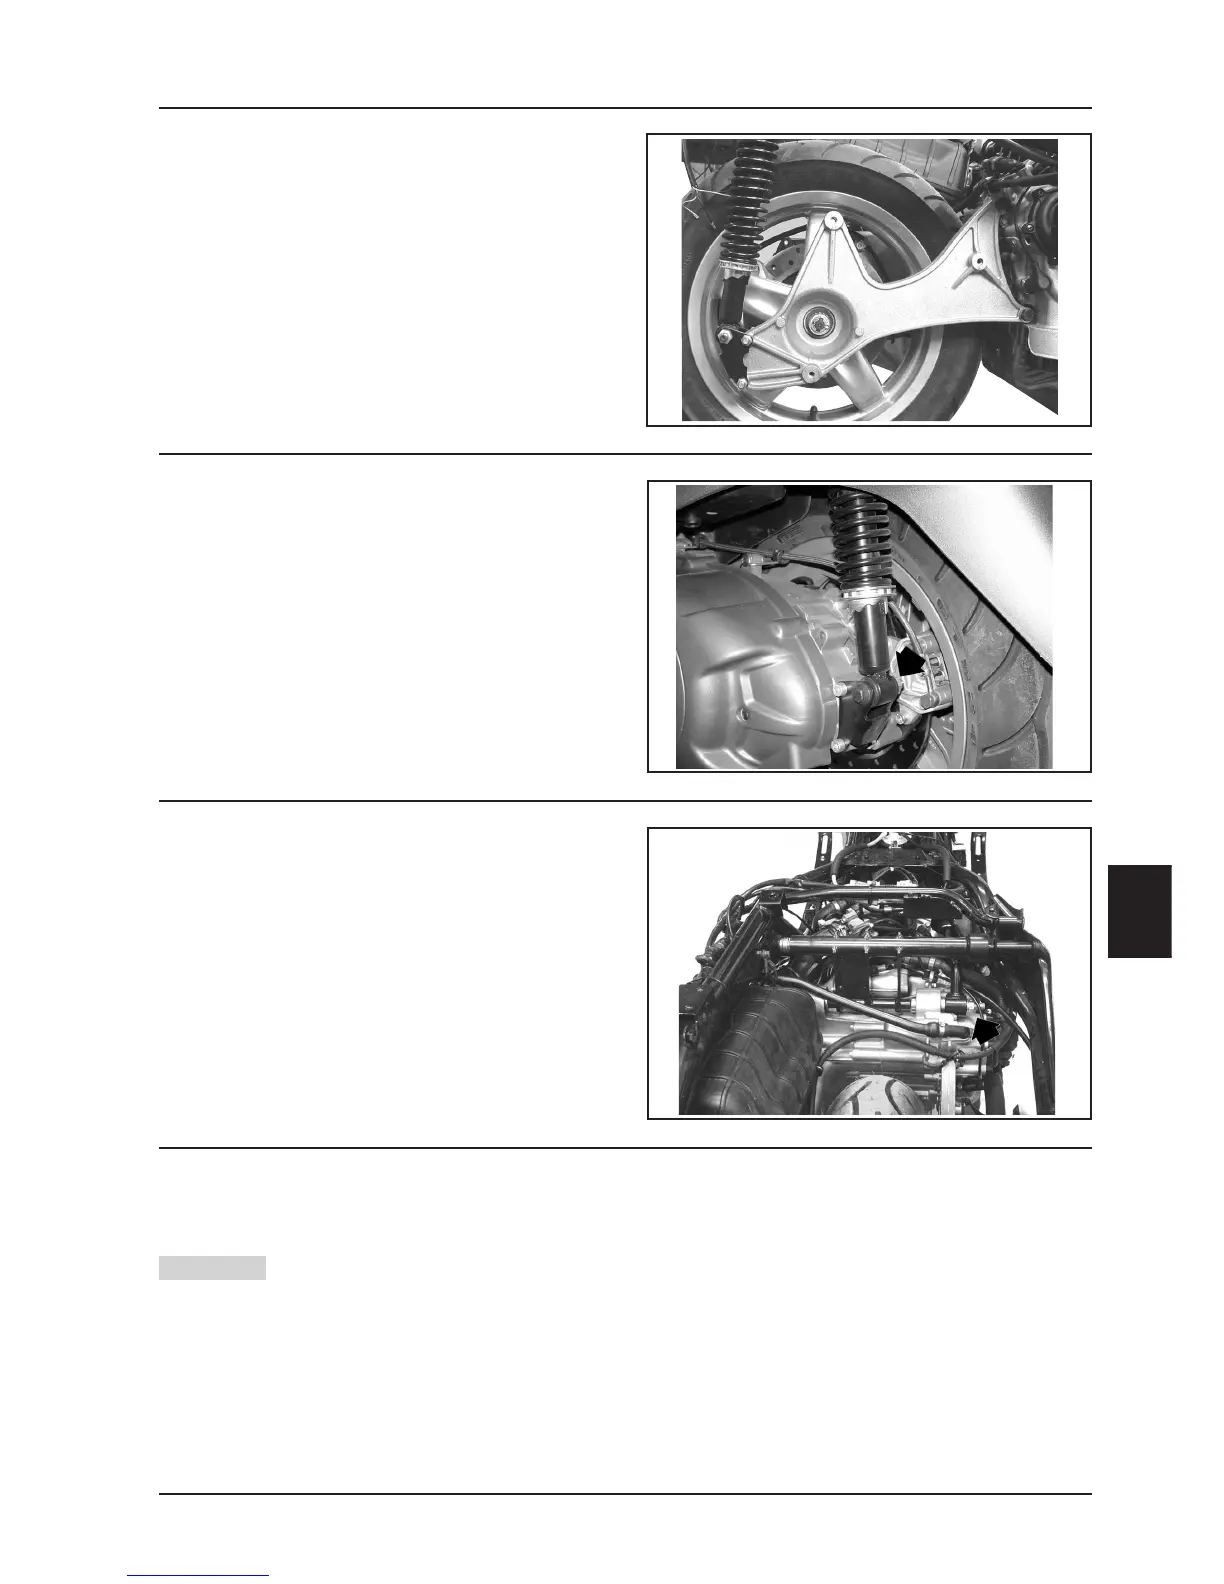
Supporting arm disassembly
- Unscrew and remove the r.h. shock absorber to
supporting arm lower fixing bolt
- Unloose the arm to engine 2 fixing screws.
- Remove the split pin and unscrew the wheel axle nut;
avoid the wheel turning by means of the integral
brake.
- Remove the supporting arm.
05_004
05_005
Disassembly of l.h. shock absorber lower pin
- Remove the bolt shown in the figure.
N.B.: To be able to remove the shock absorber support,
remove the two nuts on the brake caliper side and the
screws.
Engine pin/swing arm disassembly
- Adequately support the engine.
- Remove the nut shown in the figure.
- Remove the pin.
- Now the engine is free.
Engine assembly to vehicle
- Perform the assembly in the reverse order observing the tightening torques indicated in Chapter 1.
- Take care not to invert the position of the two accelerator control transmissions. Check that both show
a slight play with the valve in contact with the register.
N.B.: Carefully clean the injector Tee Joint before reassembling the quick-connections. Direct the injector in such
a way as to avoid any interferences of the electrical cables with the coolant and fuel pipes.
- Check the engine oil level, top up if necessary with oil of the recommended type.
- Fill the cooling system (Chapter 11-Cooling).
- Check the accelerator and electrical devices function.
Warning
Engine
05_003

 Loading...