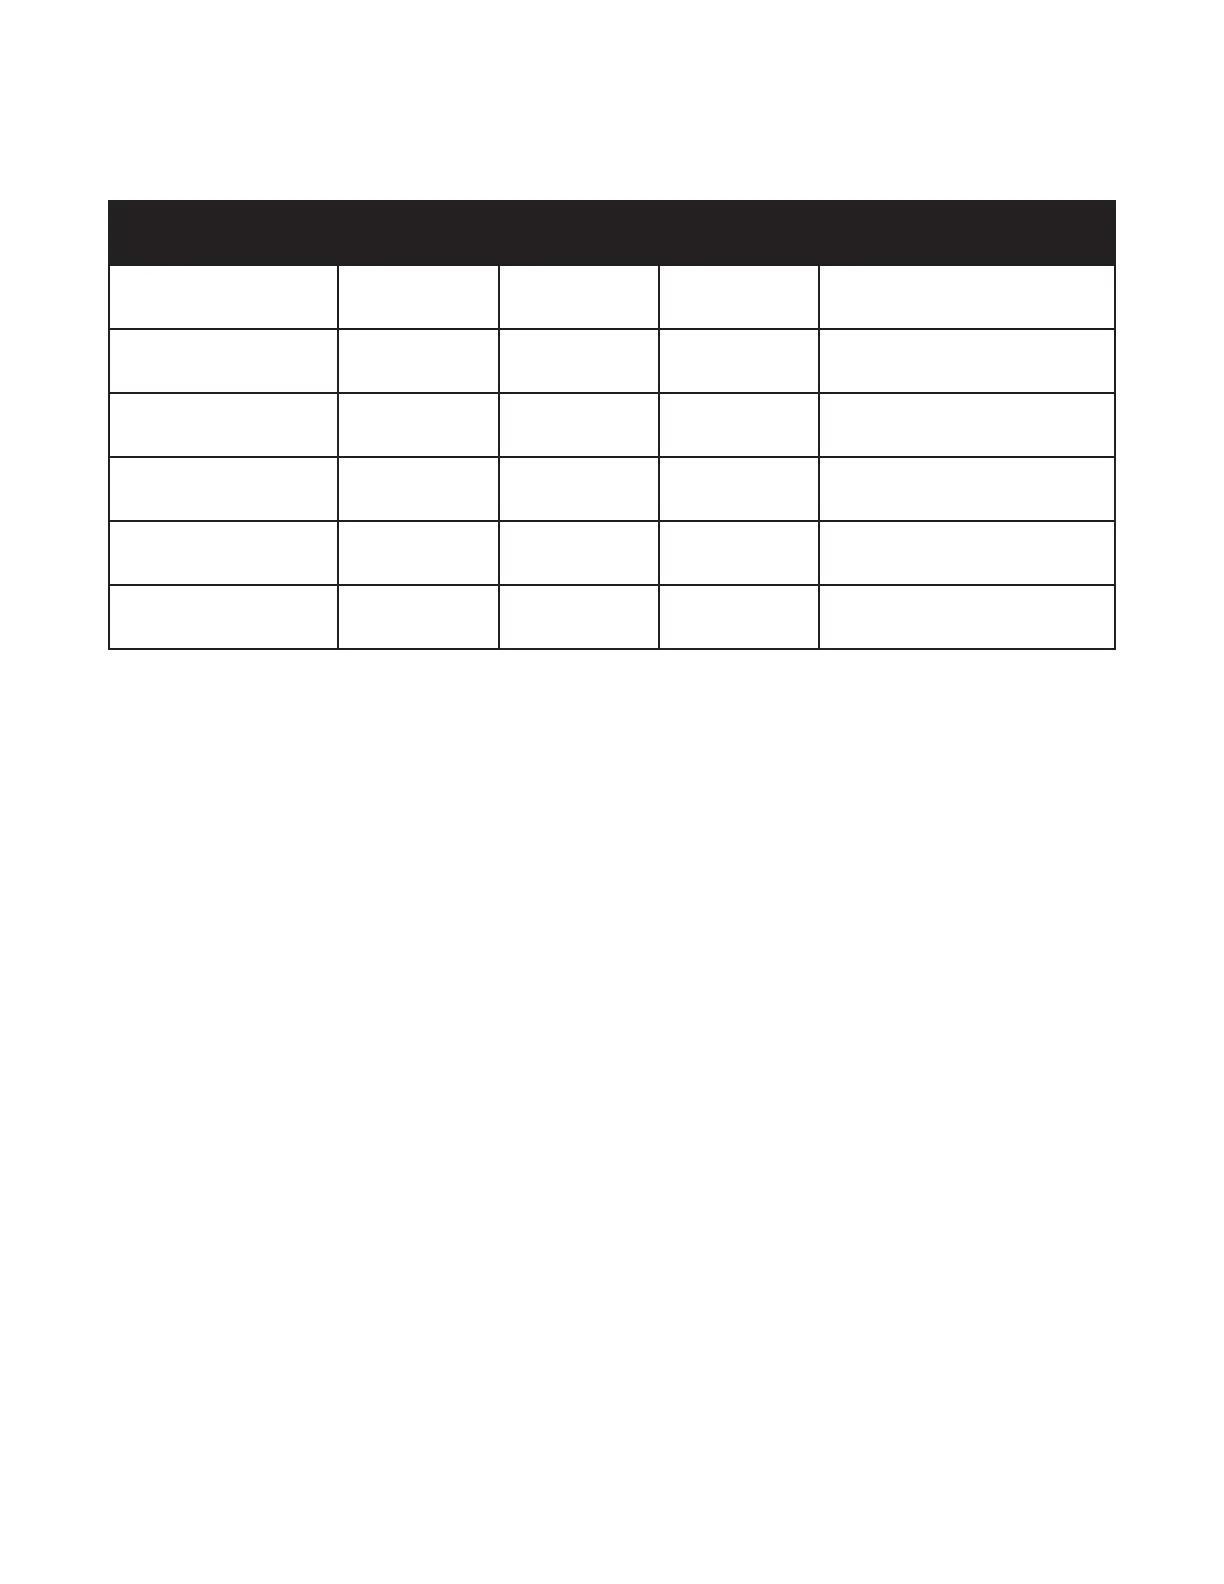
12
Toggle Switch Functionality Summary Chart
Toggle Switch UI Off Green Red
Orange
(push and hold)
SYNC / MULTI SYNC off MULTI 1:1 Sync Multiplier Menu
SERIES / PARALLEL N/A SERIES PARALLEL Expression Options Menu
STEREO / SPLIT N/A Input Split Stereo
Remote Switch Varispeed
Interval Menu
ARM / ALL N/A ALL ARM Loop Aging Menu
CUE / FADE INSTANT FADE CUE Fade Multi Menu
SAMPLE RATE 48kHz 12kHz 24kHz Sample Rate Menu
Arming a loop is achieved by pressing the footswitch that corresponds to the desired loop. The Arm
light above the selected loop will glow red indicating its status as armed. A loop must be armed in
order to accept further commands. When Infinity 3 powers up initially, LOOP 1 is armed by default.
Loop 2 cannot be armed until material is recorded on Loop 1.
Once a loop is armed, pressing the footswitch for that loop will begin recording. The corresponding
loop LED will glow red to indicate recording. You must record to Loop 1 first. You will be able to
record on Loop 2 once there is audio recorded on Loop 1.
Pressing a Loop footswitch aer the loop has started recording will stop recording and immediately
begin playback. The loop LED will glow green to indicate playback.
Pressing the Stop footswitch while a loop is recording will stop recording without immediate playback.
You will need to press the appropriate loop footswitch again to begin playback.
Arm
Record
INFINITY 3 RULES