4 Programming the Hunter-Pro series with an LED keypad
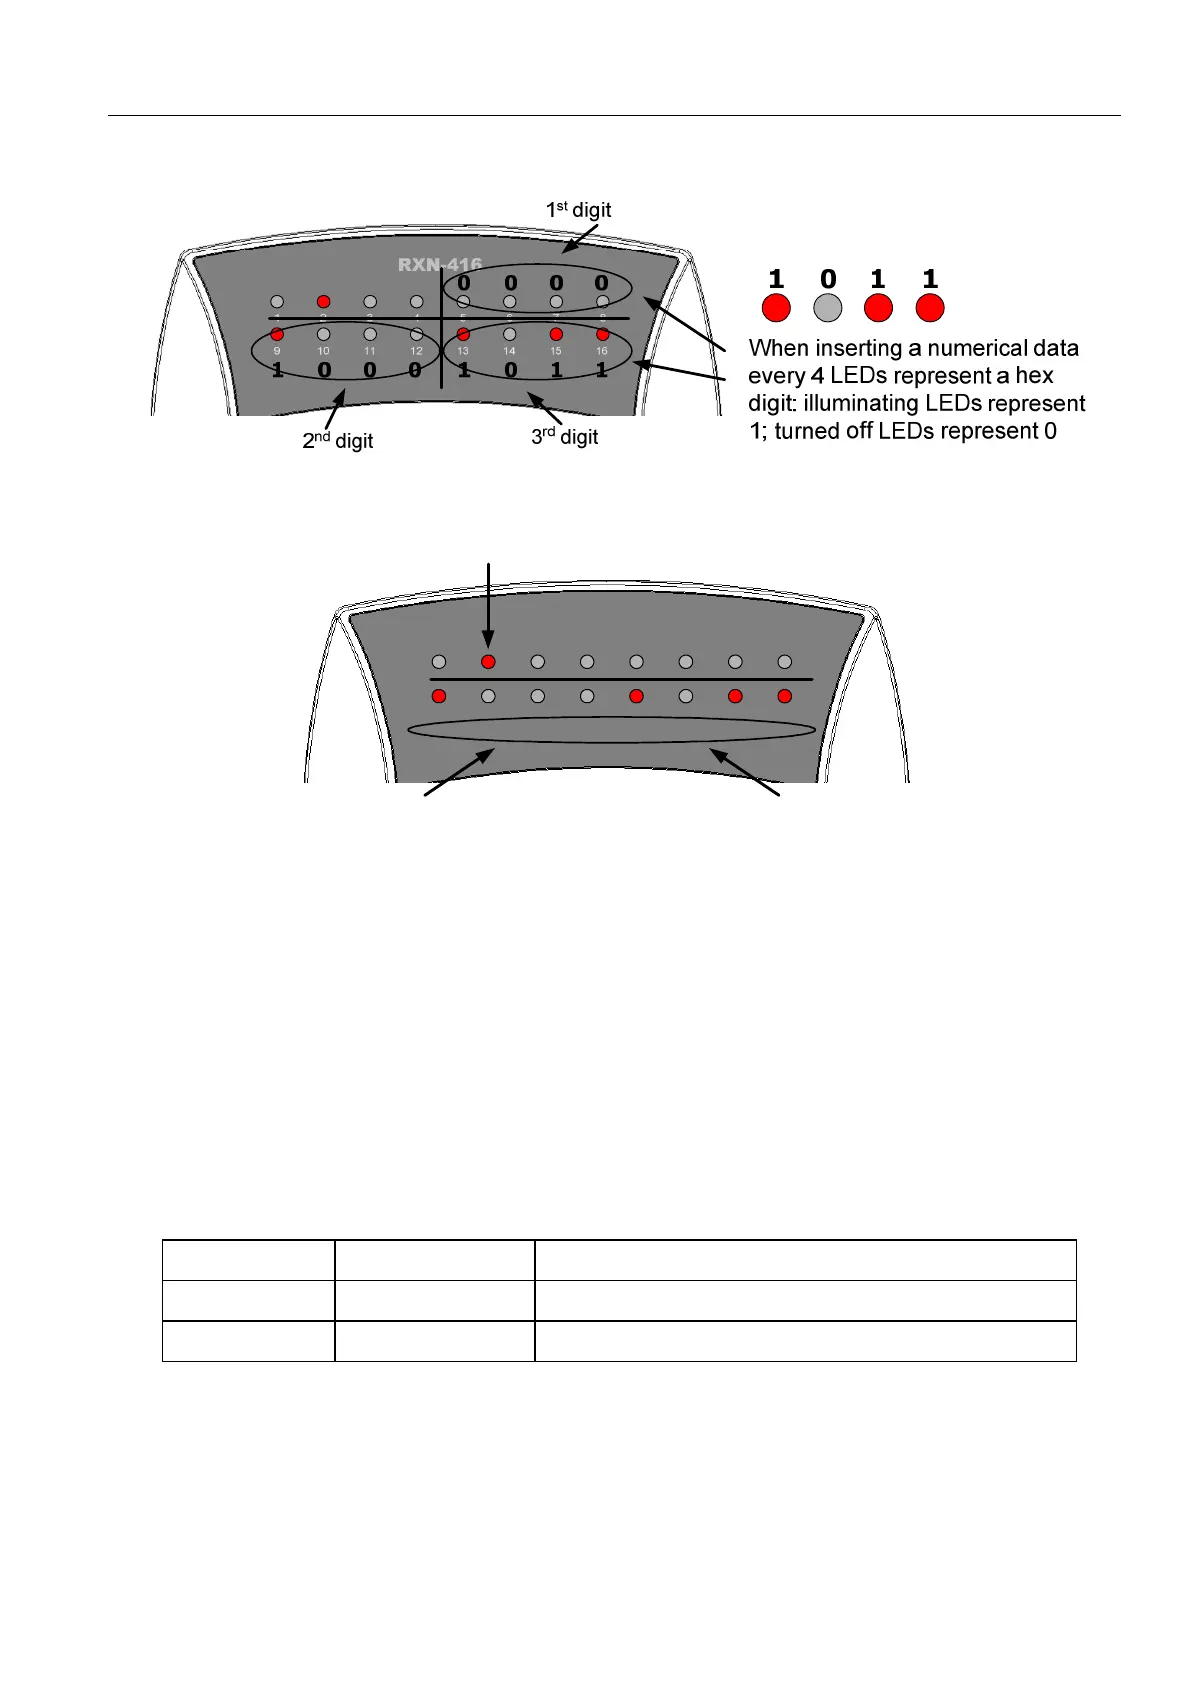
Figure 2. Setting an address
RXN-416
12345678
9 10111213141516
+- - - + - ++
When inserting discrete data the behavior of the keypad is the same as the LCD
one: the top line shows where the ‘cursor’ is (looking from left to right) and the
bottom shows the toggle status of the parameter: illuminating LED represents ‘+’
which means enabled; off LED represents ‘-‘ which means disabled.
If the Hunter-Pro menu contains more than 8 parameters, the first 8 are part of the
first byte and the second 8 are part of the second byte (applies to the address table
in chapter 3)
Top line illuminating LED:
Location of the ‘cursor’
One byte
Figure 3. Reading discrete data
The LED keypad programming flow resembles the LCD keypad flow to some extent.
2.1 The LEDs
1. When the system is in programming mode the Red Armed LED indicates by flashing
fast. The Green fault LED indicates whether the parameter’s address is being set or
its value:
Green LED Red LED Mode
Flashes fast Off Programming: inserting an address
Flashes fast Flashes slowly Programming: Inserting a value (parameter)
2. When the system is in address setting mode, the address value is determined by
the combination of the illuminating LEDs in both the 2 lines.
3. When the system is in parameter setting mode, the upper illuminating LEDs mark
the position (as a digit or bit) of the ‘cursor’ (as in the LCD keypad), and the bottom
line mark the value of this parameter (as a digit or bit).
4. All numbers, e.g. telephone numbers, timings, etc., are displayed in hexadecimal
(base-16) system. A conversion table is in the next sub-section.

 Loading...