26
Belt Replacement (40” Models)
(40”) Part #: MP268800
A. Place the machine in the Rok-Bak position. Remove
the pad holders by holding the end of the spindle
shaft, located on the top side of the deck, with a 3/4”
open-end wrench and turn the pad holder clockwise.
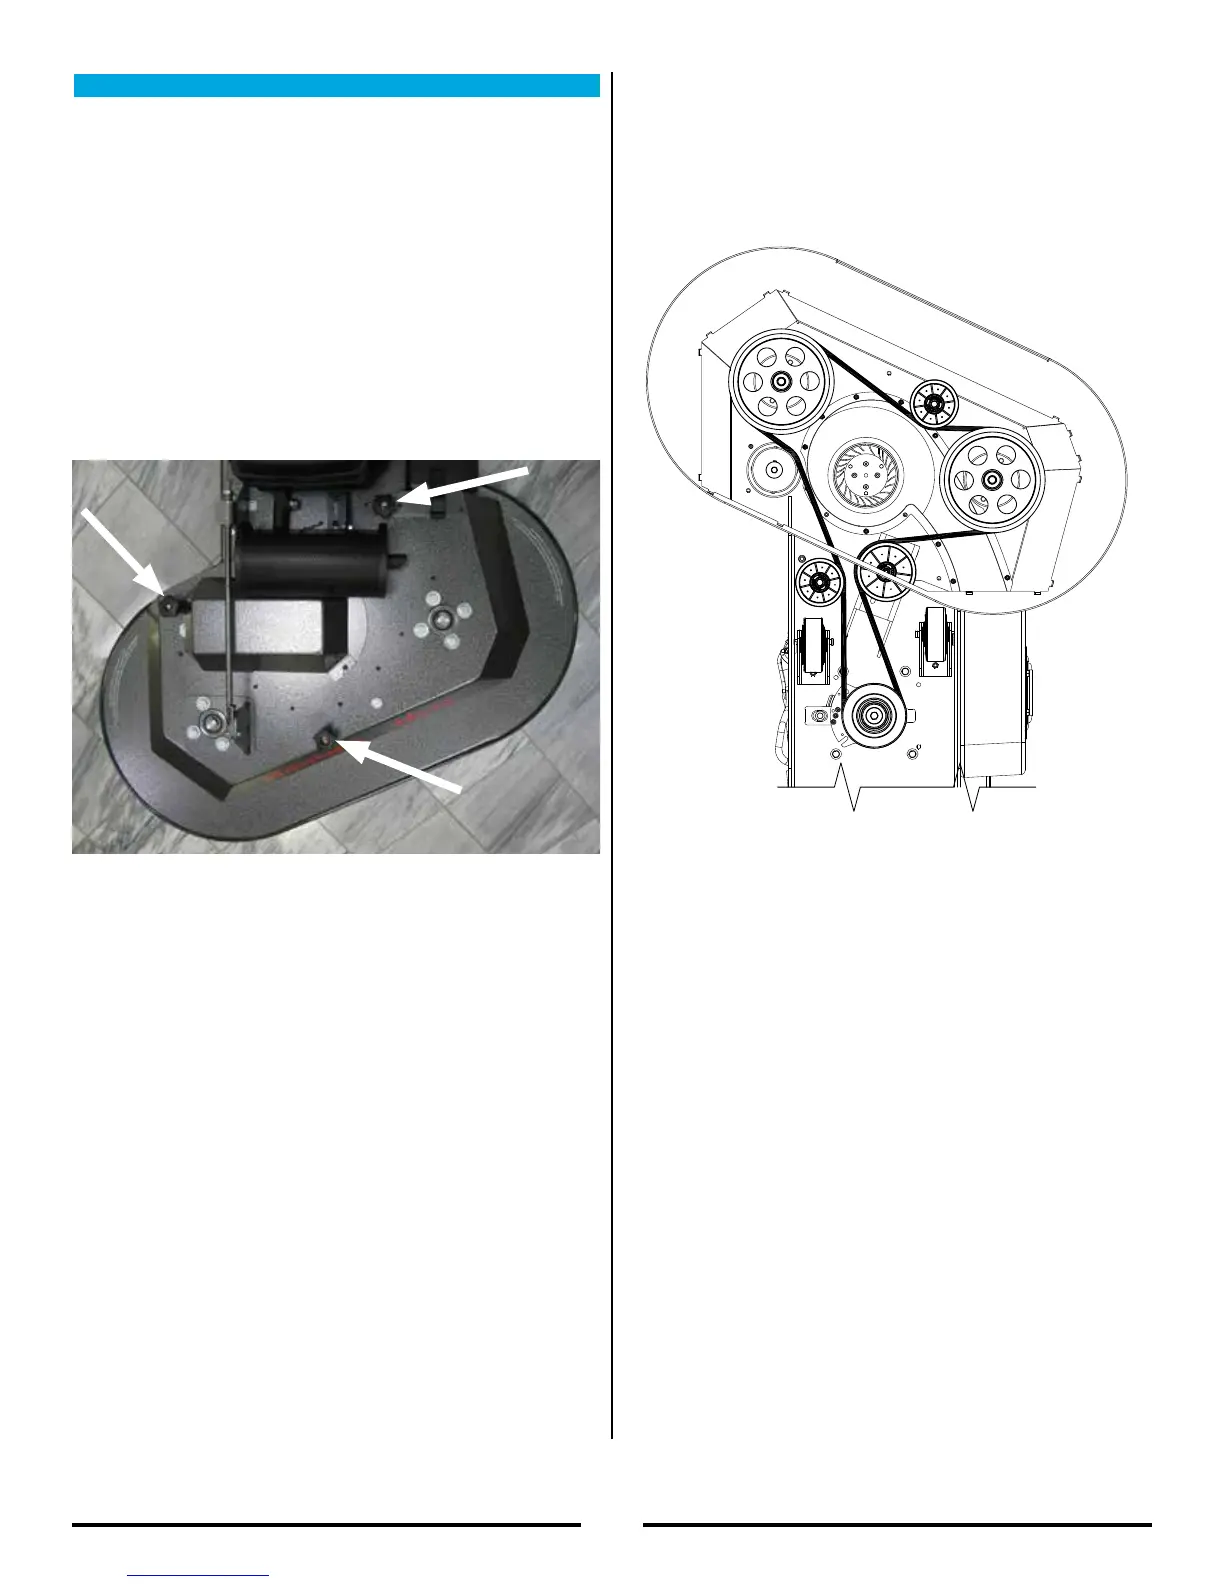
B. Remove the dust skirt by removing the three skirt
retainer pins.
NOTE: Document the number of turns that are
needed to remove each retainer knob so that it can
be reinstalled properly. Also, document the location
of each spring and bolt. These components must be
placed back in the same location in order for the skirt
to function properly.
C. Remove each retainer knob located on the top side
of the deck. Remove the pin and spring assembly
from the channel. When all of the retainer pins
removed, the skirt can be removed.
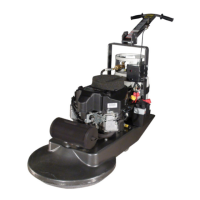
D. Loosen the nut that retains the tensioner pulley.
Slide the tensioner pulley downward releasing the
tension of the belt.
E. Use a 3/4” open-end wrench to turn one of the
spindle shafts on top of the machine while working
the belt off one side of the spindle pulleys.
F. Remove the belt from the engine clutch pulley and
then remove the belt from the unit.
G. With the belt removed, check all of the hardware
attaching the pulleys for proper tightness. Also,
check the bearings for wear and the condition of
each pulley.
H. Install the new belt by routing it through opening in
the deck and then onto the engine clutch pulley first.
Route the belt onto each idler and tensioner pulley,
leaving one of the spindle pulleys for last.
I. Use a 3/4” open-end wrench to turn the spindle shaft
and work the belt onto the spindle pulley.
J. With the belt properly routed, tighten the belt by
forcing the tensioner pulley upward. Tighten the
hex nut of the tensioner pulley when the belt has
adequate tension. The belt should depress between
1/4” (0,6cm) and 1/2” (1,3cm).
K. Turn the belt through several revolutions to make
sure that the belt tracks properly.
L. Reinstall the skirt assembly. Be sure that each
pin and spring assembly is installed in the proper
location. When attaching the retainer knob to each
pin, use the same number of turns used to remove
the knob.
M. Reinstall the pad holders onto the spindle shafts.
N. Lower the machine to the operating position.
O. Install tank and start unit. Engage clutch to check for
correct operation.