EasyManua.ls Logo

Pioneer PD-201 User Manual

Pioneer PD-201
12 pages
To Next Page IconTo Next Page
Page #1 background imageLoading...
Page #1 background image
eye
erating
‘Instructions
DEMO
MODE
e
Demo
mode
allows
you
to
see
variation
of
the
display.
To
enter
the
demo
mode,
press
POWER
and
then
ke<d
~<-<¢
within
1
second
without
inserting
the
disc.
COMPACT
DISC
PLAYER
PD-101
PD-201
ols
DIGITAL
AUDIO
@
To
exit
the
demo
mode,
press
any
buttons
boxed
with
broken
lines
({_})
in
the
above
illustrations.
Thank
you
for
buying
this
Pioneer
product.
Please
read
through
these
operating
instructions
so
you
will
know
how
to
operate
your
model
properly.
After
you
have
finished
reading
the
instructions,
put
them
away
in
a
safe
place
for
future
reference.
In
some
countries
or
regions,
the
shape
of
the
power
plug
and
power
outlet
may
sometimes
differ
from
that
shown
in
the
explanatory
drawings.
However,
the
method
of
connecting
and
operating
the
unit
is
the
same.
WARNING:
To
PREVENT
FIRE
OR
SHOCK
HAZARD,
DO
NOT
EXPOSE
THIS
APPLIANCE
TO
RAIN
OR
MOISTURE.
IMPORTANT
NOTICE
[For
U.S.
and
Canadian
models]
The
serial
number
for
this
equipment
is
located
on
the
rear
panel.
Please
write
this
serial
number
on
your
enclosed
warranty
card
and
keep
it
in
a
secure
area.
This
is
for
your
security.
[For
Canadian
model
with
the
polarized
plug]
CAUTION:
To
PREVENT
ELECTRIC
SHOCK
DO
NOT
USE
THIS
(POLARIZED)
PLUG WITH
AN
EXTENSION
CORD,
RECEPTACLE
OR
OTHER
OUTLET
UNLESS
THE
BLADES
CAN
BE
FULLY
INSERTED
TO
PREVENT
BLADE
EXPOSURE.
[Pour
le
modéle
canadien
avec
Ia
fiche
polarisée]
ATTENTION:
pour
PREVENIR
LES
CHOCS
ELECTRIQUES
NE
PAS
UTILISER
CETTE
FICHE
POLARISEE
AVEC
UN
PROLONGATEUR,
UNE
PRISE
DE
COURANT
OU
UNE
AUTRE
SORTIE
DE
COURANT,
SAUF
SI
LES
LAMES
PEUVENT
ETRE
INSEREES
A
FOND
SANS
EN
LAISSER
AUCUNE
PARTIE
A
DECOUVERT.
LINE
VOLTAGE
SELECTOR
SWITCH
Only
multi-voltage
models
are
provided
with
this
switch.
U.S.,
Canadian,
European,
U.K.,
and
Australian
models
are
not
provided
with
this
switch.
Mains
voltages
in
Saudi
Arabia
are
127V
and
220V
only.
The
line
voltage
selector
switch
is
located
on
the
rear
panel
of
this
player.
Before
your
player
is
shipped
from
the
factory,
the
switch
is
set
to
the
power
requirements
of
the
player's
destination.
Check
that
itis
set
properly
before
plugging
the
power
cord
into
the
outlet.
If
the
voltage
is
not
properly
set
or
if
you
move
to
an
area
where
the
voltage
requirements
differ,
adjust
the
selector
switch
as
follows:
e
Use
a
medium-sized
(flat
blade)
screwdriver.
Insert
the
tip
of
the
screwdriver
into
the
groove
of
the
selector
switch
and
turn
it
so
that
the
power
voltage
marking
of
your
area
points
to
the
arrow.
ae
WW
220-240
V
110-127V
“This
product
complies
with
the
Radio
Interference
require-
ments
of
the
EC
(European
Community)
Directive
87/308/EEC.
The
Art
of
Entertainment
Question and Answer IconNeed help?

Do you have a question about the Pioneer PD-201 and is the answer not in the manual?

Pioneer PD-201 Specifications

General IconGeneral
BrandPioneer
ModelPD-201
CategoryCD Player
LanguageEnglish

Summary

Line Voltage Selector Switch

General Safety Precautions

Environmental & Power Safety

Precautions for water, location, ventilation, heat, and power sources.

Electrical Safety & Cord Handling

Alerts for shock hazards, opening covers, and cord safety.

Antenna Grounding & Cart Safety

Guidelines for outdoor antenna grounding and appliance cart handling.

Specific Cautions & User Information

Laser Safety & Product Cautions

Warnings regarding laser diode class and general product safety.

Radio Interference & User Guidance

Information on FCC compliance and user guidance for interference.

Hearing Protection Advice

Recommendations for safe listening levels to prevent hearing damage.

Handling and Maintenance Guide

Player Installation and Handling

Guidelines for safe installation, location, and handling of the player.

Cleaning and Disc Storage

Instructions for cleaning the player, discs, and proper disc storage.

System Connections

Audio Output & Synchro Connections

Connecting audio output and CD-Deck synchro function.

Remote Control Integration

Connecting for system remote control with a Pioneer stereo amplifier.

Power Cord Connection

Instructions for connecting the power cord to the unit and outlet.

Getting Started: Accessories & Setup

Supplied Accessories

List of items included with the player.

Remote Control Setup

Inserting batteries into the remote control unit.

Front Panel Overview

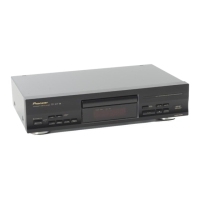
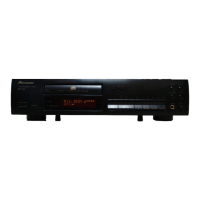
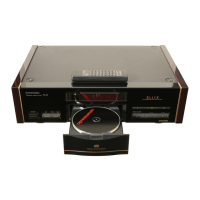
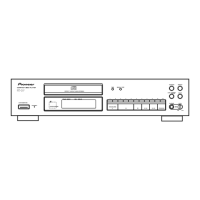
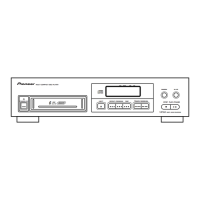
Identification and function of front panel controls and indicators.

Basic Operations Guide

Playback Control Functions

How to play, pause, and stop disc playback.

Time Display Modes

Explains different time displays available during playback.

Timer Playback Setup

How to set up automatic playback using an external audio timer.

Advanced Playback Features

Track Selection & Search

Methods for direct track play, track search, and manual passage search.

Special Playback Modes

Features like Hi-Lite Scan, Repeat Play, and Random Play.

Program Playback & Recording Preparation

Peak Search & Recording Level

Finding peak volume and adjusting recording level.

Program Track Sequencing

Creating custom playback sequences by programming tracks.

Programming Techniques

Methods for programming tracks during stop or playback modes.

Program Management & Recording

Program Editing & Pauses

Managing programmed tracks, including pauses, clearing, checking, and modifying.

Recording Assistance Features

Features for automatic programming for tape recording.

Troubleshooting Guide

Recording Operation Issues

Troubleshooting common problems during recording operations.

Playback & Sound Problems

Solutions for playback stopping, no sound, and distorted audio.

Technical Specifications

Troubleshooting Common Solutions

Addresses issues like disc noise, TV interference, and remote control failure.

System Performance Specifications

Detailed technical specifications for power, audio, dimensions, and accessories.

Related product manuals