EasyManua.ls Logo

Pioneer PD-F100 User Manual

Pioneer PD-F100
20 pages
To Next Page IconTo Next Page
Page #1 background imageLoading...
Page #1 background image
|
Operating
-.
Instructions
FILE-TYPE
COMPACT
DISC
PLAYER
PLE
lIO©
COF
ne
10
O-O1sc
COMPACT
DIGITAL
AUDIO
POWER
ON
DEMO
display
mode
allows
you
to
see
variations
of
the
display.
To
enter
the
POWER
ON
DEMO
display
mode,
press
POWER
and
then
He
<<
within
1
second
after
turning
on
the
power.
Thank
you
for
buying
this
Pioneer
product.
Please
read
through
these
operating
instructions
so
you
will
know
how
to
operate
your
model
properly.
After
you
have
finished
reading
the
instructions,
put
them away
in
a
safe
place
for
future
reference.
{n
some
countries
or
regions,
the
shape
of
the
power
plug
and
power
outlet
may
sometimes
differ
from
that
shown
in
the
explanatory
drawings.
However,
the
method
of
connecting
and
operating
the
unit
is
the
same.
WARNING:
To
PREVENT
FIRE
OR
SHOCK
HAZARD,
DO
NOT
EXPOSE
THIS
APPLIANCE
TO
RAIN
OR
MOISTURE.
IMPORTANT
NOTICE
{For
U.S.
and
Canadian
models]
The
serial
number
for
this
equipment
is
located
on
the
rear
panel.
Please
write
this
serial
number
on
your
enclosed
warranty
card
and
keep
it
ina
secure
area.
This
is
for
your
security.
[For
Canadian
model]
CAUTION:
To
PREVENT
ELECTRIC
SHOCK
DO
NOT
USE
THIS
(POLARIZED)
PLUG
WITH
AN
EXTENSION
CORD,
RECEPTACLE
OR
OTHER
OUTLET
UNLESS
THE
BLADES
CAN
BE
FULLY
INSERTED
TO
PREVENT
BLADE
EXPOSURE.
ATTENTION:
Pour
PREVENIR
LES
CHOCS
ELECTRIQUES
NE
PAS
UTILISER
CETTE
FICHE
POLARISEE
AVEC
UN
PROLONGATEUR,
UNE
PRISE
DE
COURANT
OU
UNE
AUTRE
SORTIE
DE
COURANT,
SAUF
Si
LES
LAMES
PEUVENT
ETRE
INSEREES
A
FOND
SANS
EN
LAISSER
AUCUNE
PARTIE
A
DECOUVERT.
POWER
ON
DEMO
display
To
cancel
the
POWER
ON
DEMO
display
mode,
press
any
button.
lf
the
STOP
button
is
pressed
after
canceling
the
POWER
ON
DEMO
display
mode,
the
player
enters
POWER
ON
DEMO
display
mode.
LINE
VOLTAGE
SELECTOR
SWITCH
Only
multi-voltage
models
are
provided
with
this
switch.
U.S.,
Canadian,
European,
U.K.,
and
Australian
models
are
not
provided
with
this
switch.
Mains
voltages
in
Saudi
Arabia
are
127V
and
220V
only.
The
line
voltage
selector
switch
is
located
on
the
rear
panel
of
this
player.
Before
your
player
is
shipped
from
the
factory,
the
switch
is
set
to
the
power
requirements
of
the
player's
destination.
Check
that
itis
set
properly
before
plugging
the
power
cord
into
the
outlet.
If
the
voltage
is
not
properly
set
or
if
you
move
to
an
area
where
the
voltage
requirements
differ,
adjust
the
selector
switch
as
follows:
e
Use
a
medium-sized
(flat
blade)
screwdriver.
Insert
the
tip
of
the
screwdriver
into
the
groove
of
the
selector
switch
and
turn
it
so
that
the
power
voitage
marking
of
your
area
points
to
the
arrow.
a
%
220-240
V
110-127
V
CAUTION:
This
product
satisfies
FCC
regulations
when
shielded
cables
and
connectors
are
used
to
connect
the
unit
to
other
equipment.
To
prevent
electromagnetic
interference
with
electric
appliances
suchas
radios
and
televisions,
use
shielded
cables
and
connectors
for
connections.
This
player
is
for
consumer
use.
If
the
player
is
used
in
business
{for
example,
using
for
along
period
at
the
restaurant),
the
player
is
repaired
with
charge
even
though
it
is
under
warranty.
@
PIONEER’
The
Art
of
Entertainment
Question and Answer IconNeed help?

Do you have a question about the Pioneer PD-F100 and is the answer not in the manual?

Pioneer PD-F100 Specifications

General IconGeneral
TypeCD Player
Disc Capacity100 discs
Weight10.6 lbs
Dynamic range100 dB
Signal to Noise Ratio98 dB
Total harmonic distortion0.05%
Channel separation90 dB
Output voltage2.0 V
Dimensions17 x 5.9 x 14.5 inches
Playback ModesRepeat, Random
Digital OutputsOptical
Disc formatCD
Frequency response2 Hz - 20 kHz
Channels2

Summary

Important Notices and Cautions

Model-Specific Information and Safety

Serial number location, Canadian plug caution, FCC compliance, and line voltage selector switch usage.

Line Voltage Selector Switch Operation

Instructions for using the line voltage selector switch to match the player to local voltage.

Safety Instructions

General Safety Precautions

Read, retain, heed warnings, follow instructions, water/moisture, location, ventilation, heat, power sources, cord protection, polarization, cleaning.

Installation and Environmental Safety

Wall/ceiling mounting, outdoor antenna grounding, and cart safety guidelines.

Operational and Servicing Safety

Nonuse periods, object/liquid entry, damage, servicing, and European models caution.

United Kingdom Power Requirements

U.S. Model Operational Cautions

User Information and Equipment Alterations

Hearing Safety Guidelines

Transportation and Power Safety

Transportation Screws

How to remove and reinstall transportation screws for safe moving.

Power Cord Handling Caution

Guidelines for safe handling and maintenance of the power cord.

Accessories and Remote Control Setup

Supplied Accessories Confirmation

Lists and identifies all included accessories and index label usage.

Remote Control Battery Installation

Guide on inserting batteries into the remote control unit with precautions.

Remote Control Operation Basics

How to operate the remote control unit effectively.

Handling and Care Precautions

Installation and Environment Cautions

Proper location, ventilation, and condensation prevention.

Player and Disc Handling

Cleaning the player, discs, and CD lens cleaner usage.

Disc Storage Guidelines

How to store CDs to prevent damage and warping.

Connections and System Integration

Audio and Power Connections

How to connect the player to an amplifier and power outlet.

CD-Deck Synchro Functionality

Connecting for synchro recording between CD player and cassette deck.

System Remote Control Setup

Integrating with a Pioneer stereo amplifier for unified remote control.

Preparing the Player for Operation

Inserting Discs into the Rolling Rack

Step-by-step guide and important cautions for loading discs.

Component Identification

Front Panel Controls and Indicators

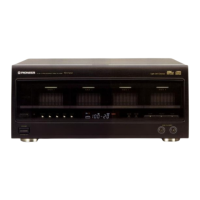
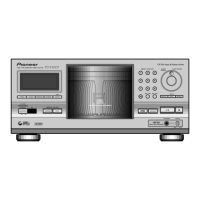
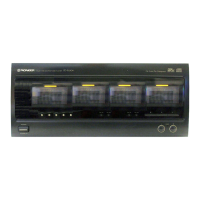
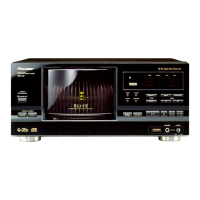
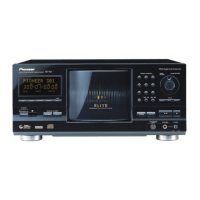
Identifies and explains the functions of the front panel parts.

Remote Control Buttons

Identifies and explains the functions of the remote control buttons.

Basic Playback Operations

Playing a Compact Disc

Step-by-step guide to start disc playback.

Pause and Stop Functions

How to temporarily pause and stop playback, including last disc memory.

Playback Modes and Time Display

Selecting Playback Modes

How to choose between ALL, SINGLE, and CUSTOM playback.

Understanding the Time Display

Explains the different time displays during playback.

Advanced Search Functions

Direct and Disc/Track Search

How to directly search for specific discs or tracks.

Manual Passage Search

How to search for a specific passage within a track.

Custom Playback Programming

Creating and Managing Custom Playlists

How to program and manage custom playback modes.

Playback Repeat and Random Modes

Repeat Playback Functions

How to use repeat modes for tracks, discs, or programs.

Random Playback Operation

How to play tracks in a random order.

ADLC Functionality

Explanation of the Automatic Digital Level Controller.

Programmed Playback

Programming Tracks and Discs

How to create a program for playing specific tracks or discs.

Disc All and Direct Program Modes

How to program entire discs or direct program current tracks.

Program Management

Preserving and Pausing Programs

How to save programs and insert pause steps.

Erasing and Clearing Programs

How to remove programmed steps or clear all program data.

Troubleshooting Common Issues

Problem Diagnosis and Solutions

A table listing common symptoms, causes, and remedies for malfunctions.

General Specifications

Audio Section Specifications

Output Terminal Specifications

Functionality Specifications

Display Specifications

Included Accessories List

Index Card Usage

Related product manuals