Do you have a question about the Pioneer PD-F805 and is the answer not in the manual?
Enables viewing of display variations; press POWER and then any button to cancel.
Locates serial number, advises writing it down for security and keeping warranty card.
Appliance should not be exposed to rain or moisture to prevent fire or shock.
Satisfies FCC regulations when using shielded cables and connectors for connections.
Alerts user to uninsulated dangerous voltage within the product enclosure.
Do not remove covers; refer servicing to qualified personnel to prevent shock.
Outdoor antenna should be located away from power lines.
Grounding mast and lead-in wire provides protection against voltage surges and static.
Product contains a laser diode; do not remove covers or access inside for safety.
Details wire colors (blue/brown) and terminal connections for UK plugs.
Specifies that controls/procedures other than specified may result in hazardous radiation exposure.
Explains compliance with FCC rules and how to correct radio/TV interference.
Warning against using polarized plug with extension cords unless blades are fully inserted.
Instructions on handling power cords to prevent damage, fire, or shock.
Lists features like programming discs, accessing favorite tracks, and previous disc scan.
Guides on inserting batteries, aligning polarities, and notes on battery care.
Advises removing batteries when not in use and avoiding button depression.
Explains aiming the remote at the sensor and its operating range and angles.
Advise on ventilation, heat sources, humidity, dust, stable surfaces, and avoiding tuners/TVs.
Guides on keeping discs clean, wiping techniques, and avoiding cleaning sprays.
Advice on storing discs vertically, avoiding heat/humidity, and car interiors.
Recommends consulting service for dirty lenses and caution with commercial cleaners.
Connects unit outputs to amplifier inputs, avoiding PHONO jacks, and connecting power.
Connects the DIGITAL OUT OPTICAL jack to an amplifier's optical input.
Guides on inserting plugs, avoiding kinks, coil diameter, and protecting plugs.
Connects CONTROL IN/OUT jacks for controlling the CD player with an amplifier's remote.
Connects jacks for synchro recording between player and cassette deck.
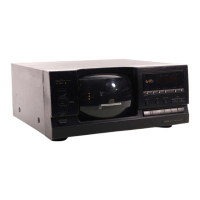
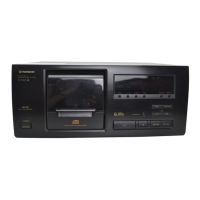
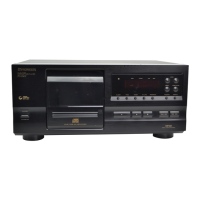
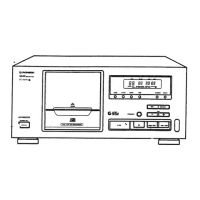
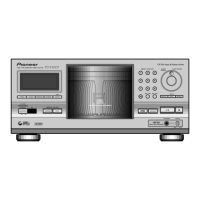
Identifies buttons and indicators on the player's front panel.
Explains the meaning of various lights and indicators on the player's display.
Identifies buttons on the remote control unit and their functions.
Step-by-step guide on opening the hood, lifting the handle, and loading discs into the rack.
Warning against loading anything other than CDs or using adapters for 8-cm CDs.
Instructions for inserting a disc into the CD SLOT, noting the red indicator.
Warning that inserting multiple discs into CD SLOT can cause damage or malfunction.
Steps to turn on the player, load discs, and start playback in sequential order.
How to use digit buttons and DISC/TRACK SET to choose specific discs and tracks.
Explains ALL, SINGLE, and CUSTOM play modes and how to select them.
Press the stop button (■) to stop playback.
Press the play/pause button (/II) to pause and resume playback.
Tap track search buttons (/ or ►►) to skip to the next or previous track.
Hold down track search buttons (◄◄/►►) for fast forward/reverse.
Allows programming up to 50 favorite discs for custom playback.
Use TIME button during stop mode to view stored disc numbers.
Press MODE to select CUSTOM, then press CLEAR to erase the entire file.
Cannot change or erase individual discs; memory backup function available.
Select a disc number using DISC (-, +) buttons and start playback.
Use track search buttons or press /II to select and play a desired track.
Explains One track, ALL, SINGLE, CUSTOM repeat modes and how to turn OFF.
Plays tracks at random from selected discs or all discs; stops when all tracks played.
Press the stop button (■) to stop random play.
Allows programming up to 24 steps for desired track/disc playback order.
Memory backup, programming disc in CD SLOT vs rack, and handling missing/backward discs.
Allows direct programming by pressing PGM during playback or pre-programming.
Skip step 3 of operation example to program an entire disc as one step.
Allows programming a pause into the playback sequence.
Press CLEAR twice (or MODE/RANDOM/PREVIOUS) to erase the program.
Use the BEST button to store up to 15 favorite tracks for one-touch memory.
Press BEST during stop mode to play the most recently memorized track.
Scans discs in reverse order, playing about 1 min 10 sec of each.
Press the stop button (■) to cancel the scanning and resume normal play.
Plays a 10-second portion of tracks at a set interval for scanning.
Plays 10-sec portion of the first track on each CD, starting from the first CD.
Plays 10-sec portion of each track on each CD, starting from the first CD.
Plays 10-sec portion of each track within the programmed sequence.
Plays 10-sec portion of each track in the best selection memory.
Press TIME to cycle through display of track number, elapsed time, and remaining time.
Lists common symptoms, probable causes, and remedies for operational issues.
Explains the unit's self-diagnostic function and error messages (Service No.).
Shows examples of error messages like U1, U2, U3 and their countermeasures.
Details unit status and countermeasures for Service Numbers U1, U2, U3.
Details type, power requirements, consumption, temperature, weight, and dimensions.
Covers frequency response, S/N ratio, dynamic range, distortion, and output voltage.
Lists audio line output, control input/output, CD-DECK SYNCHRO, and optical digital output.
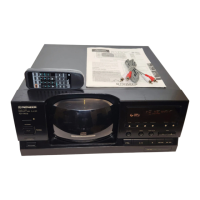
Lists items included with the player, such as remote control, cables, and liner notes file.
Provides advice on safe listening levels to prevent hearing damage.
| Type | CD Player |
|---|---|
| Digital Outputs | Coaxial, Optical |
| Weight | 12.1 lbs |
| Frequency Response | 2 Hz - 20 kHz |
| Output Voltage | 2.0 V |
| Playback Formats | CD, CD-R |
| Channels | 2 |