M
Mary CantuSep 23, 2025
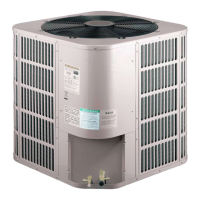
What does it mean when my Pioneer YH060GHFI18RT2 Heat Pump displays an abnormal AC voltage?
- LLori AndersonSep 23, 2025
If your Pioneer Heat Pump is experiencing abnormal AC voltage (either >275V or
What does it mean when my Pioneer YH060GHFI18RT2 Heat Pump displays an abnormal AC voltage?
If your Pioneer Heat Pump is experiencing abnormal AC voltage (either >275V or
Why is my Pioneer YH060GHFI18RT2 Heat Pump not cooling or heating properly?
If your Pioneer Heat Pump isn't cooling or heating well, start by cleaning the outdoor unit's heat exchanger. Remove any indoor heating devices and maintain good air tightness in the room. Clear any blockages from the outdoor heat exchanger and double-check the temperature settings.
What to do if my Pioneer YH060GHFI18RT2 is leaking water?
If your Pioneer Heat Pump is leaking water, the drainage pipe may be blocked or broken. Try changing the drainage pipe. Also, check the refrigerant pipe joint's wrap to ensure it's completely sealed and re-wrap it tightly if necessary.
Why does the compressor in my Pioneer Heat Pump start and stop frequently?
If the compressor in your Pioneer Heat Pump starts and stops frequently, it might be due to blocked air inlet or outlet. Remove any obstacles that are causing the blockage.
How to fix a Pioneer YH060GHFI18RT2 that is lacking refrigerant?
If your Pioneer Heat Pump is low on refrigerant, discharge the existing refrigerant and then recharge it according to the rating label instructions.
What causes an EEprom Data error in a Pioneer YH060GHFI18RT2?
To fix an EEprom Data error in your Pioneer Heat Pump, replace the EE components. If that doesn't work, replace the outdoor control board components or reassemble the EE components.
What should I do if my Pioneer Heat Pump displays a defrosting sensor fault?
If your Pioneer Heat Pump is showing a defrosting sensor fault, first, reconnect the wiring of the defrosting sensor. If the problem persists, replace the defrosting sensor or the outdoor control board.
How can I resolve an IPM and control board communication fault in my Pioneer YH060GHFI18RT2 Heat Pump?
To address an IPM and control board communication fault in your Pioneer Heat Pump, begin by reconnecting the cable between the control board and the driver board. If the issue persists, replace the communication cable between these boards, or replace the driver board or the control board.
How to fix a 4-way valve commutation failure in a Pioneer YH060GHFI18RT2?
To resolve a 4-way valve commutation failure in your Pioneer Heat Pump, start by reconnecting the wiring of the 4-way valve. If the problem persists, replace the 4-way valve coil, the 4-way valve itself, or the driver board of the way valve.
Why does my Pioneer YH060GHFI18RT2 turn off due to high pressure protection?
If your Pioneer Heat Pump's high-pressure switch is activated, or the unit is shutting down due to high-pressure protection, begin by reconnecting the wiring of the high-pressure protector. If the problem continues, replace the high-pressure protector. A faulty outdoor control board could also be the cause, so consider replacing it. Overload in cooling or heating modes may also trigger this protection.
Details electrical specifications including voltage, current, and ELB requirements.
Presents cooling and heating capacity data based on ambient temperature.
Provides factors for adjusting capacity based on pipe length and height difference.
Shows the electrical wiring schematic for the 24K outdoor unit, including connections to components.
Identifies components on the 24K outdoor unit's main control board.
Identifies components and connections on the 36K outdoor unit's main control board.
Identifies components and connections on the 60K outdoor unit's main control board.
Recommends wire sizes and provides ELB information for system wiring.
Explains how to configure the outdoor unit using DIP switches.
Explains how to query and display system operating parameters via the 7-segment display.
Specifies the maximum allowed pipe length and height difference for system installation.
Describes the method for performing an air-tight test using nitrogen to check for leaks.
Provides formulas and guidelines for calculating additional refrigerant charge based on pipe length.
Explains various control functions and protection mechanisms of the air conditioner.
Provides a guide for troubleshooting common malfunctions and their causes.
Describes fault code display using the 7-segment display on the main control board.
Lists outdoor unit fault codes, their descriptions, causes, and solutions.
Explains how drive board flashing indicates failure codes.
Details the start, stop conditions, and operational actions for the cooling mode.