4
ASSEMBLY INSTRUCTIONS
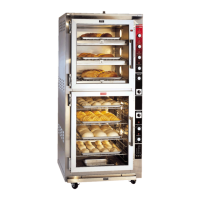
OVEN AND PROOFER
WARNING! Risk of Electric Shock – Appliance must be secured to building structure.
DECK OVEN
Your Piper oven is shipped completely assembled with the exception of the chrome plated wire bake
racks. These bake racks are packed in a separate box with your shipment. The light weight, bake rack
should be placed on each deck with the four long wires down. The bake racks provide the correct spacing
between the deck and the product for proper baking along with making it easier to slide the pans in and
out of the oven.
PROOFER
Place the stainless steel water pan into the opening in the bottom of the unit, on top of the heating element.
There are mounting brackets on the top and bottom sides of the proofer for the side racks. Place the top
of the side rack in the top mounting brackets (front & back) and lift up. Then put the bottom of the side
rack in the bottom brackets (front & back) and push down to the vertical position. (see Figure #1 below).
Next slide the horizontal shelf racks in place so they rest on the rungs of the side racks. The side racks will
accommodate 9 shelf racks, 6 are furnished with the unit.
Figure 1
INSTALLING THE DRIP TROUGH
Mount the drip trough on the screws that are located on the front of the unit along the bottom of the proofer.