Page 6 <&(%$*4.8"4,7%K'*#$"&8#L%/7*,#*%4,77%HMNNNMNIIMOPQP1 Item 63397
?@<6AR ST6;@ACSE D@CEA6E@EU6?6AFT
S/*(,$"&8
AS%T;6!6EA%?6;CSF?%CE]F;R-%Y&%8&$%)&(J%&8%$.*%G"2$L%&(%7*,^*%"$%'8,$$*89*9%"2%
$.*%G&4J%X,(%"#%8&$%"8%/&#"$"&81%%_**/%47*,(%&2%G"2$%@(5#%9'("83%&/*(,$"&81
G"2$"83
1. Use the Handle to roll the Lift into position.
Lower the Lift by turning
the Handle counterclockwise.
2. Roll the Lift under the load. (See vehicle owner’s
manual for recommended lift points.) Align the
Saddle under the vehicle base frame.
V@;ECEW\ If the vehicle base frame cannot sit flatly on
the Saddle, do not use this Lift.
The vehicle could fall over.
3. Turn the Handle completely clockwise.
Then pump the Handle up and down to raise the lift.
4. Continue to pump the Handle up and down until
the Saddle just touches the load. Make sure the
load is centered and balanced on the Saddle.
If the load is not evenly distributed on the Saddle
it may fall from the lift, causing serious injury.
5. Use tie-down straps (sold separately)
to secure the load.
6. Continue to raise the Lift to the desired height.
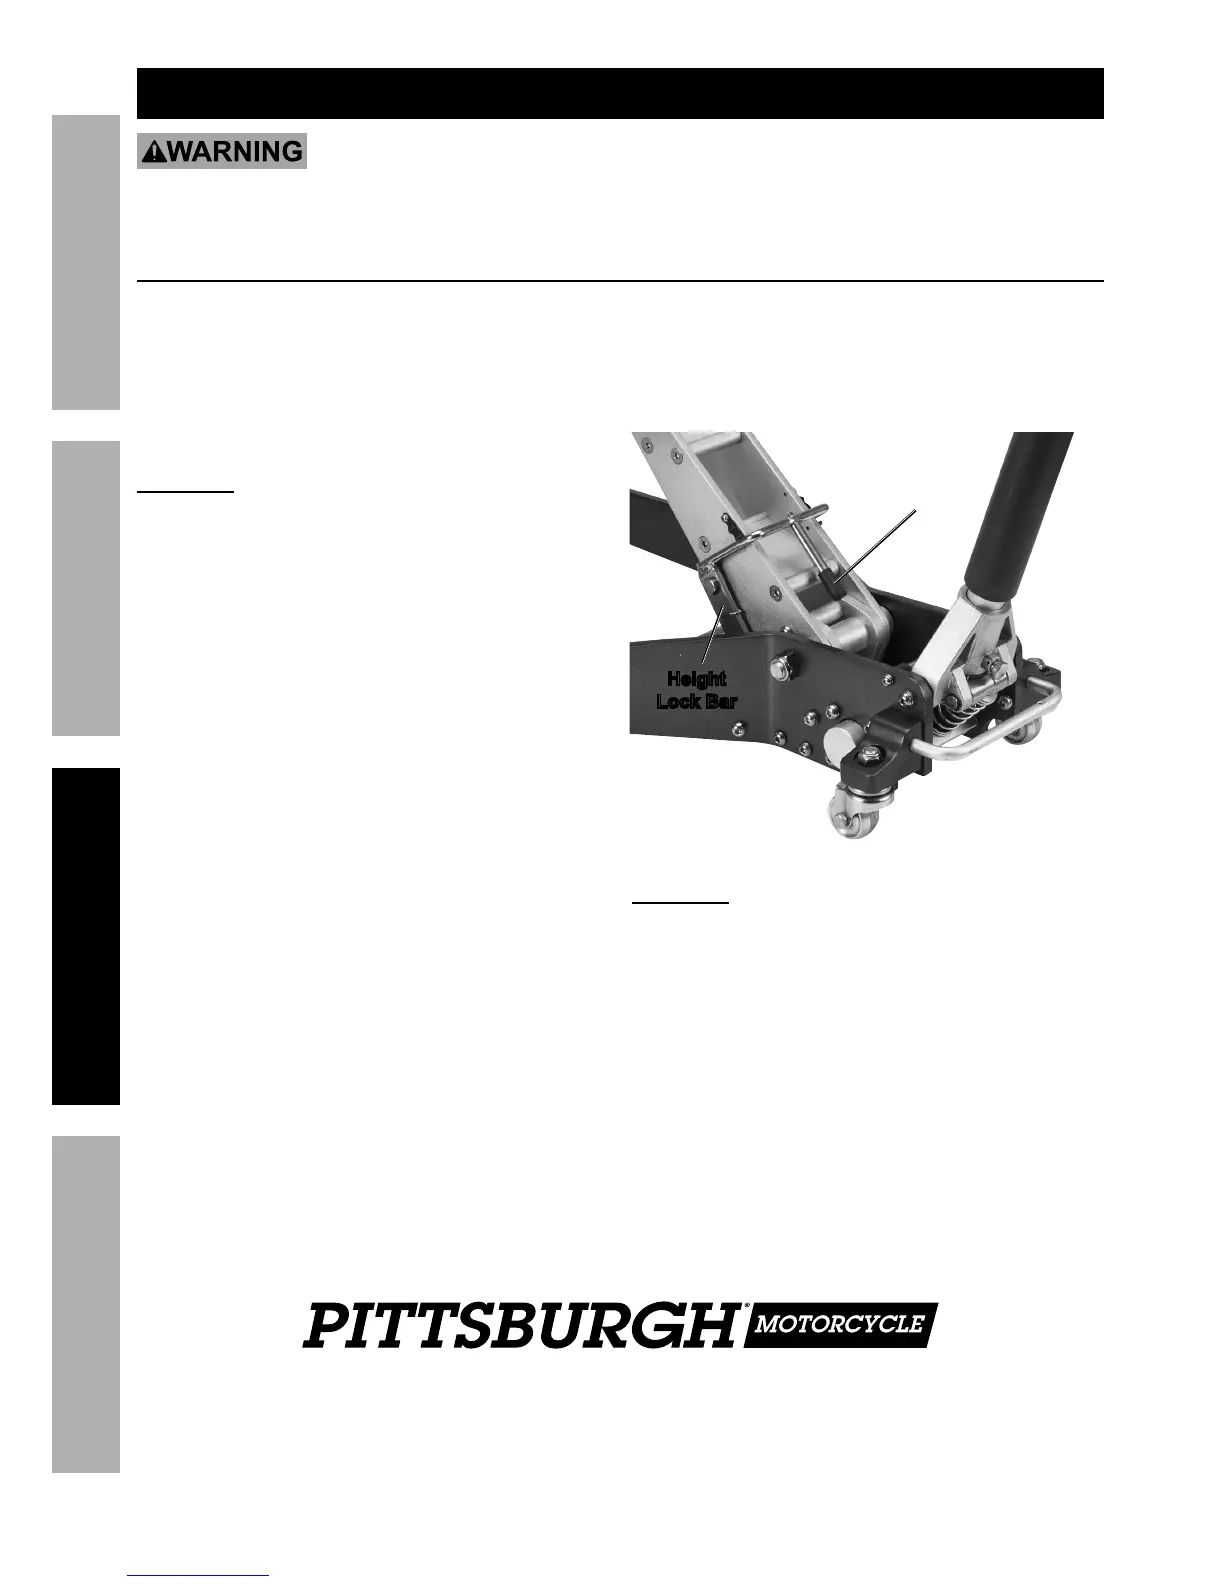
Install Risers before operating the lift
when more lift is needed. Height Lock
Bar will click into a supporting position.
?**%<"3'(*%Y-%B*"3.$%G&4J%X,(1
B*"3.$%
G&4J%
B,897*
B*"3.$%
G&4J%X,(
<"3'(*%Y-%%B*"3.$%G&4J%X,(
V@;ECEW\ Not engaging the Height Lock Bar may
result in serious injury or death, and damage the Lift.