Page 88
4. Enter the desired name for the Printer Agent (PA) Name.
5. Normally, the NDPS Manager will be the NDPS Manger object you are using.
6. Select Novell Printer Gateway in the Gateway Type. (see figure2 above)
7. Click OK and then select the available printer.
8. Select Remote (LPR on IP) in the Connection Type.
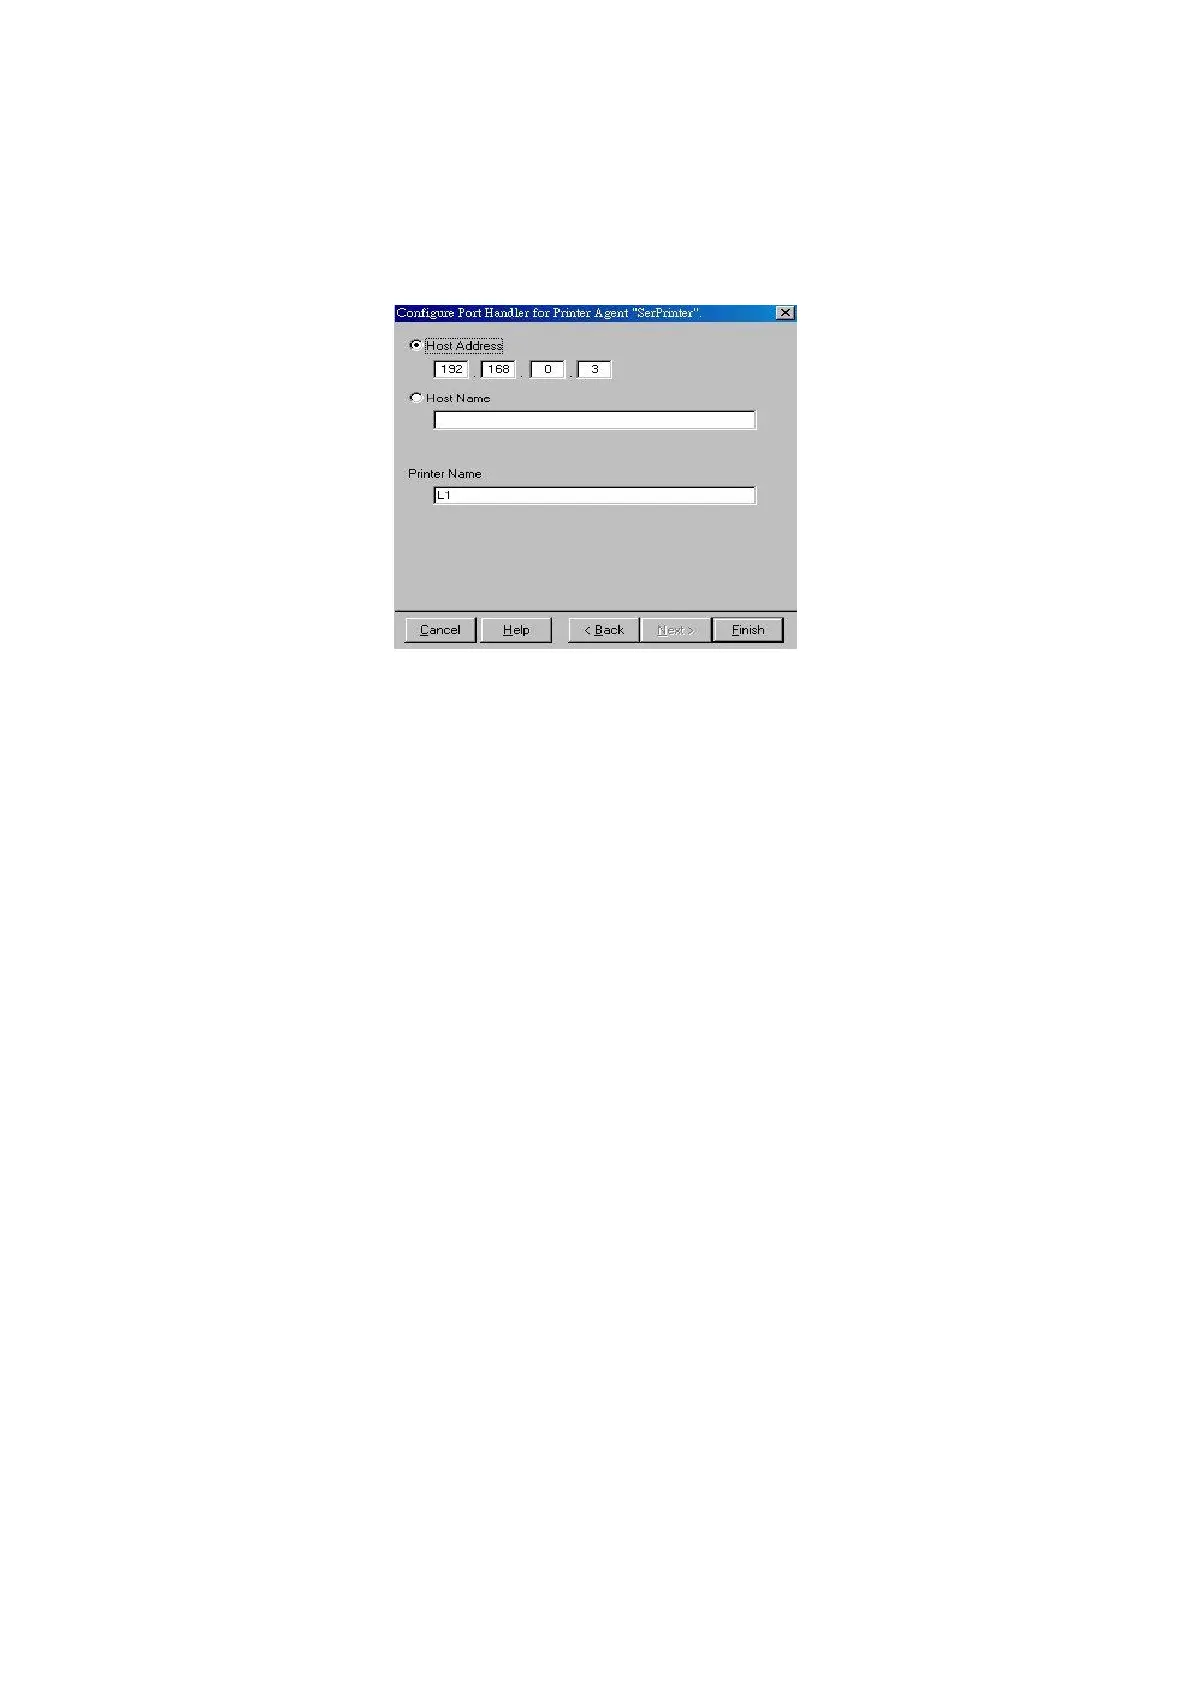
9. Click Next to see the following Configure Port Handler screen.
Figure 29 Configure Port Handler
10. In the Host address IP field, enter the IP Address previously assigned to the Print
Server device.
11. In the Printer Name field, enter the Logical Port name on the Print Server. (e.g.: L1)
Note: For Print Servers with one parallel port, the logical ports are named L1, L2
and L3. For devices with three parallel ports, the logical ports are named L1 to L8.
12. Click Finish, then select appropriate drivers for Windows 3.1, Windows 95/98 and
Windows NT 4.
13. The new Printer Agent will now appear in the Printer Agent List window.
Repeat this procedure for any other ports on the Print Server, or for any other logical
printers you wish to use.
Client PCs can now be configured as described in Chapter 4 - Client Configuration.