3.2.4 Placement
Make sure the device is placed in a safe environment to avoid equipment failure.
DONOTplaceanythingontopofthedevice.Excessiveweightcoulddamageit.
DO NOT obstruct ventilation slots on each side of the IPX-2500 or expose it to
direct sunlight or other heat sources. Be sure that there is adequate air ow
around the IPX-2500.
PlacetheIPX-2500onaatsurfacetoavoidanydamage.
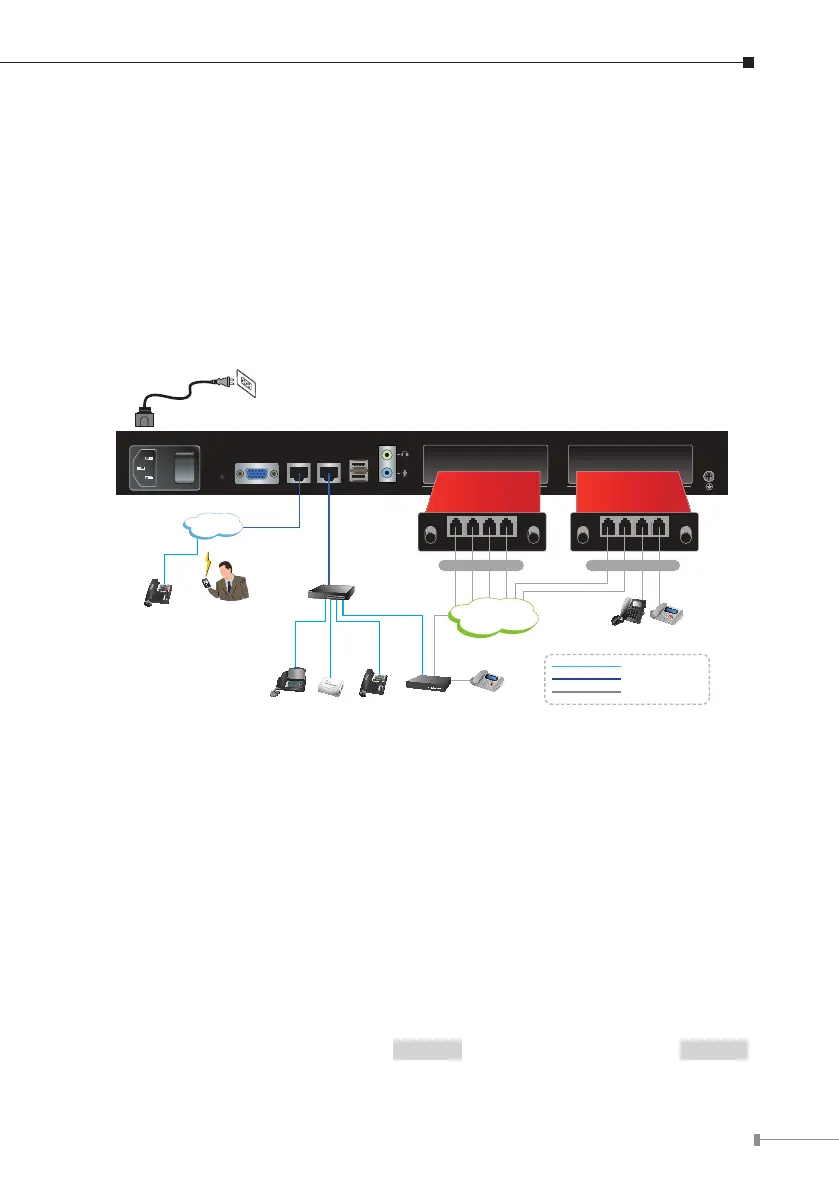
3.2.5 Physical Connection
100~240V AC
PWR
VGA WAN LAN USB AUDIO
SLOT 2 SLOT 1
FXO Card Life Line Card
Video Phone IP Phone
Voice
Gateway
Switch
ATA
SLT Phone Fax
2 x FXO + 2 x FXS4 x FXO
Fax
PSTN
Internet
IP Phone
Mobile
SIP Phone
100Base-TX UTP
1000Base-T UTP
Telephone wire
Physical Connection Topology of the IPX-2500
3.3 BasicSystemConguration
3.3.1 Web Login
Step 1. ConnectacomputertoaLANportontheIPX-2500.YourPCmustsetup
to the same domain as 192.168.0.X as the IPX-2500.
Step 2.
Start a web browser. To use the user interface, you need a PC with
InternetExplorer(version6andhigher),Firefox,orSafari(forMac).
Step 3. Enter the default IP address of the IPX-2500: 192.168.0.1 into the URL
address box.
Step 4.
Enter the default user name admin and the default password admin ,
and then click Login to enter Web-based user interface.