17
SA-100 F
EATURES
FUSE PROTECTION
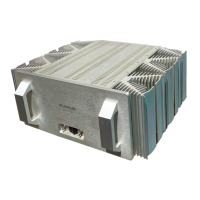
When any internal fuse is damaged one or more fuse warning LEDs will light. These LEDs are under the
amplifier lid located in the four corners of the main circuit board. Should any of the internal fuses need to
be replaced the lid of the amplifier will need to be removed and the fuses located. The rail fuses are near
the corners of the circuit board. Replace them with the same type (10 amp normal blow).
IMPORTANT: DO NOT FIT A FUSE WITH A HIGHER RATING.
Please note that fuse failure may indicate a severe problem. Check all speakers and speaker cables for
damage/short circuit etc. Should the amplifier continue to exhibit rail fuse failure contact your PLINIUS
PLINIUSPLINIUS
PLINIUS
dealer.
MAINS/LINE FUSE
A Mains/Line fuse is fitted within the IEC Mains/Line socket on the rear of the amplifier. A small drawer at
the bottom of this socket may be removed (after the IEC plug is removed) by levering it out with a flat
blade screwdriver. The fuse fitted should be rated at no greater than 10 amps slow blow.
In the unusual event that this fuse should blow, you must first establish the cause of this failure (such as
power surges, damaged mains cable etc.) before replacing the fuse with one of the same rating and type.
IMPORTANT: DO NOT FIT A FUSE WITH A HIGHER RATING.
CHANGING THE MAINS/LINE VOLTAGE CONFIGURATION
In the event that your mains supply voltage is different to that printed on the back of your Plinius SA-100,
a suitably qualified service technician may alter it.
The two options are:
110V - 120V
110V - 120V 110V - 120V
110V - 120V (USA/Japanese Markets)
220V - 240V
220V - 240V220V - 240V
220V - 240V (European/Pacific Rim Markets)
Firstly disconnect the lead from the IEC socket on your Plinius SA-100 and make sure the Mains switch is
OFF. Carefully remove the base by undoing the 16 posi-drive screws. Locate the mains terminal block
with a clear perspex guard, towards the front of the amplifier. Remove the guard by undoing the M3 nuts.