Checking Cal ibr ation
10
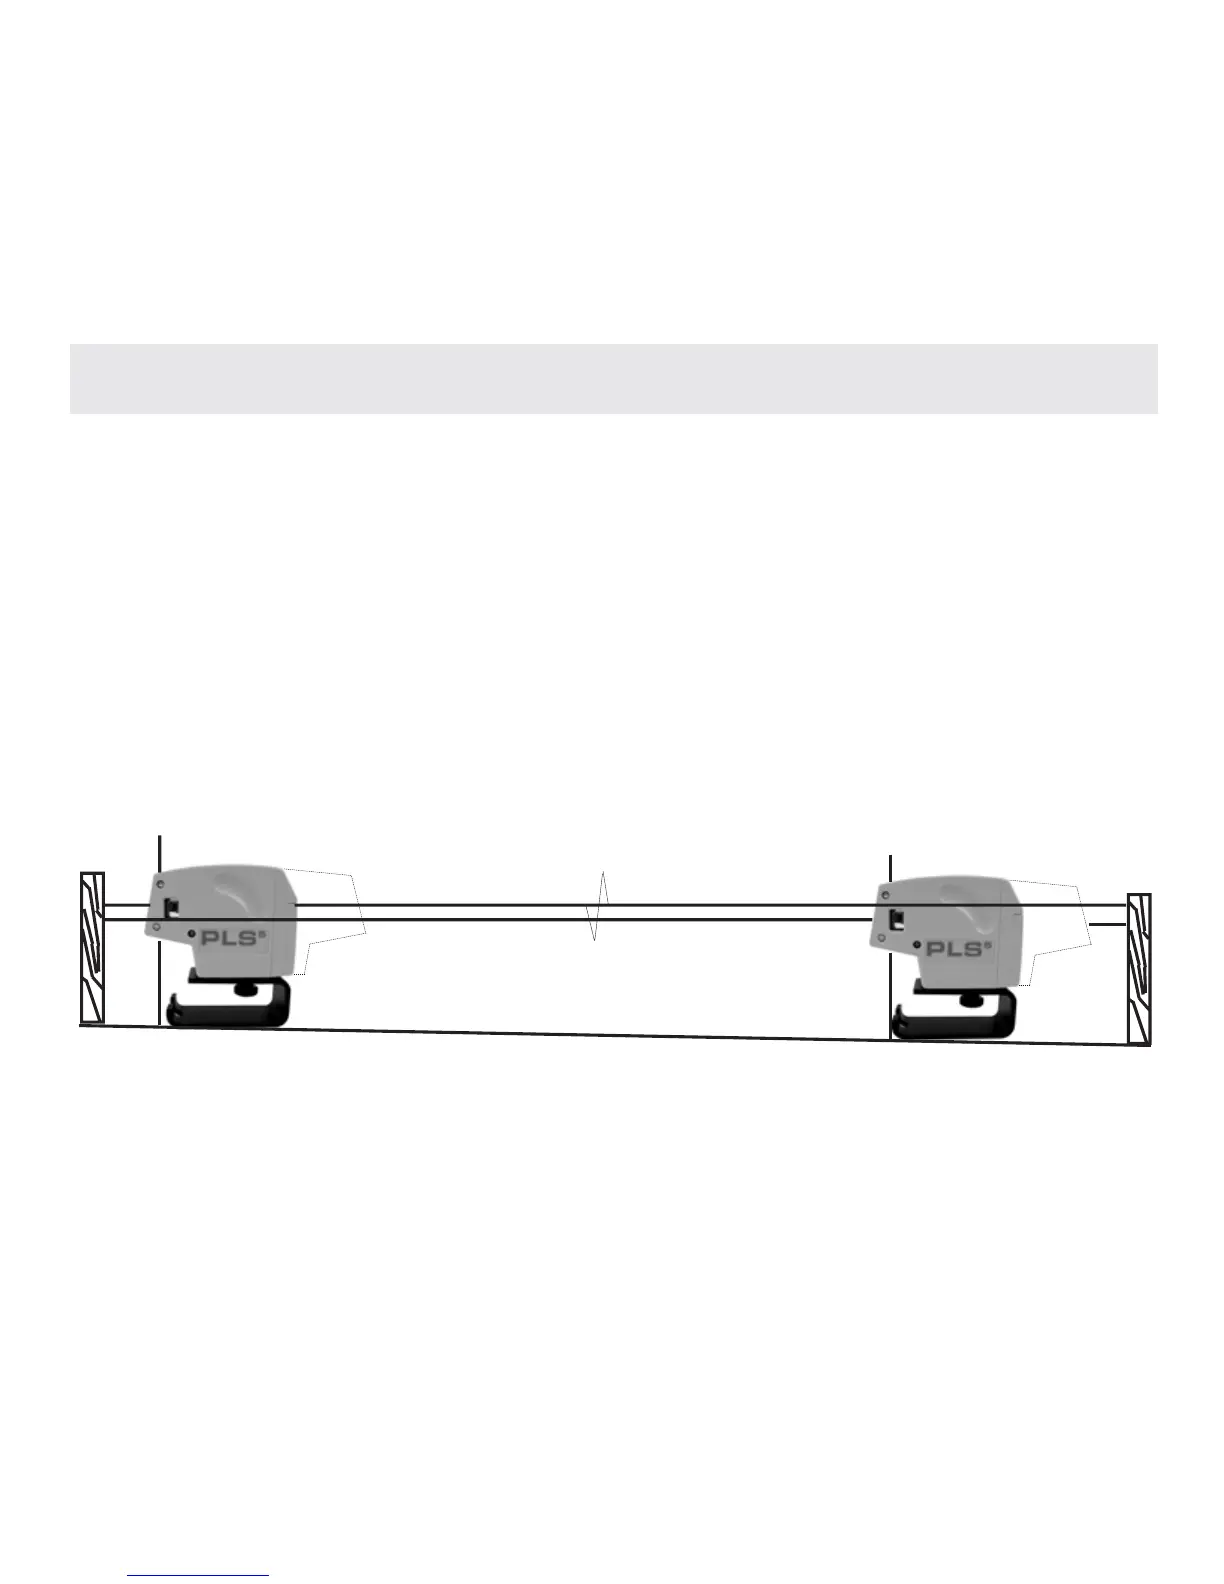
FIG. 9
METHOD 2 (both PLS
5
and PLS
3
) Exact Check of Level Accuracy. Find a fairly level site line
(preferably a concrete slab) 25’-0” or greater with two opposing walls. You can also use scrap
2 x 4s, for example, as targets. See Fig. 9. Place the laser about 6” from target #1, and carefully
mark the elevation of #1 forward beam on the target. Swivel the laser 180˚ on its center. Mark
the elevation center of #1 forward beam on target #2. Move the laser to target #2. At 6” from the
target, mark the center of elevation of #1 forward beam on target #2. Swivel the laser on its cen-
ter and mark center of elevation at target #1. You now have two centers of elevation at each tar-
get. Carefully measure the distance between centers of each set of marks. If the distance is the
same, the laser is exactly level. If there is a difference, subtract one measurement from the other.
This method magnifies any error by a factor of two. Therefore, divide this difference by two to find
the exact error of level. The maximum error for the PLS
5
is 1/16” at 25’-0” or 1/8” at 50’-0.” The
maximum error for the PLS
3
is 1/8” at 25’-0” or 1/4” at 50’-0.”
TA RG E T # 1
TA RG E T # 2