Level
7
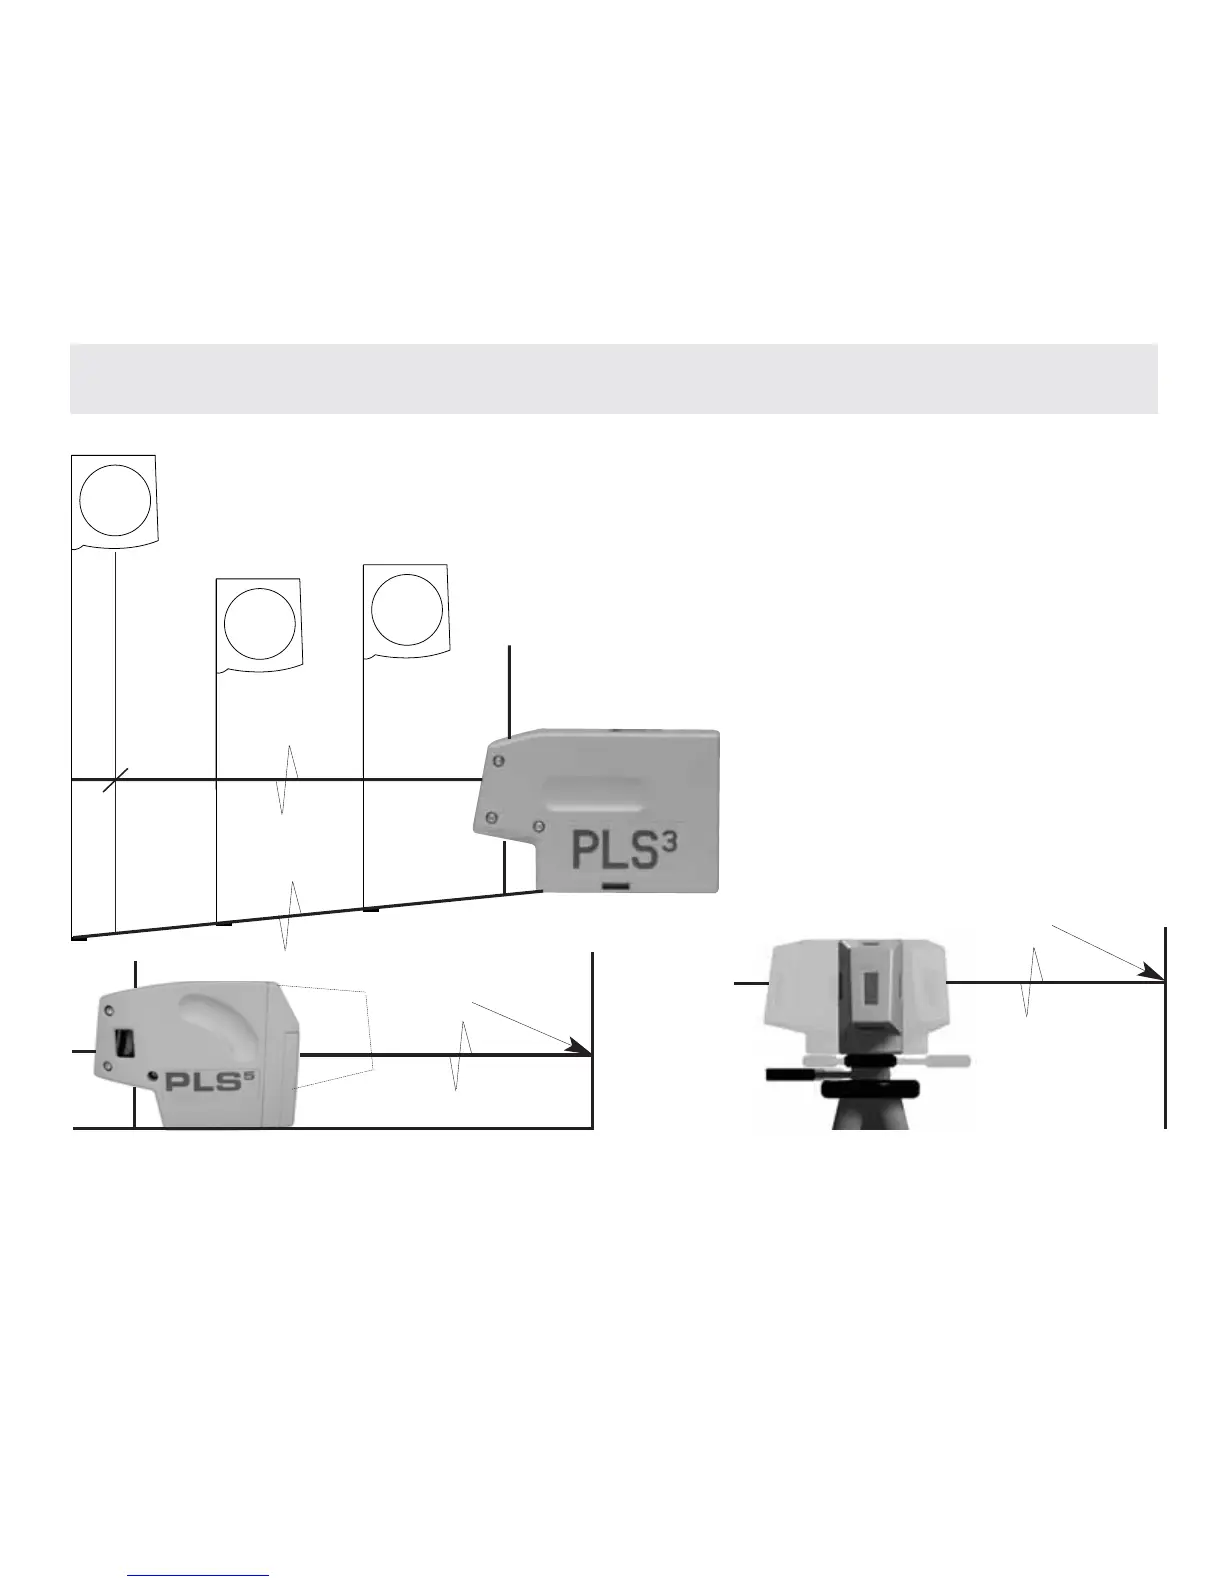
Precise level and grade marks are easily established with the PLS
5
and PLS
3
.Swivel the
unit about its center, stopping to mark the desired level or grade points. See Fig. 4. Any
stable surface can be used. When mounted on a tripod or wall mount, swivel and mark.
See Fig. 5. When turning your PLS
5
or PLS
3
on a tripod
be sure tripod head is perfectly level. Error in marks can
result with tripod out of level.
To s u r ve y ex i s t i n g c o n d i t i o n s fo r l eve l ,
point in the direction to survey. Using
a tape or rod with a bench mark, the
variations in level or grade can be
noted quickly at various distances.
See Fig. 6.
MAR K
FIG. 4
FIG. 5
MAR K