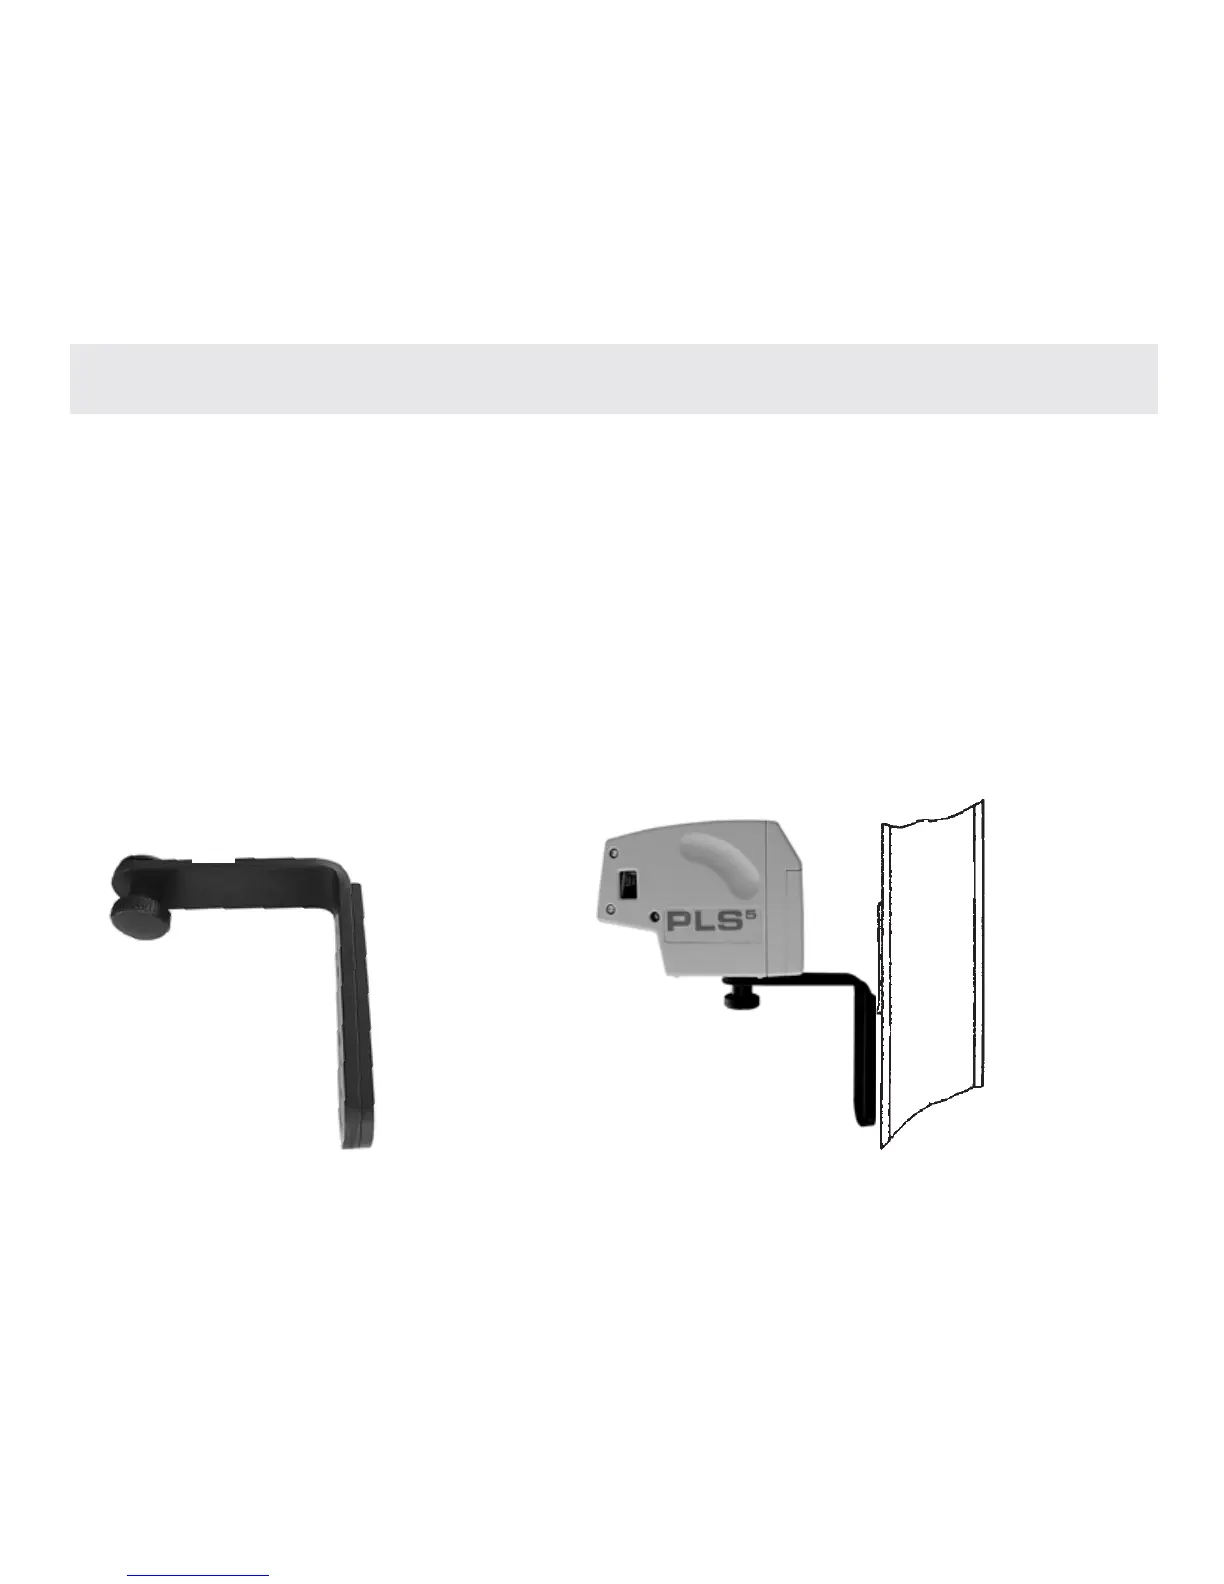
Magnet ic Br acket Inst r uct ions
12
To u s e th e m a g n e ti c b ra cke t w i t h t h e PL S l a s e r :
1.Screw the 1/4 x 20 threaded knob to the mount on the base of the PLS laser.
2.Mount the PLS laser and bracket to steel studs, steel door frame, I-beams, carpenter’s
square, etc.
3.Rotate the PLS laser to desired point and make your mark.
Combine the PLS laser, the magnetic bracket, a standard steel carpenter’s framing square and one
or more clamps and you have the ability to mount the laser in unlimited ways. Clamp carpenter’s
square to concrete forms, ladders, wood studs, etc. Attach the PLS laser with magnetic mount as
described above. If you drill two small holes centered on the long section of the carpenter’s square,
the square can be attached to unfinished drywall partitions with screws or removable nails. Slide
the PLS laser up and down the mounted carpenter’s square to the precise desired height.
FIG. 11
FIG. 12
STEEL STUD