Pl umb
6
#2
CEN TE R B EA M
ON L AYOUT
FIG. 2
FLOOR
LAYOUT
PLUMB
POINT
FIG. 3
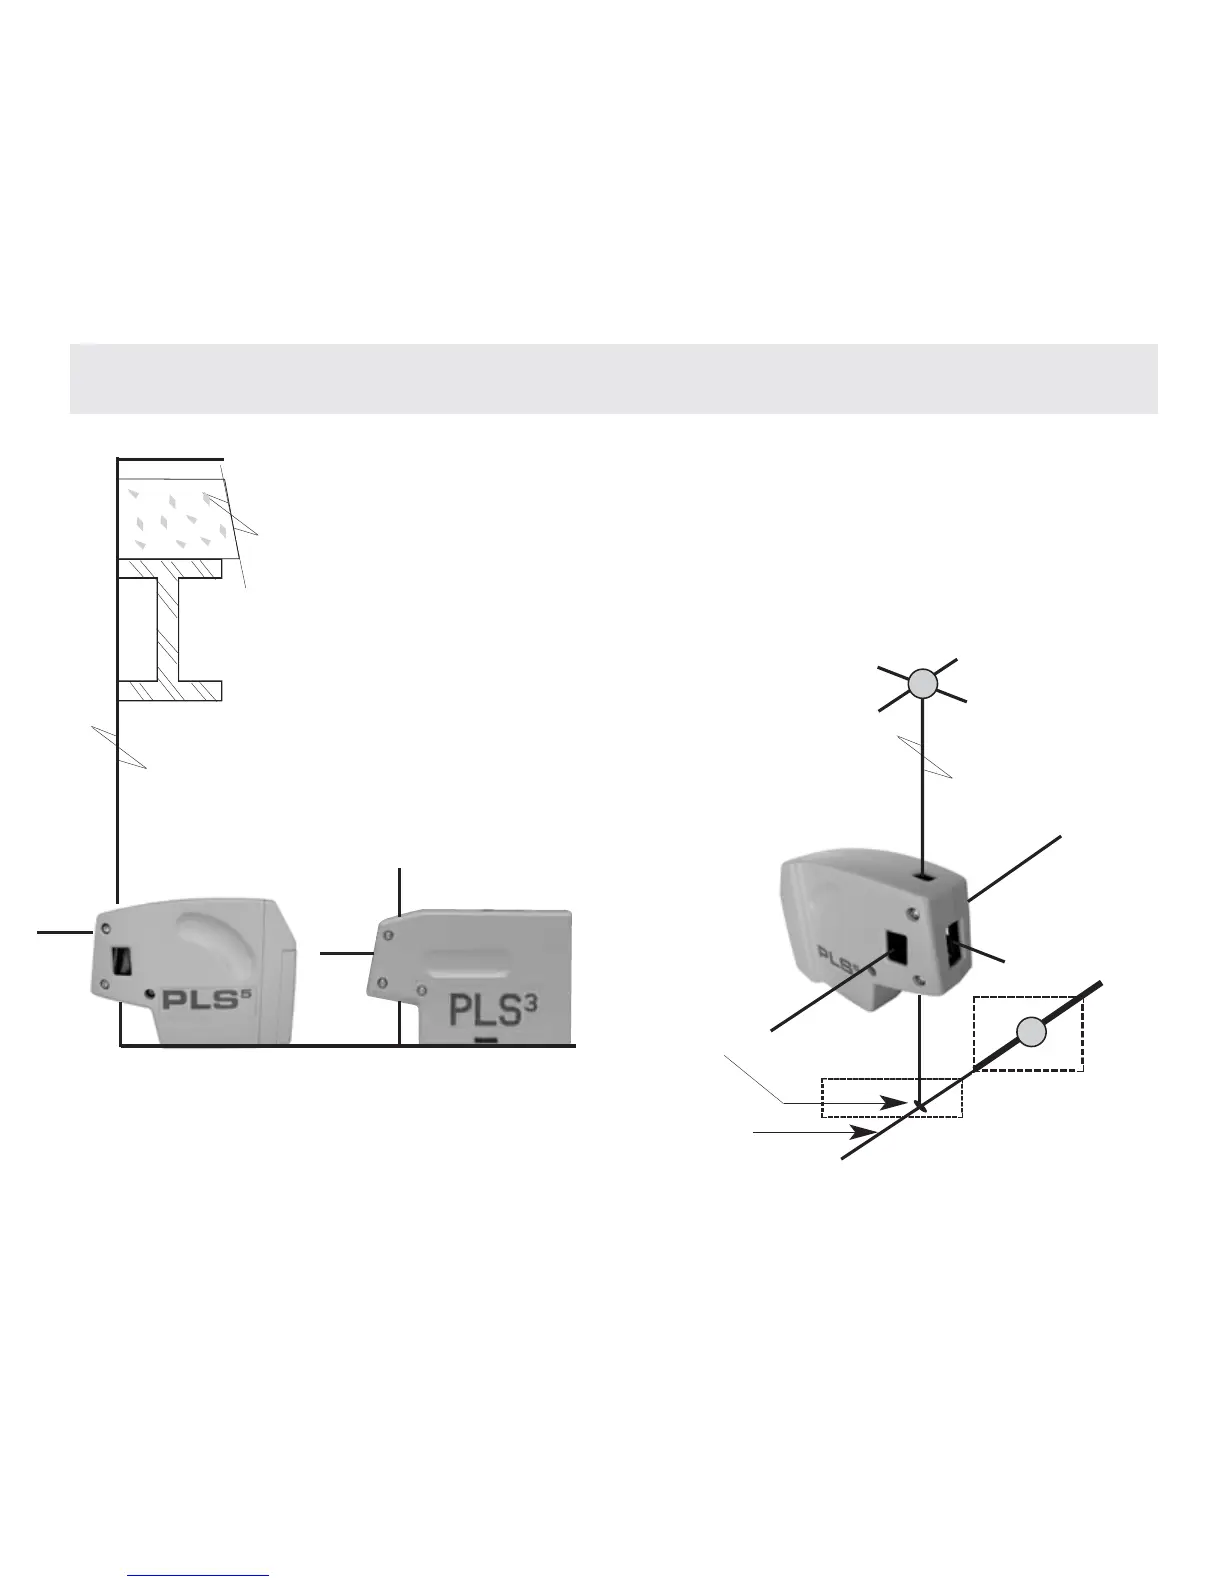
To es ta bl i s h p l um b w i t h th e P L S
5
and PLS
3
, place the #2 down beam over the mark to be
transposed. See Fig.1. The #3 up beam is exactly plumb within specification. You can
shoot plumb marks down and up, or cantilevered over the edge of a building/shaft opening
or floor track, etc. See Fig.2. Use the floor stand with your PLS
5
or PLS
3
to increase the
sight angle of the #2 down beam.
The PLS
3
and PLS
5
can quickly survey existing conditions for plumb. Use a tape
and #3 up beam. Position the laser near the structure.
Check any distance up or down the structure. It is also
possible to transpose marks from a roof or ceiling down to
the floor. Move the laser until the #3 up beam hits the edge or
center of the ceiling component to be transposed. Mark the
floor at the #2 down beam. See Fig. 2 and 3.
#3
FIG. 1