Seite 4 von 11
2 Putting the device into operation
Press the power button briefly to turn the device on. The screen will come on immediately
and the device will start up. After approx. 1 minute, the device is ready to operate. Press the
power button briefly to turn the device off.
Note:
If necessary, you can force the device to shut down by holding the power button.
3 Learning about the „plusoptiX A12R / A12C“
The „plusoptiX A12R / A12C“ is made up of the device with a child-friendly smiley face.
During a measurement,the „plusoptiX A12R / A12C“ records a series of images. To ensure
children look into the camera during the measurement, the “plusoptiX A12” plays a warble
sound.
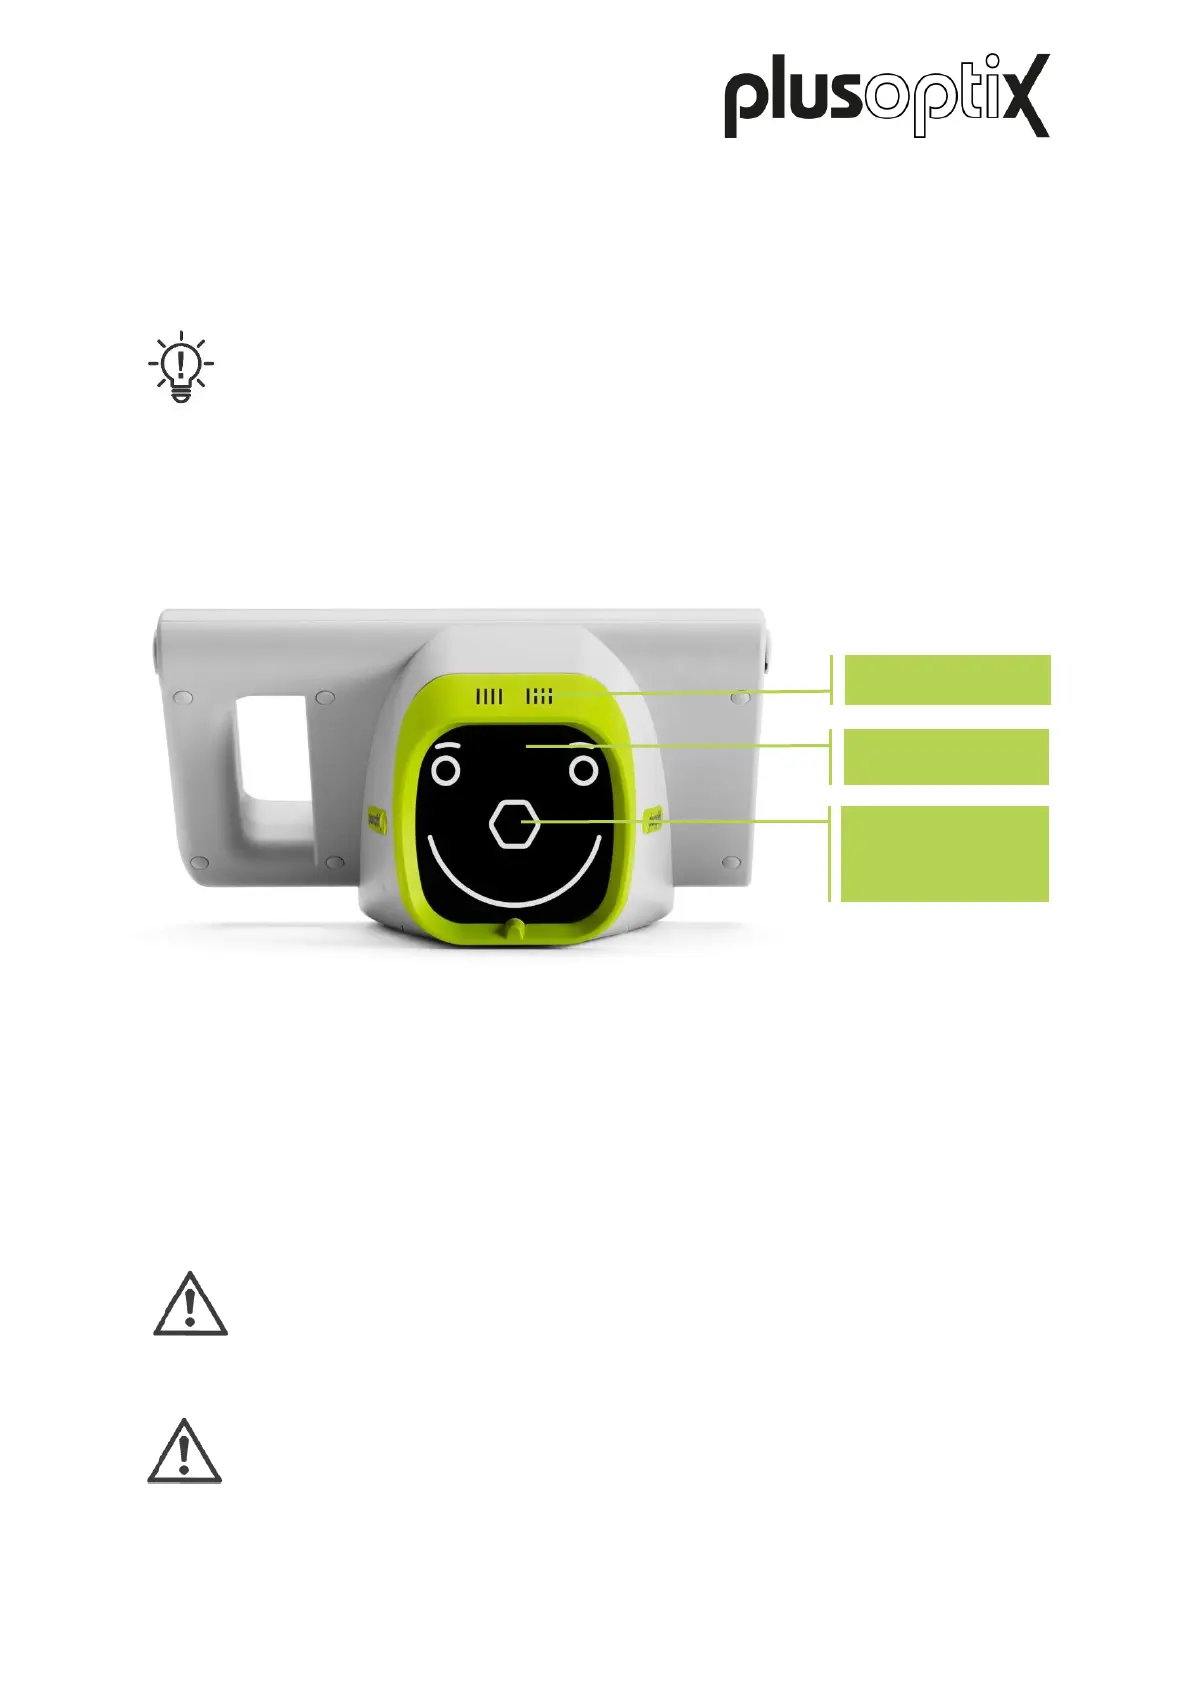
The speaker, the camera lens and the LEDS needed to light the images are located behind
the black protective screen with the smiley. This smiley helps to keep the child’s attention.
Attention:
If a child does not look at the nose of the smiley face during the measurement,
this can lead to a an aborted measurement. The patient's nose and knees must
always be aligned with the device.
Attention:
If you need to put the device on its rear side, e.g. to insert or replace the
rechargeable batteries, please place a soft cloth under the device.
Camera lens
behind hexagonal
nose
Figure 1: Front view of the device (plusoptiX A12C)