Connect your Solo to Wi-Fi
Note: Please have your Wi-Fi password ready and complete these steps whilst near to your Solo.
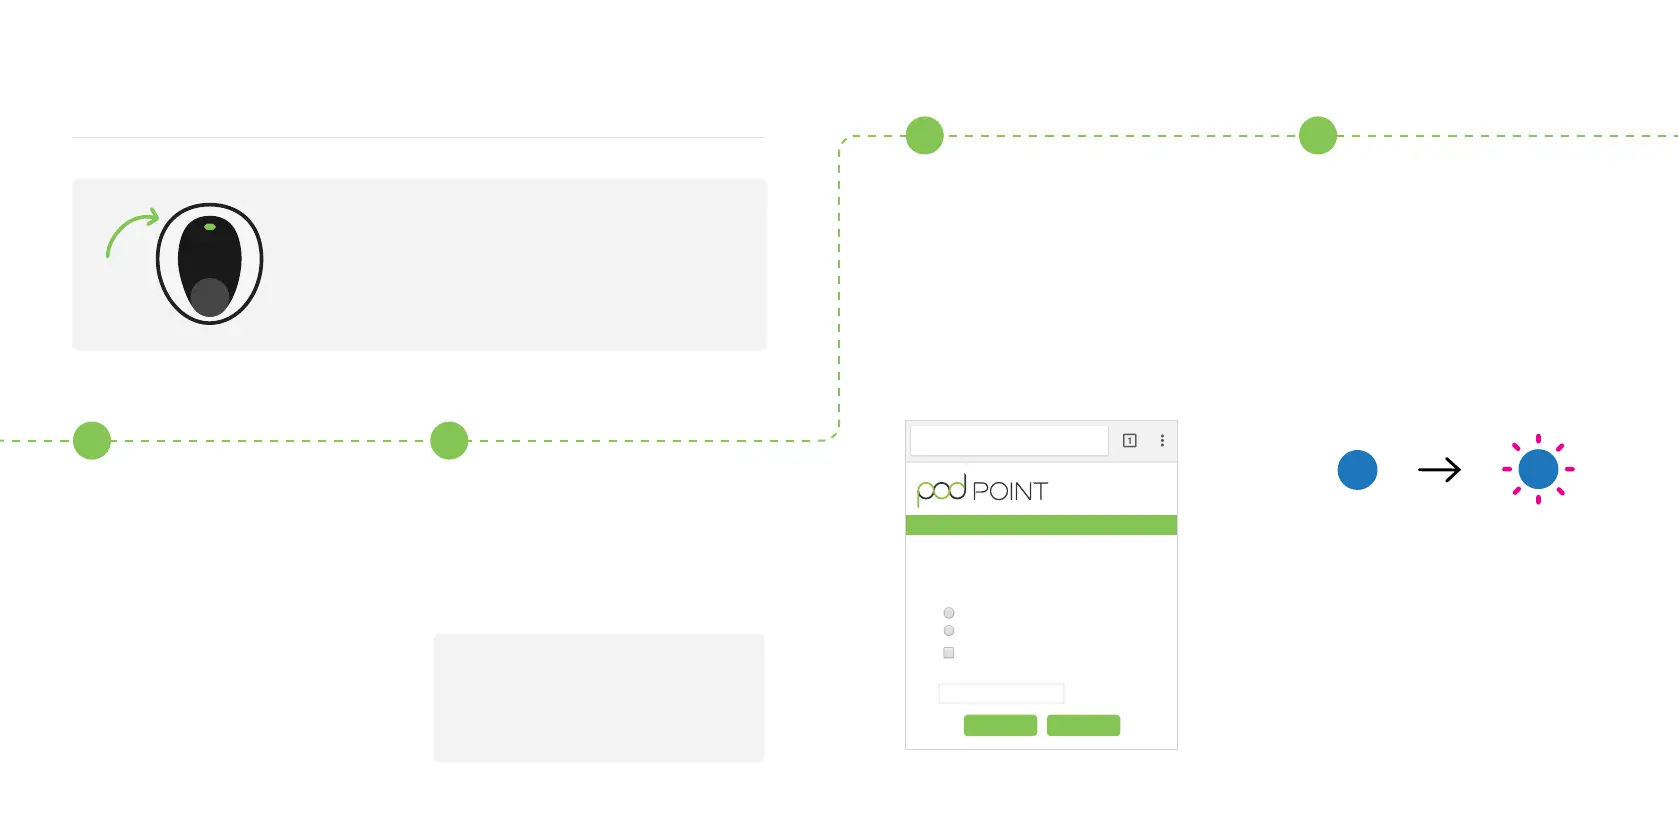
Turn the Solo o and on at
the switch on the fuse box/
consumer unit.
Scan for podpoint Wi-Fi
network on a mobile device
and press connect.
For Android device users:
Press YES on the pop-up
message.
Open you web browser, type in one
of the following IP addresses - please
try the sequence below and use all full
stops. If the rst IP address does not
work, please try the next one.
Pick your home Wi-Fi
network from the list and
type the password.
Press Connect.
Note: Please pair the Solo to 2.4
GHz Wi-Fi networks only.
The new settings will take
15-30 minutes to activate. You can
activate them immediately if you
switch your charger o and on
again. The Solo’s status light should
go blue with a short pink ash
every few seconds.
If the status light remains white,
you may need to restart the Solo
again and verify the settings. If
the connection is still unsuccessful,
retry the process with a dierent
device. If this still isn’t working,
contact support.
192.168.1.1
Or
192.168.101.1
1 2
3 4
04
Solo status light
Once the Solo is turned on, the status light on
the front will illuminate white.
03
Pod Point Home Unit Wi-Fi
My Home Wi-Fi
Guest Wi-Fi
Pod Central
Connect your Pod Point Home Unit to Wi-Fi by selecting a
network and entering the password.
Available Networks
Show advanced data
192.168.101.1
Pod Point Home Unit Wi-Fi
PP3GWIFITEST
PP3GWIFI
Network Password
Connect WiFi Scan