10
ADJUSTMENTS
ADJUSTMENTS
CAUTION: After the first use of the vehicle, the
adjustment settings (track tension, alignment and
angle of attack) on each Track System must be re-
verified. Incorrect adjustments can decrease the
performance of the System and produce
premature wear on certain components.
NOTE: To make the following adjustments, position
the vehicle on a flat and level surface.
ANGLE OF ATTACK - FRONT SYSTEMS
To obtain the correct angle of attack on front
Track Systems, perform the following:
• Use handlebars to point tracks straight ahead.
• Temporarily apply pressure to the front of the
track to make stay flat on the ground
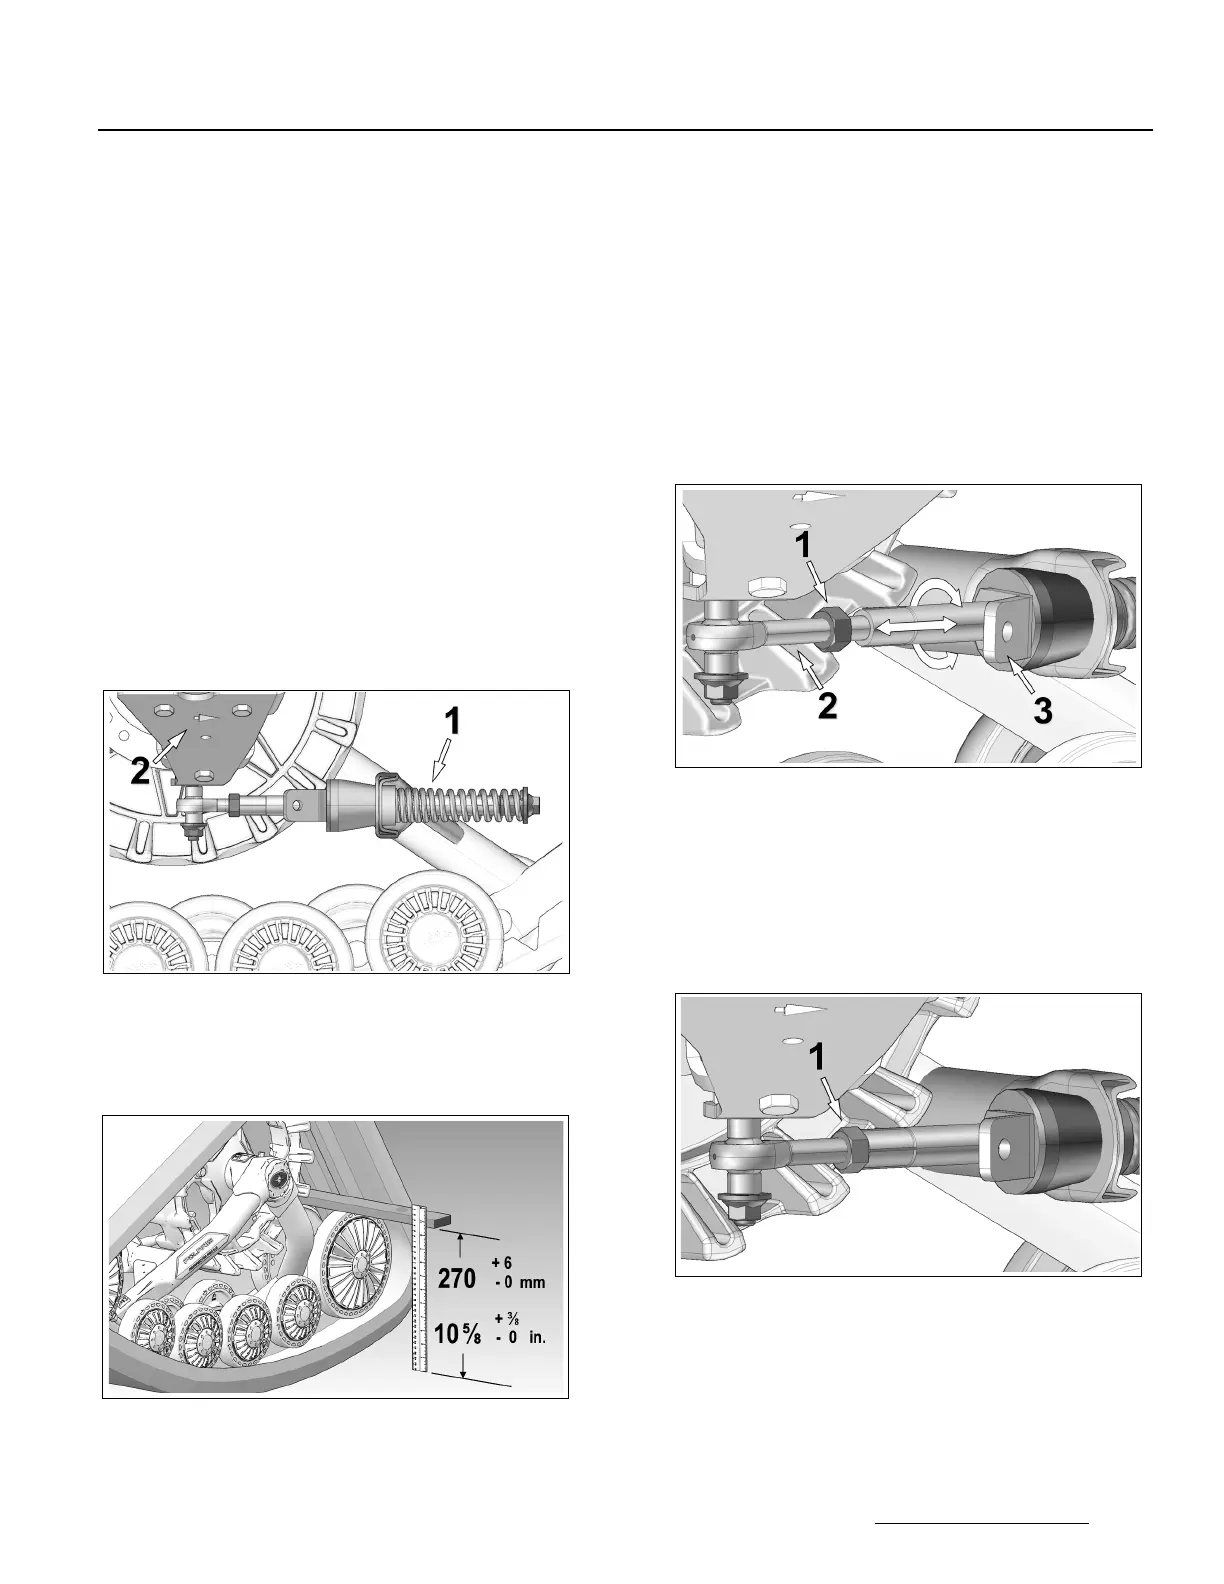
•
Stabilizing arm (
1
) must be attached to front
anchor bracket (
2
) mounted on vehicle.
Figure 3.
Figure 3
• Position a flat bar on top of rear wheels of front
track system and measure from the ground up
to flat bar as shown on Figure 4.
.
Figure 4
NOTE : Before each measurement, temporarily apply
light pressure to the front of the track to make
sure that it stays flat on the ground.
• Loosen jam nut (1). Adjust length of rod end (2)
by rotating the steering limiter support plate on
(3) the stabilizing arm. Use a 30 mm wrench to
rotate support plate and obtain 270 mm above
the ground. Refer to Figure 5.
NOTE: The stabilizing arms on front Track Systems
incorporate a steering limiter support plate (3)
that is bent. This plate should be positioned
inwards, towards the vehicle.
Figure 5
• When angle of attack is correctly set, tighten
the jam nut (1) back against the stabilizing arm
to 40 N•m [30lb•ft] of torque. See Figure 6.
CAUTION: Follow the recommended torque when
tightening the jam nut. Over-tightening the nut
might damage the rod end.
Figure 6
 Loading...