15
ENGLISH
Clean the filter periodically or change it. Remove the filter loosening the
clamps, unscrew the 2 screws using a cross screwdriver, remove the filter
cover and then the filter. Wash the filtering material with water and mild
soap. Dry the filter carefully, and then moisten it with oil for filters.
Clean filter box inside using a cloth and check the presence of foreign
bodies. Now reassemble all the parts. Wash the filter for maximum 2-3
times and then replace it with a new one.
! WARNING! If the filter becomes clogged with fine dust as well as
normal dirt, replace it with a new one.
! WARNING! Dirty air filter may compromise the correct operation
of the engine and it causes poor performance. Torn or broken filters can
allow dirt to enter the engine and cause rapid deterioration of the piston
rings, piston and barrel.
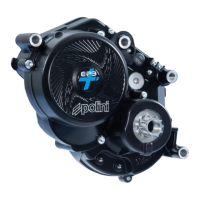
9.2- GEAR REDUCTION OIL CHECK
Operate when the engine is cold. Maintain the engine in vertical position and
remove the oil level screw on the transmission crankcase. (photo 4 – OIL
LEVEL). Check that the oil level reaches the lower edge of the level hole. If there
is too much oil, let it flow out from the hole until it stops flowing and collect
the oil in a suitable container. If there is not enough oil, top up as required
through the breather hole located at the top. After checking it, tighten the
screws. Use ELF Moto Gear Oil 10 W 40 ANTI Clutch Slippage or Shell advance
gear SAE 10 W 40 API GL-3
9.3- GEAR REDUCTION OIL CHECK
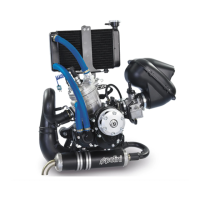
Change the oil when the engine is cold. Unscrew the screw on the lower
side of the clutch/gear group (Photo 4-A).
04
OIL LEVEL
A
Collect the oil flowing out in a suitable container. Wait till the oil has
completely flown out and, if necessary, tilt the engine to the side to
make this operation easier. Tighten the screw withy strength. Unscrew
the breather pipe in the top side of the crankcase (photo 5) and fill it
out with 100cc of ELF Moto Gear Oil 10 W 40 ANTI Clutch Slippage oil.
05
Fit the pipe and its tube again. As an alternative you can use also oil:
Shell advance gear SAE 10 W 40 API GL-3 or an oil with 10W40 viscosity
compatible with clutch (similar to motorcycle engine oil)
WARNING! Do not throw spent oil into the environment. Dispose of it
correctly through authorized collection points.
9.4-STARTER ROPE REPLACEMENT (Flash Starter)
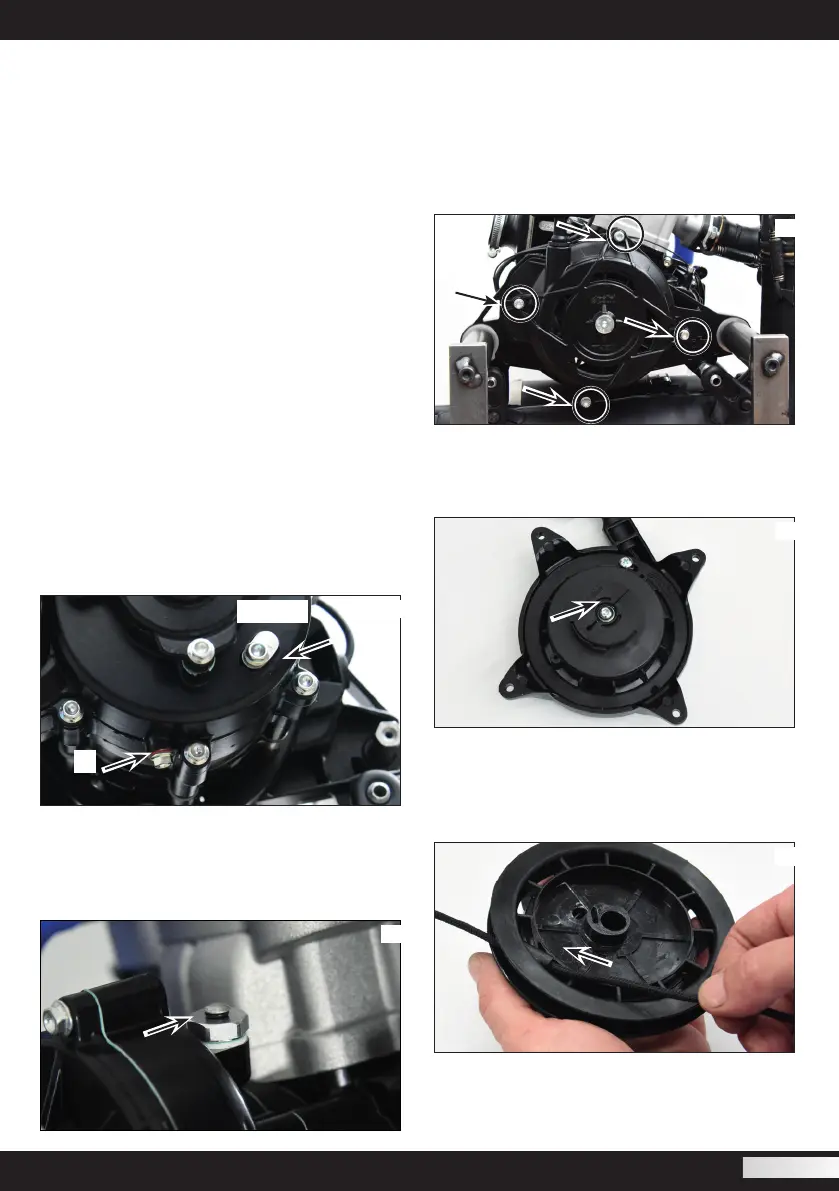
Remove the starter from the engine unscrewing the 4 screws (Photo 6).
06
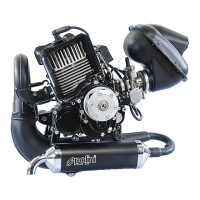
Remove the handle knot. Be careful since the central wheel will spin till
the spring is completely discharged: keep it and discharge it slowly to
avoid damages or possible injuries. Remove the central screw and its
cover (photo 7).
07
! ATTENTION! Under the cover there are two teeth for the starter jaw
(check their condition and if worn replace them); under them 2 small
calipers. Be very careful not to lose these small parts.
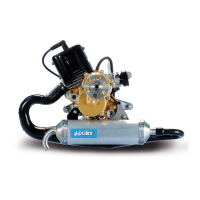
Prepare the new rope and tie a knot at the top. Remove the plastic wheel
and the old rope. Thread the new rope in its hole (photo 8),
08
wind up the rope on the wheel (according to the entrance sense of the
rope on the wheel) (Photo 9).