2. Assembly
2.a. What you will need
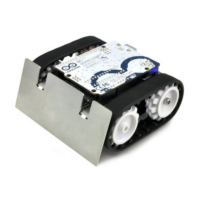
The Zumo Shield is designed to be mounted on a Zumo chassis kit [http://www.pololu.com/catalog/product/1418],
which is included (along with a Zumo blade [http://www.pololu.com/catalog/product/1410]) if you have a Zumo robot
kit for Arduino [http://www.pololu.com/catalog/product/2505]. In addition, you will require these items to construct a
working Arduino-controlled Zumo robot:
Additional required components
• Two micro metal gearmotors [http://www.pololu.com/catalog/category/60] (we recommend 100:1
[http://www.pololu.com/catalog/product/1101] or 50:1 [http://www.pololu.com/catalog/product/998] gear ratio versions
with HP motors)
• An Arduino (we recommend an Uno R3 [http://www.pololu.com/catalog/product/2191] or a Leonardo
[http://www.pololu.com/catalog/product/2192])
• Four AA batteries (we recommend rechargeable AA NiMH cells [http://www.pololu.com/catalog/product/1003])
Please see the product description for the chassis kit [http://www.pololu.com/catalog/product/1418] for more
information and recommendations about selecting these components.
Additional optional components
• Basic sumo blade for the Zumo chassis [http://www.pololu.com/catalog/product/1410]
• Sensors [http://www.pololu.com/catalog/category/7], such as our QTR reflectance sensors
[http://www.pololu.com/catalog/category/123]
• Connectors and jumper wires [http://www.pololu.com/catalog/category/19], for connecting additional sensors
and components
• Battery charger (such as the iMAX-B6AC [http://www.pololu.com/catalog/product/2260]), if you are using
rechargeable batteries
Assembly tools
• Soldering iron and solder (we recommend one with adjustable temperature control)
• Wire cutter
• Small Phillips screwdriver
• 3 mm Allen wrench (hex key)
• long-nose pliers (for bending the Zumo blade mounting tabs)
2.b. Assembling the Zumo Shield and chassis
Please follow these instructions carefully to assemble your Zumo Shield and chassis properly.
Pololu Zumo Shield for Arduino User's Guide © 2001–2012 Pololu Corporation
2. Assembly Page 5 of 28


 To Next Page