Page 10 of 20
March 2024
PJN3 SERIES
RECIRCULATING FLUSH
TOILET SEAT INSTALLATION:
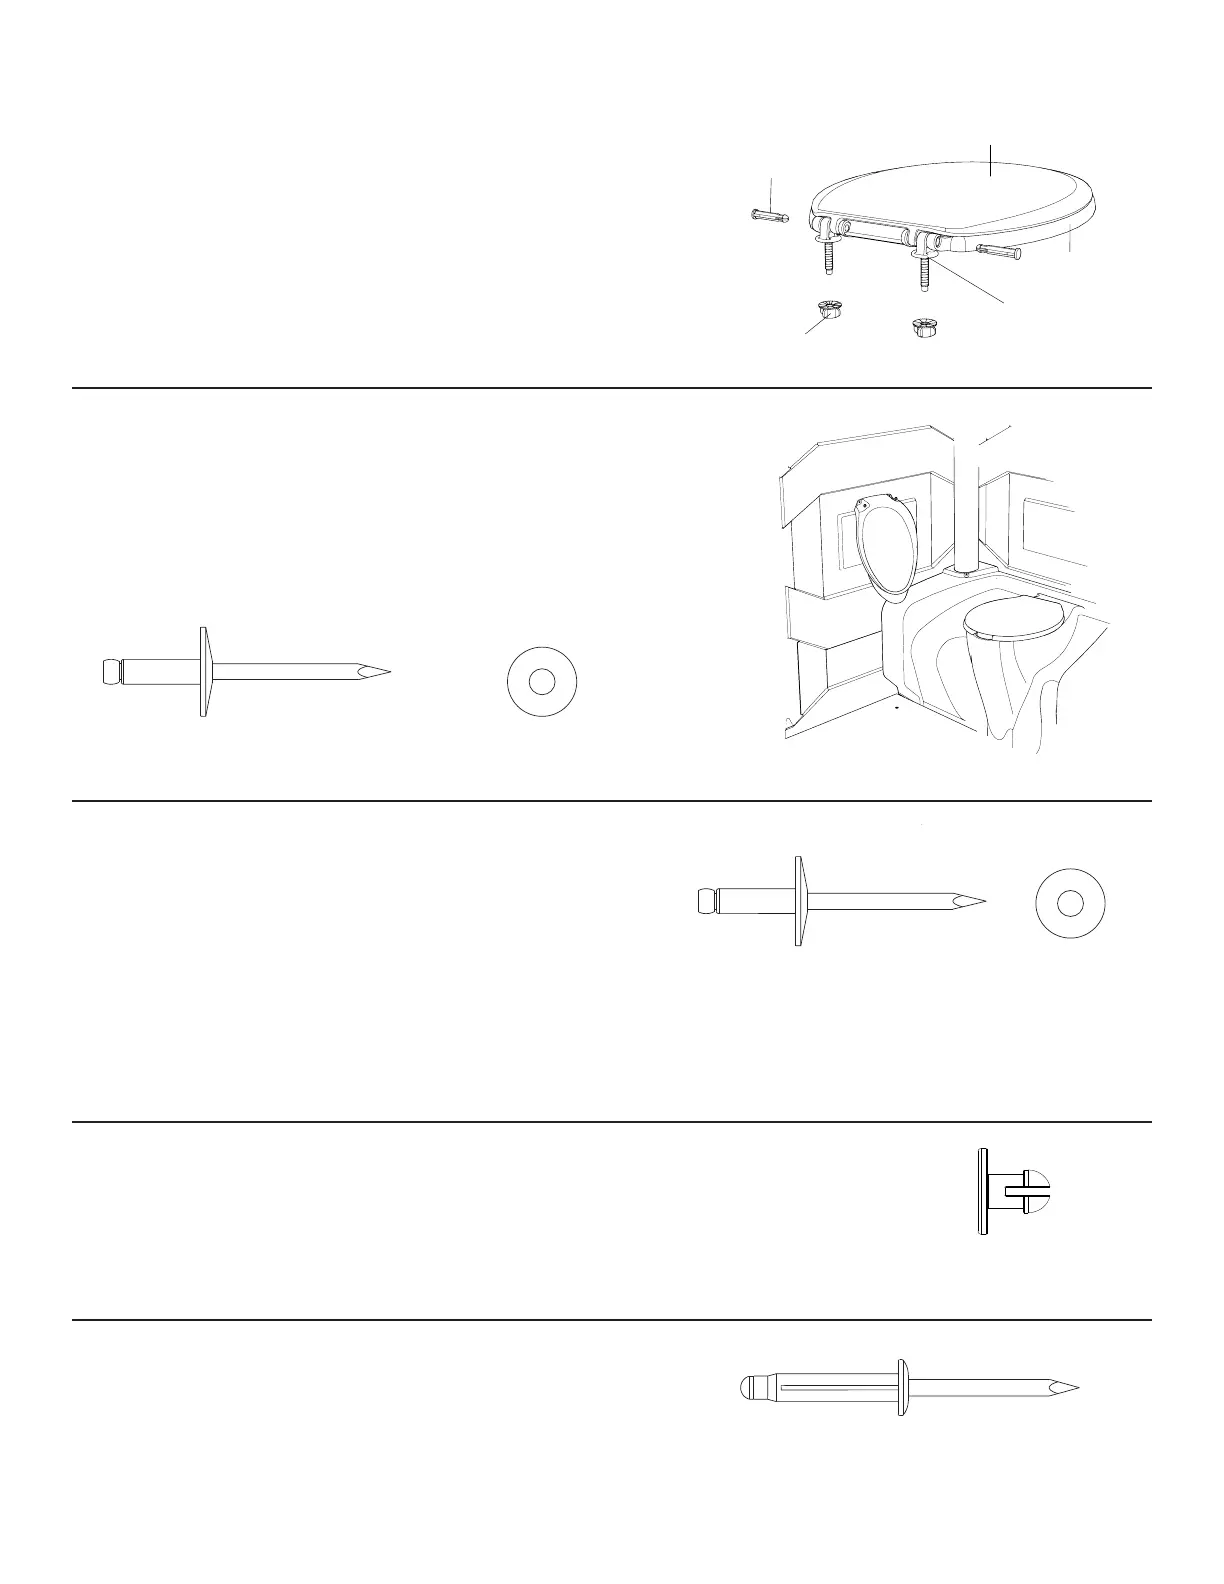
Push the lid onto the seat (lining up the holes of the lid with those in the seat). Line up the holes
of the hinge bolts with those in the seat/lid. From the outer edge, push the pins through the holes
until flush. Place the seat/lid on to the tank (inserting the bolts through the holes in the tank). Use
pliers to tighten the nuts.
STEP 14:
ASSEMBLY INSTRUCTIONS
URINAL INSTALLATION:
OMIT THIS STEP IF OPTIONAL SINK IS BEING INSTALLED ON THE LEFT SIDE
WALL. Refer to Figure 8. Insert the drain spigot of the urinal into the hole on the left top surface
of the holding tank. Position the urinal so that it is level. There are two holes at the top of the
urinal. Drill 13/64” holes through those holes and through the side wall panel. From outside of
the restroom one person will rivet through the drilled holes with PC-000100 rivets, while another
person inside the restroom places PC-000106 back-up washers on the rivet stems.
TOILET PAPER DISPENSER INSTALLATION:
The double roll dispenser is mounted up on the right wall panel. Position the dispenser on the
top edge of the second raised panel directly below the fly screens at the desired location.
(If sink is installed on the right wall, position the dispenser towards the rear of the panel).
CAUTION: BE SURE THE LOCATION OF THE DISPENSER IS NOT IN THE WAY OF
PERSONS USING THE RESTROOM. Level the dispenser on the wall. Using the holes in the
back of the dispenser as a guide, mark the locations for the drill holes with a marker. Drill four
13/64” holes into the drill spots marked. From the outside rivet into the holes just drilled with (4)
PC-000100 rivets while someone places (4) PC-000106 back-up washers onto the rivet stems
on the inside.
MIRROR:
The mirror is mounted into the square recess on the inside of the door with (4) PC-000367 nylon push rivets.
CONVENIENCE HOVER HANDLE:
The convenience handle is mounted into the two square recesses on the inside of the door
with (2) PC-000105 bulbex rivets.
STEP 15:
STEP 16:
STEP 17:
STEP 18:
PC-000106 Washer
2 used in this step
PC-000106 Washer
4 used in this step
PC-000100 Rivet
2 used in this step
PC-000100 Rivet
4 used in this step
PC-000105 Rivet
2 used in this step
PC-000367 Fastener
4 used in this step
TS1-0001
Seat
TS1-0002 - Lid
(2) - Pin
(2) Hinge Bolt
(2) - Nut
Figure 11
 Loading...