Page 9 of 20
March 2024
PJN3 SERIES
RECIRCULATING FLUSH
Figure 10
Figure 9
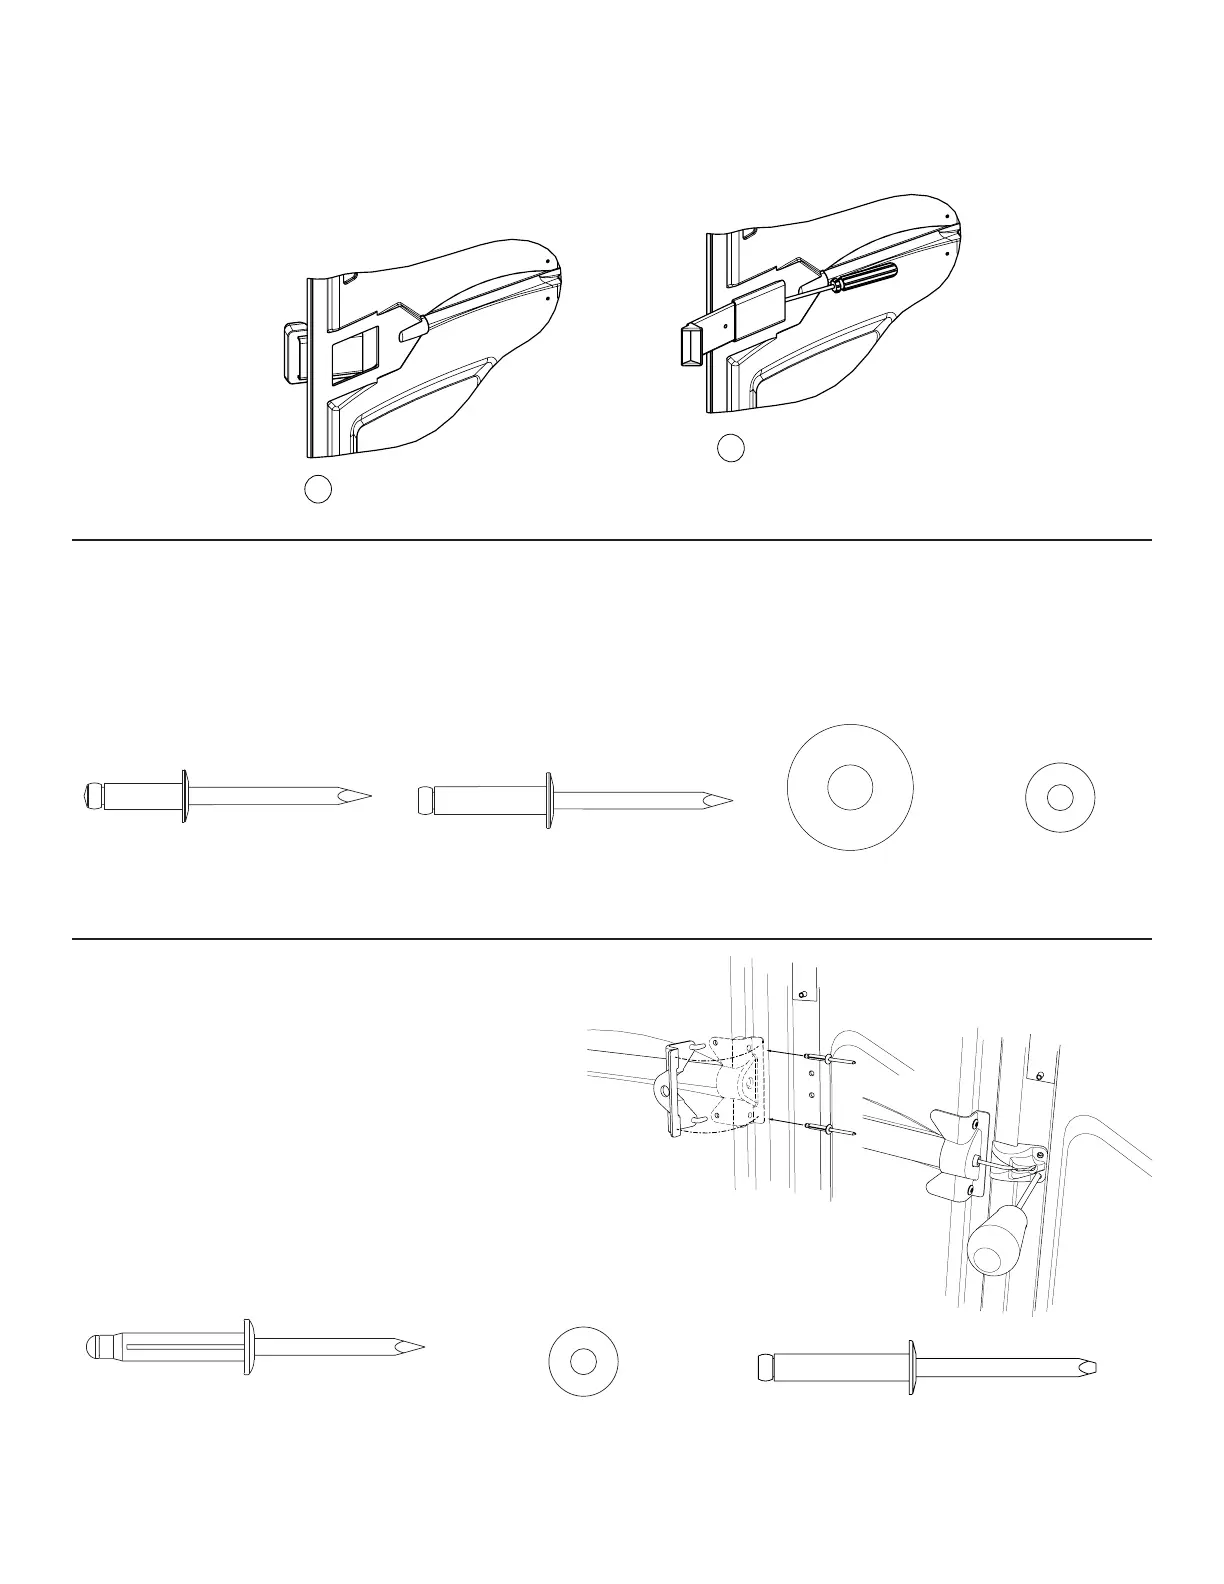
SLIDE LATCH, DOOR PULL INSTALLATION:
Refer to Figure 5. Follow steps as illustrated.
STEP 11:
ASSEMBLY INSTRUCTIONS
DOOR CHECK CABLE:
There are two holes located on the right inside surface of the door toward the top. Position the metal bracket on the end of the cable so the angle points toward the interior
of the restroom. Align the two outer holes of the bracket with the two holes in the door, rivet in place with (2) PC-000102 rivets. Locate the hole at the top, in the middle of
the door jamb and from the outside insert a PC-000104 rivet through the jamb. Attach the loop end of the cable, a PC-000168 washer, and a PC-000106 back-up washer
on the rivet stem and rivet in place.
DOOR CLOSURE INSTALLATION:
Refer to Figure 6. Place the door closure in the molded channel located at the
center of the door and push it into the molded pocket. Thread the ball end of
the cable through the hole in the door closure retainer clip. Position the door
closure retainer clip (as shown in Figure 6). Rivet in place with (2) PC-000105
bulbex rivets. Go into the restroom and close the door. Refer to Figure 7. Place
the barrel end of the spring cable into the slot of the PC-000181plastic cable
clip. Insert an awl through the bottom hole of the cable clip and pull the clip so
that awl is inserted into the drilled hole in the door jamb. Lining up the top hole,
rivet from the outside with a PC-000109 rivet with a PC-000106 washer on the
inside. Remove the awl and rivet the bottom hole in the same manner.
STEP 12:
STEP 13:
PC-000104 Rivet
1 used in this step
PC-000106 Washer
1 used in this step
PC-000102 Rivet
2 used in this step
PC-000105 Rivet
2 used in this step
PC-000168 Washer
1 used in this step
Figure 8
INSERT DOOR PULL INTO SLOT USING
NOTCHES TO GUIDE DOOR PULL
1
INSERT SLIDE LATCH
INTO DOOR PULL
2
USE SCREWDRIVER TO ASSIST
IN SLIDING THE LATCH
COMPLETELY INTO THE DOOR PULL
PC-000109 Rivet
2 used in this step
PC-000106 Washer
2 used in this step
 Loading...