3.
BASIC SETTING
3.1 Inserting the batteries
Pressing the lever on the upper side of the
thermostat, remove the rear base of the thermostat
as shown in the gure above.
The battery compartment is located on the inner
side of the front panel. Insert 2 AA alkaline
batteries (type LR6) as indicated in the seat of
the same batteries and replace the front part of
the thermostat on the base with snap closure.
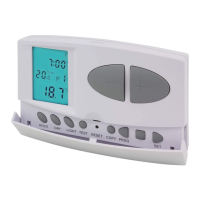
After inserting the batteries, the day, time and
program number will ash on the display as will
the measured and regulated temperatures. (If this
information does not appear on the display, press
the "RESET" button with a ne-tipped object.
To press the button, do not use any electrically
conductive material.
3.2 Set current date and time
Press the "SET" button to start the setting process.
Press the "DAY ” " button. The day number ashes
on the display, press the (-) or (+) buttons to set the
number of the current day (Monday 1; Tuesday 2;
Wednesday 3, etc.).
Press the “DAY button again to conrm the day set;
the hour number ashes on the display, press the (-) or
(+) buttons to set the current time.
Press the “DAY " button again to conrm the time set;
the number of minutes ashes on the display, press the
(-) or (+) buttons to set the minutes and conrm by
pressing the “DAY ” button.
To change the settings, press the “DAY ” button again
to return to the initial settings. To end the settings,
conrm them by pressing the SETbutton. At this point
the adjusted data is stored and the device returns to
the main screen. (After approximately 10 seconds, the
settings are automatically conrmed and the device
returns to the main screen).