5
OPERATION
WARNING: Before attempting any of the following
operations,makesurethatthetoolisswitchedoffand
unplugged and that the saw blade has stopped. Used saw
blades can be hot.
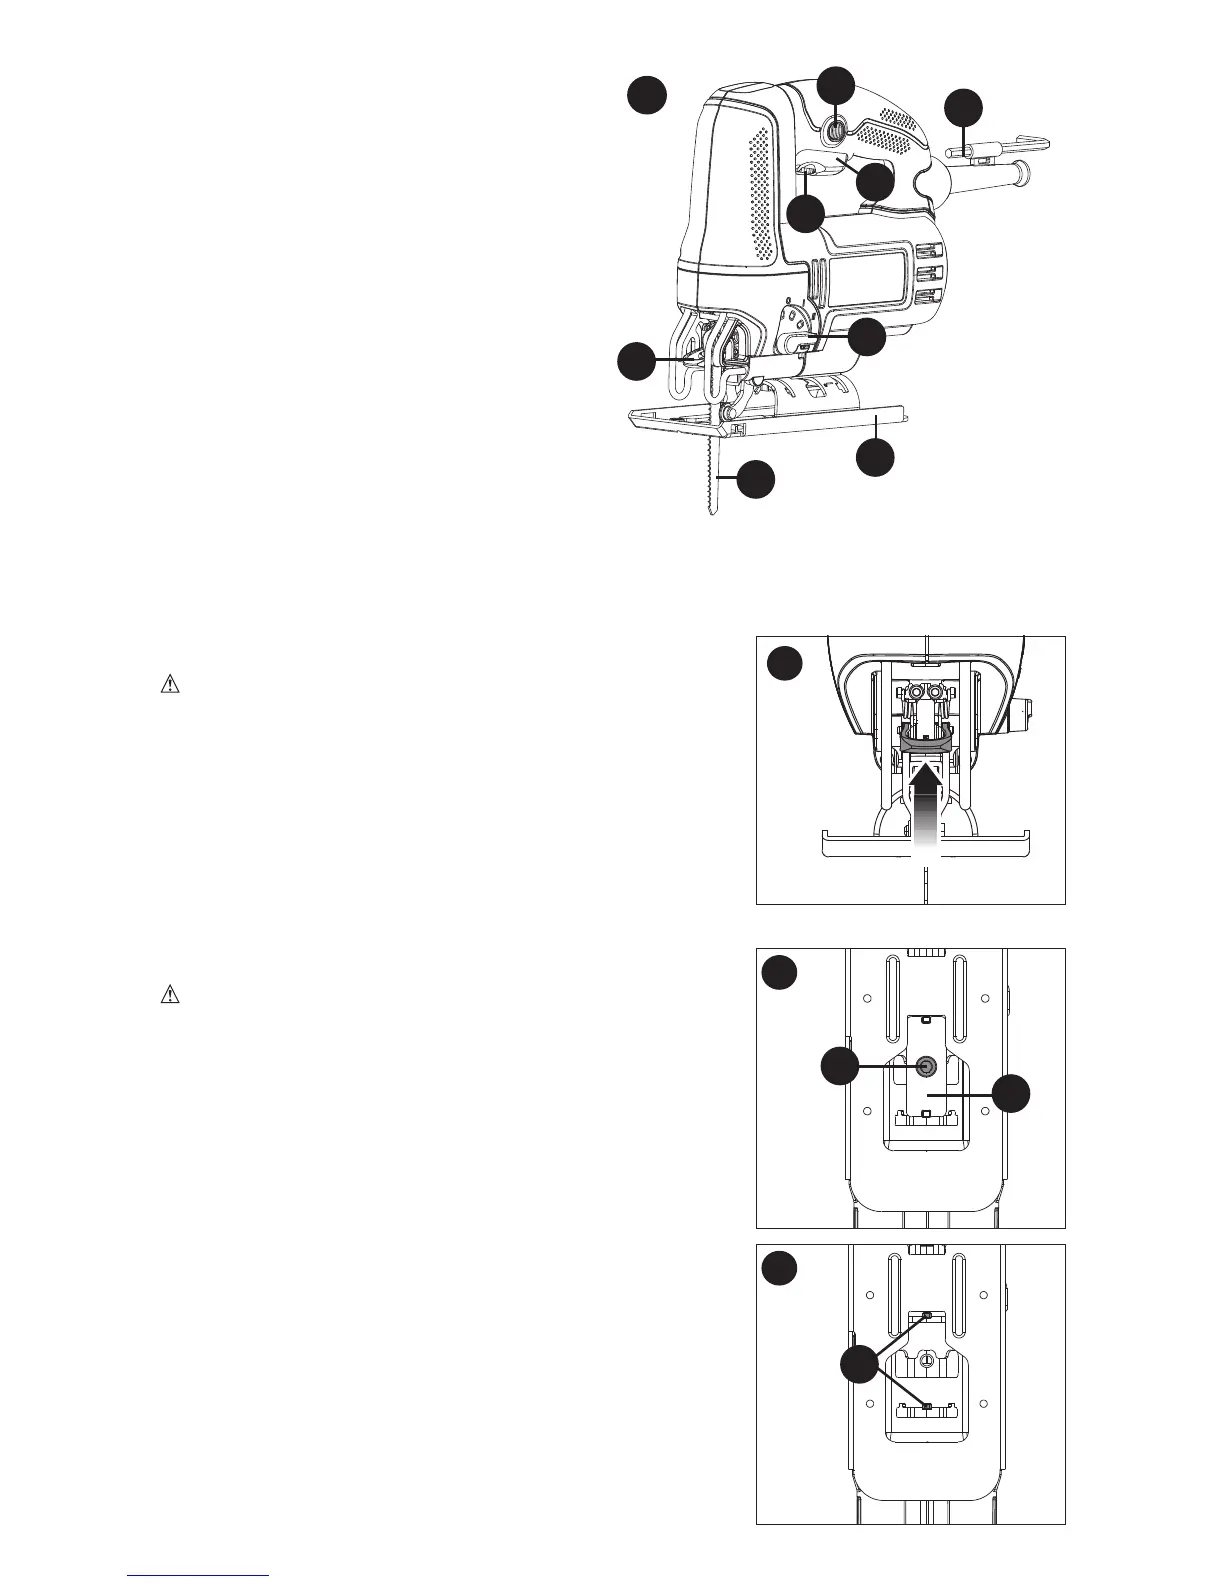
BLADE INSTALLATION (FIGURE B)
-Pushthesawbladelockinglever(4)upward.
-Withteethfacingforward,inserttheshankofthesaw
blade into the blade holder as far as it will go.
-Releasethelever.
-Checktoensurebladeissecurebeforecutting.
ADJUSTING THE SHOE FOR BEVEL CUTS
WARNING: Neverusethetoolwhentheshoe(6)
is loose or removed.
Theshoecanbesettoaleftorrightbevelangleupto45°.
-Turnsawupsidedown.Usethewrench(7)toloosen
theclampingscrew(9)andclampplate(10)asshownin
figure C.
-Slidetheshoe(6)forwardandrotateleftorrighttothe
requiredangle.
-Slidetheshoebackwardsotheshoeplatekeyways
engagethetwolockposts(11)onthetoolasshownin
figure D.
-Tightenclampingscrewandclampplatewithits
beveled side towards the tool.
B
A
1
2
4
8
5
6
7
3
C
10
9
D
11
FUNCTIONAL DESCRIPTION
1. Variable speed switch
2.Speedcontroldial
3.Lock-onbutton
4.Sawbladelockinglever
5.Sawblade
6.Shoe
7.Wrench
8.Cuttingactionlever