EasyManua.ls Logo

pottery barn kids BELDEN CORNER UNIT User Manual

pottery barn kids BELDEN CORNER UNIT
5 pages
To Next Page IconTo Next Page
Page #1 background imageLoading...
Page #1 background image
1
pottery barn kids
BELDEN CORNER UNIT
PRE-ASSEMBLY:
Please read all instructions before beginning assembly.
For your safety and ease, assembly by two adults is recommended.
Remove all parts and hardware from box and lay out on a carpeted or scratch-free work surface, as
this will avoid damaging any parts during assembly. The shipping box provides an ideal work
surface.
Do not dispose of any contents until assembly is completed to avoid accidentally discarding small
parts or hardware.
Use the parts and hardware lists to identify and separate each of the pieces included.
Note: Do not fully tighten all bolts until all parts are in place. Failure to follow these instructions may
cause the bolts to misalign during assembly.
The use of power tools for assembly is not recommended. Power tools can damage hardware or
split wood.
PARTS INCLUDED:
A Top panel (x1)
B Bottom panel (x1)
C Short divider (x1)
D Long divider (x1)
E Back panel (x2)
F Beadboard upper front panel (x2)
G Lower front panel (x2)
H Leg (x1)
I Leg (x1)
J Leg (x1)
K Leg (x1)
TOOLS REQUIRED:
Phillips head screwdriver (not included)
LWrench 88x13x2mm (included)
HARDWARE:
M – Hex Nut 5/16”x12.8x6mm (x8) N spring washer 5/16x13x2mm (x8)
O – Flat washer 5/16x18x2mm (x8) P Pan Head screw 8x19mm (x12)
Question and Answer IconNeed help?

Do you have a question about the pottery barn kids BELDEN CORNER UNIT and is the answer not in the manual?

pottery barn kids BELDEN CORNER UNIT Specifications

General IconGeneral
CategoryIndoor Furnishing
BrandPottery Barn Kids
NameBELDEN CORNER UNIT
Product NameBelden Corner Unit
MaterialWood
Assembly RequiredYes

Summary

PRE-ASSEMBLY

Parts Included

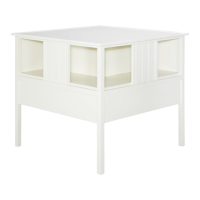
Lists all physical components required for assembly, identified by letters.

Tools Required

Lists necessary tools, such as screwdrivers and wrenches, for assembling the unit.

Hardware

Details all fasteners and connecting pieces, including nuts, washers, and screws.

ASSEMBLY INSTRUCTIONS

Initial Layout and Top Panel Assembly

Unpack parts, prepare surfaces, and attach dividers to the top panel.

Attaching Bottom Panel

Connect the bottom panel to the existing structure using pre-drilled holes and dowels.

Attaching Legs and Front Panels

Install legs (J, H) and lower front panels (G) using hardware and washers.

Attaching Remaining Legs and Back Panels

Secure leg (K) and slide in back panels (E) into designated slots.

Final Leg Attachment and Back Panel Securing

Attach leg (I), secure back panels (E), and prepare for upright positioning.

CARE INSTRUCTIONS

Related product manuals