Do you have a question about the Pottery Barn Ava and is the answer not in the manual?
Secure X-Bases to the Top Frame using Short Allen Bolts, washers, and the Allen Key.
Attach the Stretcher to the X-Base using Long Allen Bolts, washers, and the Allen Key.
Repeat initial assembly steps to attach the second X-Base to the frame.
Attach the Top Panel to the frame using Short Allen Bolts (M8 x 32mm) and washers.
Insert and secure the two Wedges into the pre-drilled holes on the X-Base.
Fine-tune the levelers under the legs to ensure the desk sits evenly on the floor.
Apply Plastic Shims and carefully position the Glass Top onto the main panel.
Wipe the desk with a soft, damp cloth and dry immediately for daily cleaning.
Avoid using unknown chemicals or harsh cleaning agents on the product surface.
Do not sit on the desktop; it is designed only for desk use.
Regularly check and tighten all Allen bolts to ensure the desk base remains stable.
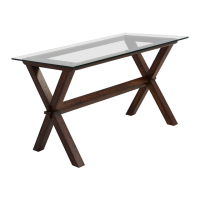
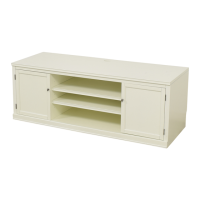
This document provides assembly instructions and care guidelines for the Pottery Barn Ava Display Desk Table.
The Ava Display Desk Table is a piece of furniture designed for display purposes, featuring a top frame, X-bases, a stretcher, wedges, a top panel, and a glass top. Its primary function is to provide a stable and aesthetically pleasing surface for displaying items. The design incorporates an X-base structure for stability and a glass top for a clear view of displayed objects or for a sleek aesthetic. The assembly process involves connecting various wooden and metal components using bolts, washers, and an Allen key, culminating in the placement of a glass top.
The desk table utilizes specific hardware components for assembly, including:
The main structural parts include:
The assembly process relies on pre-drilled holes and embedded nuts for secure connections. The use of different bolt sizes (M6 and M8) and corresponding Allen keys (4mm and 5mm) indicates specific torque requirements or structural roles for different connections. The inclusion of flat and lock washers ensures secure and stable fastening, preventing bolts from loosening over time.
The assembly instructions emphasize several usage features:
The care instructions provide clear guidelines for maintaining the desk table:
| Brand | Pottery Barn |
|---|---|
| Model | Ava |
| Category | Indoor Furnishing |
| Language | English |