This document provides assembly instructions and important safety information for the Pottery Barn Canopy Bed Frame.
Function Description
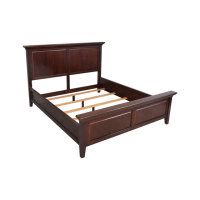
The Pottery Barn Canopy Bed Frame is a structural framework designed to support a bed and create a canopy effect. It consists of various rails, posts, and corners that are assembled to form a rectangular prism-like structure around a bed. The frame is designed to be mounted to a wall for added stability and safety.
Important Technical Specifications
The frame is constructed from multiple metal rails and posts, secured with various bolts, nuts, and screws.
Hardware Included:
- (a) Bolt: M6 x 16mm (50x)
- (b) Round Head Bolt: M4 x 6mm (4x)
- (c) Long Bolt: M6 x 65mm (4x)
- (d) Flat Washer: (4x)
- (e) Nut: (2x)
- (f) 4mm Allen Wrench: (1x)
- (g) Open Wrench: (1x)
- (h) 2mm Allen Wrench: (1x)
- (i) Mounting Screw: M4 x 50mm (2x)
- (j) Toggle: (2x)
- (k) Toggle Screw: (2x)
Parts Included:
- (A) Rail A: 1x
- (B) Rail B: 1x
- (C) Rail C: 1x
- (D) Rail D: 1x
- (E) Rail E: 6x
- (F) Rail F: 2x
- (G) Post: 4x
- (H) Corner: 4x
- (I) Mounting Bracket: 2x
- (J) Rail J: 4x
- (K) Rail K: 2x (for Queen Size)
- (L) Rail L: 2x (for Queen Size)
- (M) Rail M: 2x (for King & CK Size)
- (N) Rail N: 2x (for King & CK Size)
The frame is adaptable to different bed sizes: King, Queen, and CK (California King). Specific rails (K&L for Queen, M&N for King & CK) are provided to accommodate these variations. The mounting brackets (I) are designed for drywall or wood stud mounting.
Usage Features
Assembly:
- Pre-assembly: All parts and hardware should be removed from the box and laid out on a clear, scratch-free surface. The shipping box can serve as an ideal work surface. It is crucial not to discard any packaging until assembly is complete to avoid losing small parts.
- Tools Required (Not included): Ladders, Stud finder, Pencil, Phillips Head Screwdriver.
- Recommended Personnel: Assembly by 4 or more adults is strongly recommended for safety.
- Power Tools: The use of power tools is not recommended as they can damage hardware and split wood.
- Step 1: Base Frame Assembly: Attach Rail (A) to Rail (C) and Rail (B) to Rail (D) using Bolt (a) and 4mm Allen Wrench (f). Choose the correct holes based on the bed size (King, Queen, or CK). Repeat this for two sets of Rail (E) and Rail (F).
- Step 2: Side Frame Assembly: Attach Rail (E) to Rail (J) using Bolt (a) and 4mm Allen Wrench (f). Select the appropriate holes for the bed size (Queen/King or CK). This step results in four groups of Rail (E) and Rail (J).
- Step 3: Connecting Assemblies: Attach the (A&C) and (B&D) assemblies to the (E&J) assemblies using Bolt (a) and 4mm Allen Wrench (f).
- Step 4: Attaching Posts: Attach the four Posts (G) to the assembly from Step 3 using Bolt (a) and 4mm Allen Wrench (f).
- Step 5: Mounting Brackets and Corners: Insert Mounting Bracket (I) onto Rail (E) and Rail (F). The small bolt on the bracket can be tightened or loosened with the 2mm Allen Wrench (h) to adjust its position. Attach Corners (H) to the groups of (E&F) and (E&J) using Bolt (a) and 4mm Allen Wrench (f).
- Step 6: Lifting and Attaching to Posts: Carefully lift the assembled structure from Step 5 with four persons and attach it to the Posts (G). Ensure the mounting bracket side faces the wall.
- Step 7: Top Rail Assembly: For Queen size, attach Rail (K) to Rail (L) using Round Head Bolt (b) and a Phillips Head Screwdriver. (For King & CK size, use Rails M&N).
- Step 8: Securing Top Rails: Secure the assembled top rail group (K&L or M&N) with Canopy Bolt (a), Nut (e), and tighten with 4mm Allen Wrench (f) and Open Wrench (g). Do NOT fully tighten the bolt at this stage.
- Step 9: Final Canopy Attachment: With four persons, attach the canopy (top rail assembly) to the top corners of the frame. Insert Long Bolt (c) through Flat Washer (d) and tighten with 4mm Allen Wrench (e). Finally, fully tighten all bolts.
Mounting to the Wall:
- Safety Note: Proper hardware for the wall type is essential for safe mounting. The included hardware is for drywall or wood stud mounting only. For concrete, brick, or plaster walls, consult a local hardware store for appropriate hardware. Mounting to wood studs is preferred whenever possible.
- Step 1: Positioning: Move the canopy frame to the desired location beside the wall, ensuring the mounting bracket rests against the wall.
- Step 2: Marking: Use a sharp pencil or a screw to mark the wall through the hole in the bracket. This mark indicates where the hardware will be inserted.
- Step 3: Hardware Selection:
- Drywall Applications: Use a stud finder to check if the insertion marks align with a wall stud. If not, both a Toggle (j) and a Toggle Screw (k) will be used.
- Wood Stud Applications: If the insertion marks align with a wall stud, only a Mounting Screw (i) will be used.
- Step 4 (Drywall Mounting): Use a screwdriver to engage Toggle (j) and position its tip against the wall at the insertion mark. Gently push and rotate the toggle clockwise until its large flange is flush with the wall.
- Step 5 (Drywall Mounting): Once Toggle (j) is installed, use a screwdriver to secure Bracket (I) through Toggle Screw (k) into the toggle.
- Step 6 (Stud Mounting): Use a screwdriver to secure Bracket (I) through Mounting Screw (i) directly into the wood stud.
- Important Note for Mounting: Tighten the bolt on the bracket with the 2mm Allen Wrench (h).
Safety Warnings:
- WARNING: Do not allow children to climb on, pull on, or hang from the canopy. Failure to follow these instructions can result in serious bodily injury.
- Read all instructions carefully before assembling.
- Assemble the frame in the desired place.
- Keep instructions for future use.
- Use only vendor-supplied hardware to assemble. Unauthorized hardware could jeopardize the structural integrity of the item.
Maintenance Features
Care Instructions:
- Dusting: Dust often using a clean, soft, dry, and lint-free cloth.
- Spills: Blot spills immediately and wipe with a clean, damp cloth.
- Cleaning Products: Do not use chemical cleansers, abrasives, or furniture polish on the lacquered finish.
- Hardware Check: Hardware may loosen over time. Periodically check to ensure all connections are tight and re-tighten if necessary.