Protectivegioves(notprovided)shouldbe
wornduringassembly.
ATTACHINGTHEBAR&CHAIN(If
notalreadyattached)
_k WARNING: If received assembled,
repeat all steps to ensure your saw is properly
assembled and all fasteners are secure AI-
ways wear gloves when handling the chain.
The chain is sharp and can cut you even when
it is not moving!
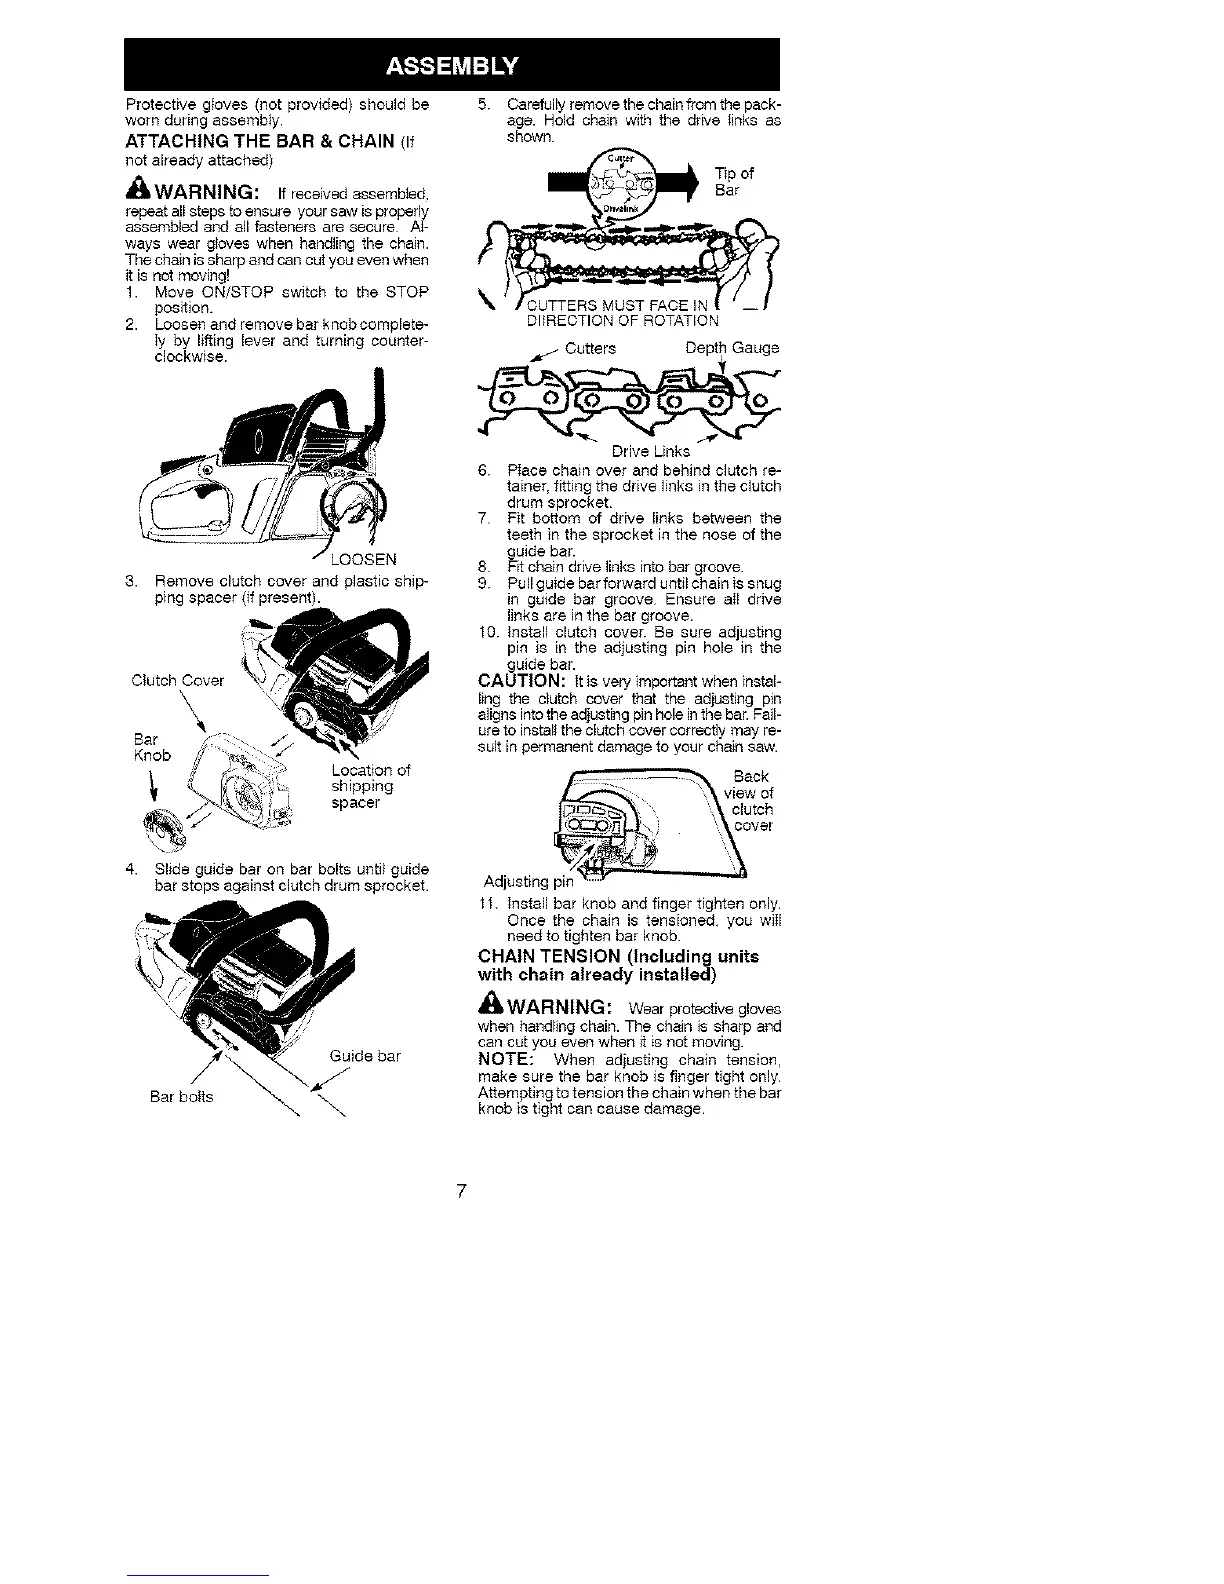
1. Move ON/STOP switch to the STOP
position.
2. Loosen and remove bar knobcomplete-
Iy by lifting lever and turning counter-
clockwise.
_OOSEN
3. Remove clutch cover and plastic ship-
ping spacer (if present).
g. Slide guide bar on bar bolts until guide
bar stops against clutch drum sprocket.
Guide bar
Bar bolts
\\
5. Carefully remove the chain from the pack-
age. Hold chain with the drive links as
shown
DItREOTION OF ROTATION
Cutters Depth Gauge
Drive Links
6 PIace chain over and behind clutch re-
tainer, fitting the drive links in the clutch
drum sprocket
7 Pit bottom of drive links between the
teeth in the sprocket in the nose of the
guide bar.
8. Pit chain drive links into bar groove
9 Pullguide barforward untilchain is snug
in guide bar groove Ensure nil drive
links are in the bar groove.
10 Install clutch cover. Be sure adjusting
pin is in the adjusting pin hole in the
guide bar.
CAUTION: it is very important when instal-
ling the dutch cover that the adjusting p_n
aligns into the adjusting pin hole in the ban Fail-
ure to install the clutch cover correctly may re-
sult in permanent damage to your chain saw.
B__ck
view of
clutch
cover
Adjusting
11. tnstall bar knob and finger tighten only.
Once the chain is tensioned, you wiII
need to tighten bar knob
CHAIN TENSION (Including units
with chain already installed)
_ WARNING: Wear protective gloves
when handling chain. The chain is sharp and
can cut you even when _t is not moving.
NOTE: When adjusting chain tension,
make sure the bar knob is finger tight only
Attempting to tension the chain when the bar
knob is tight can cause damage.




 To Next Page