Do you have a question about the Powerplus POWX026 and is the answer not in the manual?
This document outlines the operation, safety, and maintenance procedures for the Powerplus POWX026 Electronic Impact Drill. It is designed for driving and drilling through various materials such as wood, metal, plastics, and masonry, and is not intended for commercial use.
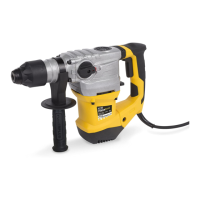
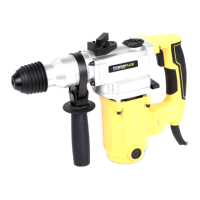
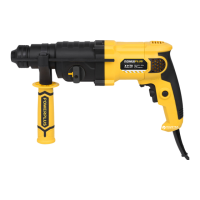
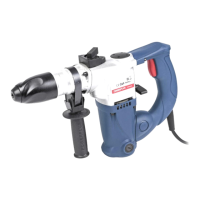
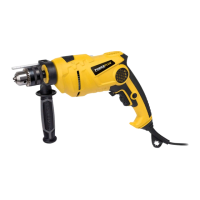
The Powerplus POWX026 is an electronic impact drill equipped with a 13mm drill chuck. It features both drilling and impact drilling modes, allowing for versatility across different tasks. The tool incorporates a right/left action switch for changing the rotation direction, an operating switch for activation, and a speed control selector to adjust the drilling speed. A lock button is included to maintain continuous operation without holding down the operating switch. For enhanced control and safety, an additional handle and a depth stop are provided. The impact mode is particularly useful for drilling into harder materials like masonry, while the drill mode is suitable for softer materials.
Before any assembly or adjustment, it is crucial to disconnect the power plug from the mains socket to prevent accidental starting. The drill or screwdriver bit is changed by inserting the chuck key into one of the three holes on the side of the chuck and turning it to open. Once the desired bit is inserted, the chuck key is turned the opposite way until the bit is firmly gripped and secure in the center of the chuck.
To operate the tool, the cord set must be plugged into a power socket. The tool is started by squeezing the ON/OFF switch. Releasing this switch will stop the tool. For continuous operation, the lock-on button can be pressed while the ON/OFF switch is depressed. To stop the tool from this locked position, the ON/OFF switch must be released.
The forward/reverse lever determines the rotation direction of the chuck. To select forward rotation, the ON/OFF switch should be released, and the lever pushed to the right (R) side of the tool. For reverse rotation, the lever is pushed to the left (L) side. It is essential to ensure the ON/OFF switch is released and the motor is stationary before changing the lever's position.
The drill features a variable speed control dial, allowing users to adjust the speed. Turning the dial towards "+" increases the speed, while turning it towards "-" decreases it. This feature provides greater control over the drilling process, adapting to different materials and tasks.
The drill and impact mode selector, located on the top of the impact drill, allows users to switch between drilling and impact drilling modes. Pushing the button to the "T" position selects the drill/impact mode, while pushing it to the drill position selects the drill mode.
For proper operation, the drill should be held with the first two fingers on the ON/OFF switch. The auxiliary handle should be used whenever possible to gain extra control and reduce fatigue. When drilling into wood, twist drill bits, spade bits, power auger bits, or hole saws are recommended. For metal, high-speed steel twist drill bits or hole saws should be used. For masonry materials like brick, cinder block, or cement, carbide-tipped drill bits are appropriate. Sufficient pressure should be applied to keep the bit biting without pushing so hard as to stall the motor or damage the bit. Pressure should always be applied in a straight line with the bit, and the drill should be held firmly to control twisting.
If the drill stalls, the trigger must be released immediately, and the drill removed from the work to determine the cause. Repeatedly clicking the switch on and off when stalled can damage the motor. To minimize stalling and breaking through material, pressure on the drill should be reduced as the bit passes through the last part of the hole. Keeping the motor running while pulling the bit out of a drilled hole helps prevent jamming.
Safety precautions are paramount. Always wear ear protection when the machine is in use. The recommended nominal operating time under permanent load is approximately 20 minutes, followed by a rest period of 5-10 minutes.
Regular maintenance is crucial for the longevity and safe operation of the tool. No adjustments should be attempted while the tool is in operation. Accumulated dust should be cleaned out with a brush or dry cloth. It is important to prevent petroleum-based products from coming into contact with plastic parts, as these chemicals can damage, weaken, or destroy the plastic.
Before any adjusting or cleaning work, the plug must be removed from the socket. The mains cable should be protected against damage from oil and acids, and the device should never be carried by the mains cable. The plug should not be removed from the socket by pulling the mains cable. When using a cable drum, the cable should be uncoiled completely, with a wire cross-section of at least 1.5 mm².
The machine should not be overloaded, and all workpieces must be secured sufficiently. Children should not have access to the tool. When using the drill freehand on ladders or scaffolding, a secure stand is essential. A line detector should be used to locate power, water, or gas lines in walls before drilling. Protection goggles and a dust mask are necessary for dust-producing work.
Any repairs must be carried out by a qualified electrician using only original replacement parts to ensure the safety of the power tool. The noise level at the workplace may exceed 85 dB (A), necessitating noise protection measures for the user.
| Chuck capacity/size | 13 mm |
|---|---|
| Drilling capacity in steel | 13 mm |
| Drilling capacity in concrete | 16 mm |
| Voltage | 230 V |
| Frequency | 50 Hz |
| No-load speed | 0-3000 rpm |
| Impact rate | 0-48000 min-1 |
| Chuck type | Keyless |
| Power source | Mains powered |