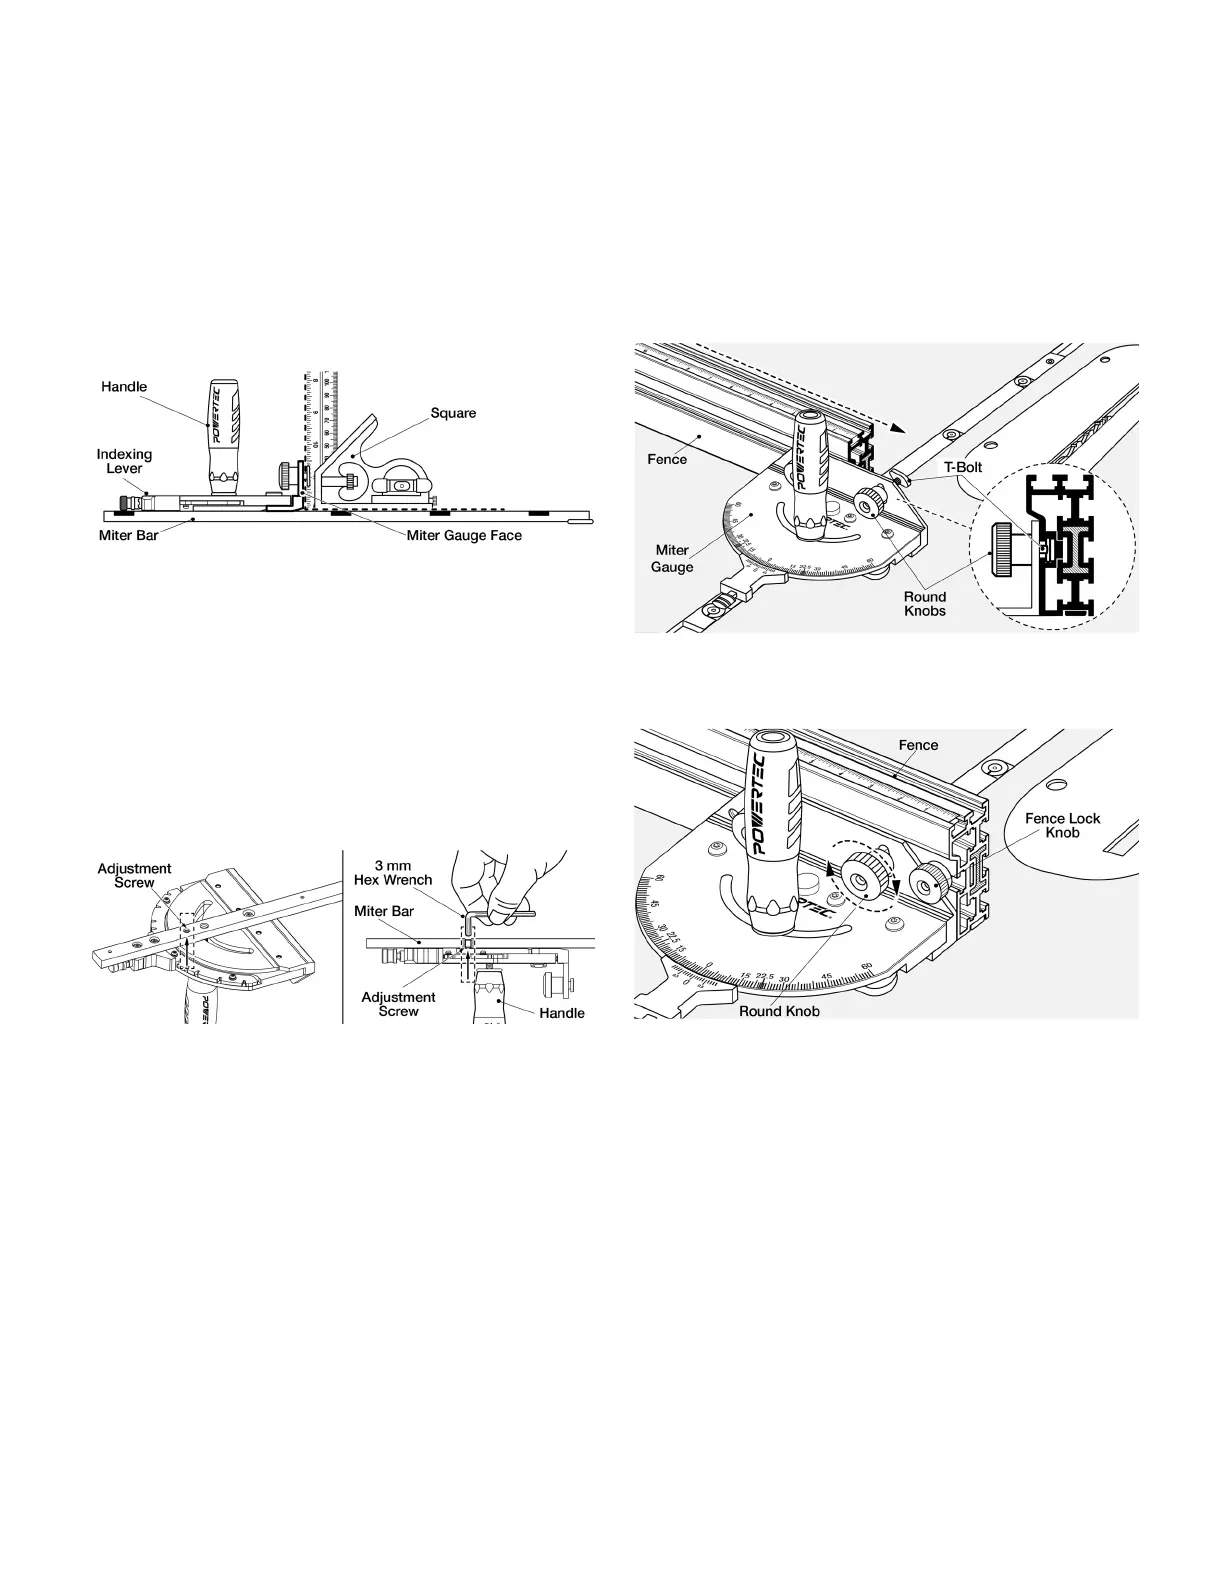
TO SQUARE THE MITER GAUGE FACE
See Figures 6, 7. The miter bar features an adjustment screw that
allows the miter gauge face to be set perpendicular to the table.
To Check:
1. Set the indexing lever to 0° and engage the spring loaded pin.
2. Tighten the handle and place the miter bar into the miter slot.
3. Use a square to check the perpendicularity of the face to the
table. If square, no adjustment is needed.
NOTE: Check can be made with or without a fence installed.
Figure 6 (Shown without Fence)
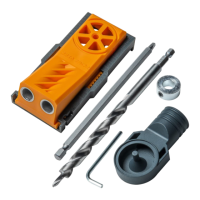
If adjustment is needed: See Figure 7
1. Remove the miter bar from the miter table slot and ip over.
2. Loosen the handle.
3. Locate the adjustment screw on the bottom of the miter bar,
adjust with the 3mm hex wrench (included).
NOTE: If the gap is at the top of the miter gauge face, tighten
the adjustment screw. If the gap is at the bottom of the miter
gauge face, loosen the adjustment screw.
4. Tighten the handle and recheck. Repeat until square.
Figure 7
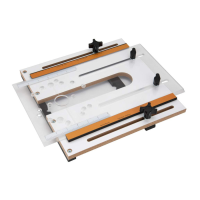
INSTALL ONTO A FENCE (Not included)
This Precision Miter Gauge is designed to work with
POWERTEC and DuBois Fences (not included). It can also be
used as a conventional Miter Gauge on various other fences.
Figures 8-9 Shown using POWERTEC 71768 Fence
(Sold separately)
1. Remove Fence Lock Knob. Loosen the two 5/16" Round
Knobs on the Miter Gauge and slide the T-bolts into the
Fence slot.
Figure 8
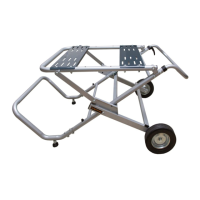
2. Tighten 5/16" Round Knobs on Miter Gauge. Reinsert Fence
Lock Knobs and tighten to secure in position.
Figure 9