GARAGE DOOR OPENERS USER MANUAL
6
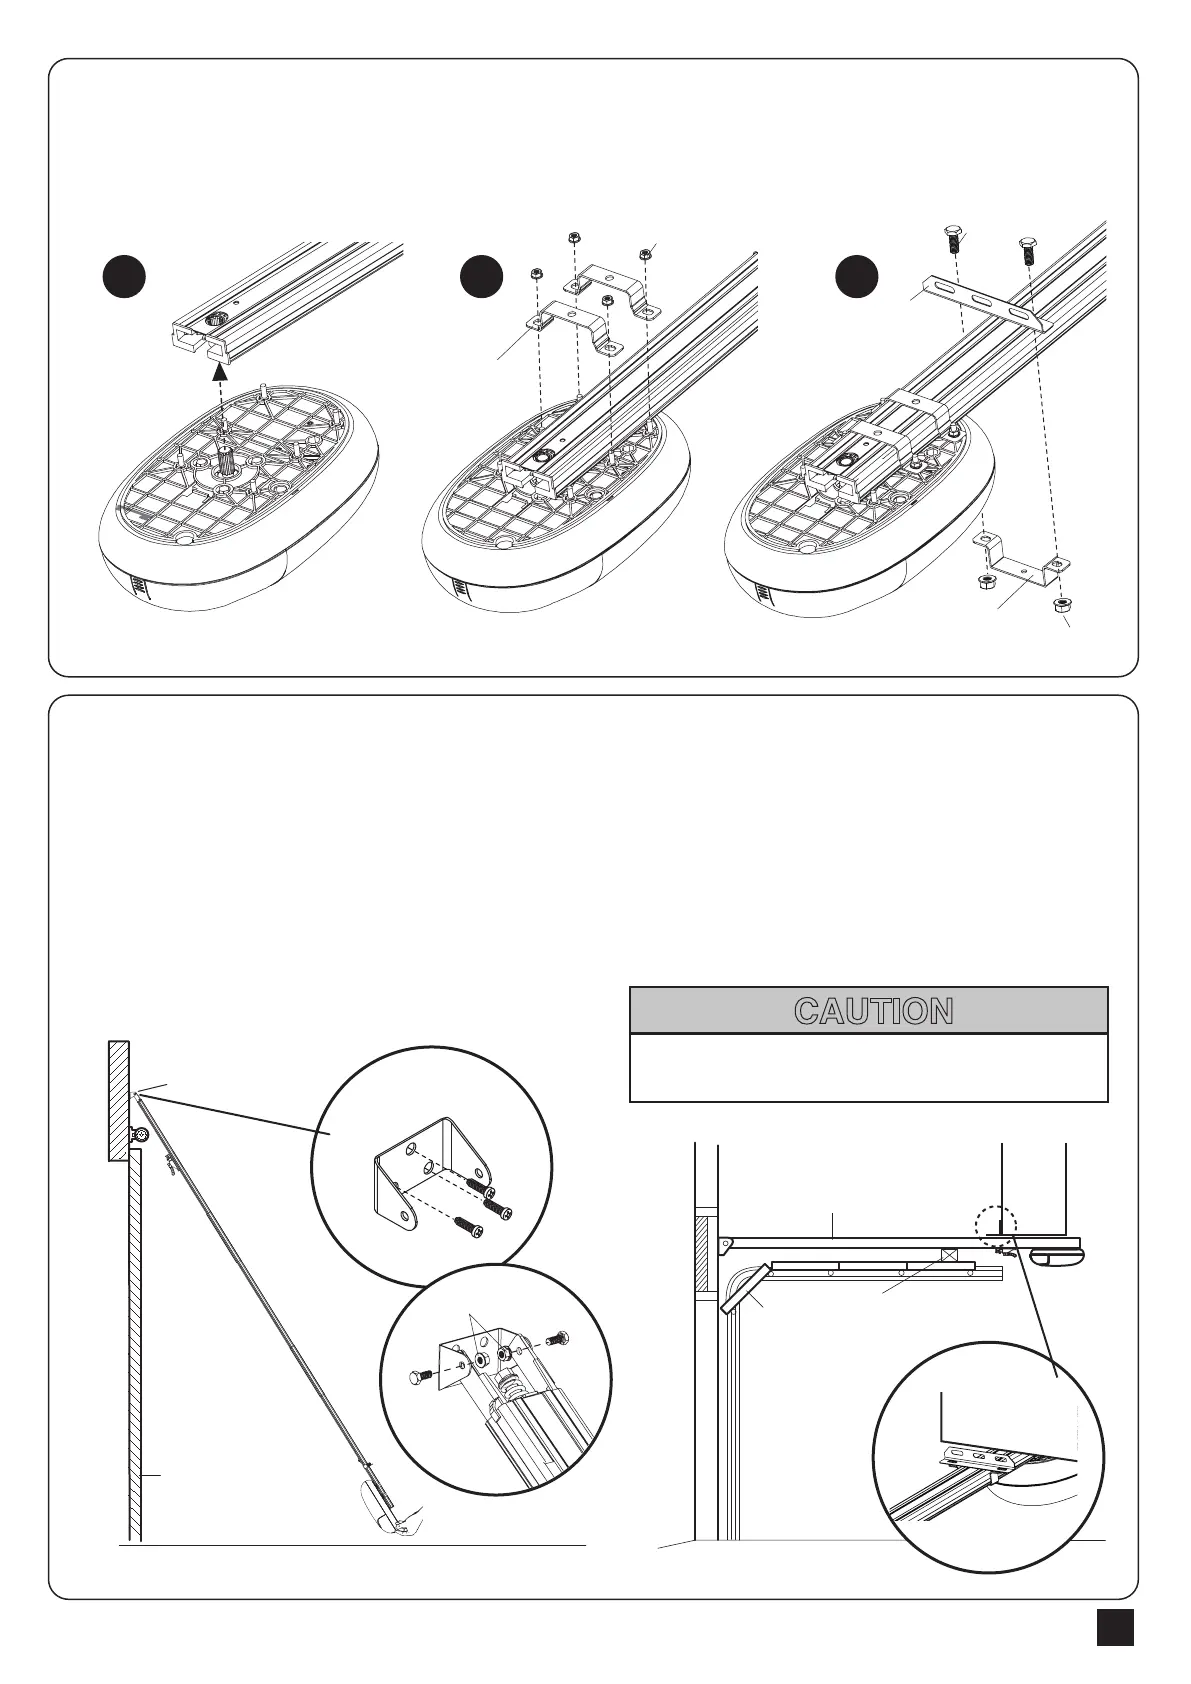
3.3 Attach the rail to the motor
Ceiling
hold bracket
Ceiling
bracket
Garage
Door
11
11
Header Bracket
Header
Bracket
24
20
HEX bolt
24
Nut
Nut
13
10
CAUTION
1. Connect the insertion gap of the (3) Rear pulley bracket to the output shaft of the motor.
2. Fasten the rail on the motor with (9) motor hold bracket and the Hex nuts (24).
3. Fasten the (10) Ceiling hold bracket and (13) Ceiling bracket at the rear side between the motor and the rear blocker
with Hex bolt (20) and Hex nuts (24)
3.4 Attach the rail on the header wall and ceiling
1. Position (11) Header bracket on the header wall.
*It is recommended that positioned at the center of the garage door.
*The installation height of the (11) Header bracket varies from 30-50cm from the top of the garage door.
2. Install the (11) Header bracket with screws.
3. Attach the front rail to header bracket with bolts.
4. Attach the (13) Ceiling bracket on the crossbeam of ceiling with crews.
Attach Rail to the Header Bracket
1 2 3
Motor
hold bracket
9
Nut24
HEX bolt
20
Rail
Door
2x4 is used to determine
the correct mounting height
from ceiling.
To prevent damage, place the garage door on the top section
to create a temporary support.