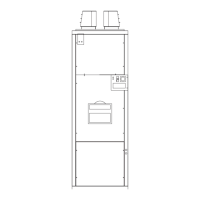
1. The max. air pressure switch must be set after all other
adjustments have been made.
2. Begin with the switch at its highest setting and the burner
working at the correct input for high fire.
3. Slowly adjust the pressure switch dial anti-clockwise, to
decrease the set point, until the burner locks out. Immediately
stop adjustment.
4. Now increase the set point by 0.1mb and restart the burner.
5. If the burner fails to start, or shuts down due to the pressure
surge on ignition, increase the pressure switch setting by a
further 0.1mb and restart the burner.
6. Continue until the burner reliably starts.
5.4.2 Oil Fired Heaters
5.4.2.1 Initial burner startup
1.Check that fuel is present in the tank and at the oil filter fitted
on the front of the heater.
2. Check that fitted fire valves are open.
3. Refer to the burner instruction book and fit a pressure gauge
(and vent valve if the burner is on a single pipe oil feed) to the
oil pump.
4. Set the time clock and thermostat to call for heat or complete
the external control circuit.
5. Turn ON the main electrical supply and check that the burner
fan starts.
6. Note: This step is only for when a vent valve is being used.
Open the vent valve. When air free oil issues from the vent
valve close the valve and the burner will fire when the ignition
spark is present. (Note: This procedure may need to be repeated
several times if the oil line cannot be purged of air within one
ignition cycle. At the end of the unsuccessful ignition cycle the
burner will go to lockout. Wait 2/3 minutes and then depress
the red reset button on the burner control box to restart the
ignition cycle.)
7. After completion of the pre-purge period the ignition spark
will be energised and the burner oil solenoid valve will open
and the burner will light.
Warning: If burner ignition cannot be achieved after 2-3 attempts
do not continue to recycle through the ignition sequence but
ascertain the cause and rectify.
WARNING:
If continued unsuccessful ignition attempts are made it is possible
to accumulate a significant quantity of oil and oil mist in the
combustion chamber which, if the burner then fires, can result
in a dangerous situation. Any such accumulation of oil must be
removed by safe means before any further attempt to light the
burner.
5.4.2.2 Final Adjustment
1.Remove the sample point cover plug from the outlet flue
length and insert a CO
2
measuring instrument.
2. Relight the burner. Check that the pump pressure is as specified
on heater data plate. If adjustment of the pump pressure is
necessary refer to the burner instructions and complete.
3. Measure the CO
2
content of the flue gases. If necessary adjust
the combustion air damper of the burner (Refer to the Burner
Instructions) to obtain a reading of 11.5 - 13.0%.
8. Turn OFF the burner. Remove pressure gauge and refit sealing
plug, refit flue sample point cover plug.
5.4.2.3 Final Checks
1. After making final adjustments check that there are no leaks
on the oil pipework.
5.5 Handing over the Air Heater
Hand these instructions to the user or purchaser for retention
and instruct the User in the efficient and safe operation of the
air heater.
In the event that the premises are not yet occupied turn off the
gas and electricity supplies and leave instructional literature
with the heater.
14

 Loading...