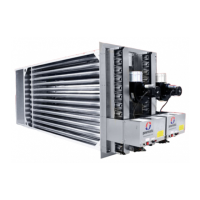
2.7.6.5. Exhaust Fan
1. Remove the four screws securing the ue outlet socket.
2. Disconnect the fan electrical connections from the main
terminal strip
3. Remove the screws securing the fan mounting box to
the exhaust header plate.
4. Remove fan assembly.
5. If needed, transfer the fan mounting box to the
replacement fan.
6. Fit replacement exhaust fan, using new gaskets and
silicon sealant as necessary, and reassemble in reverse
order.
2.7.6.6. Air Pressure Switch
1. Remove the two screws securing the cover and remove
cover.
2. Disconnect electrical connections.
3. Pull o the sensing tube from the air pressure switch.
4. Note the setting of the old pressure switch.
5. Remove the screws xing the air pressure switch and
remove switch.
6. Fit replacement in reverse order retting the sensing
tube to the negative (- or L) tapping on the pressure switch.
Adjust setting to that of the old pressure switch.
2.7.6.7. Control Box
1. Unplug all the electrical connections.
2. Remove the two screws that secure the control box in
place.
3. Fit replacement in reverse order.
Fault Cause Action
Exhaust fan does not run Electrical 1. Check that there is a main electrical supply present.
2. Check that all external control circuits are completed.
3. Check that high limit thermostat has not tripped - reset.
4. Check that mains voltage is present at fan motor - change fan if faulty.
No spark ignition Electrical 1. Check full sequence is not at lockout - reset.
2. Check full sequence controls for mains supply - change if necessary.
3. Check that exhaust fan and burner air pressure switches are activated.
4. Check spark electrode and spark gap.
Burner will not light Electrical 1. Check rectication electrode/lead/signal.
2. Check gas supply is ON.
Exhaust fan runs continuously Electrical 1. Check overrun thermostat.
3.1 Fault Finding

 Loading...