20 www.PrecisionAerobatics.com
6 Copyrights ©2007 Precision Aerobatics. All rights reserved
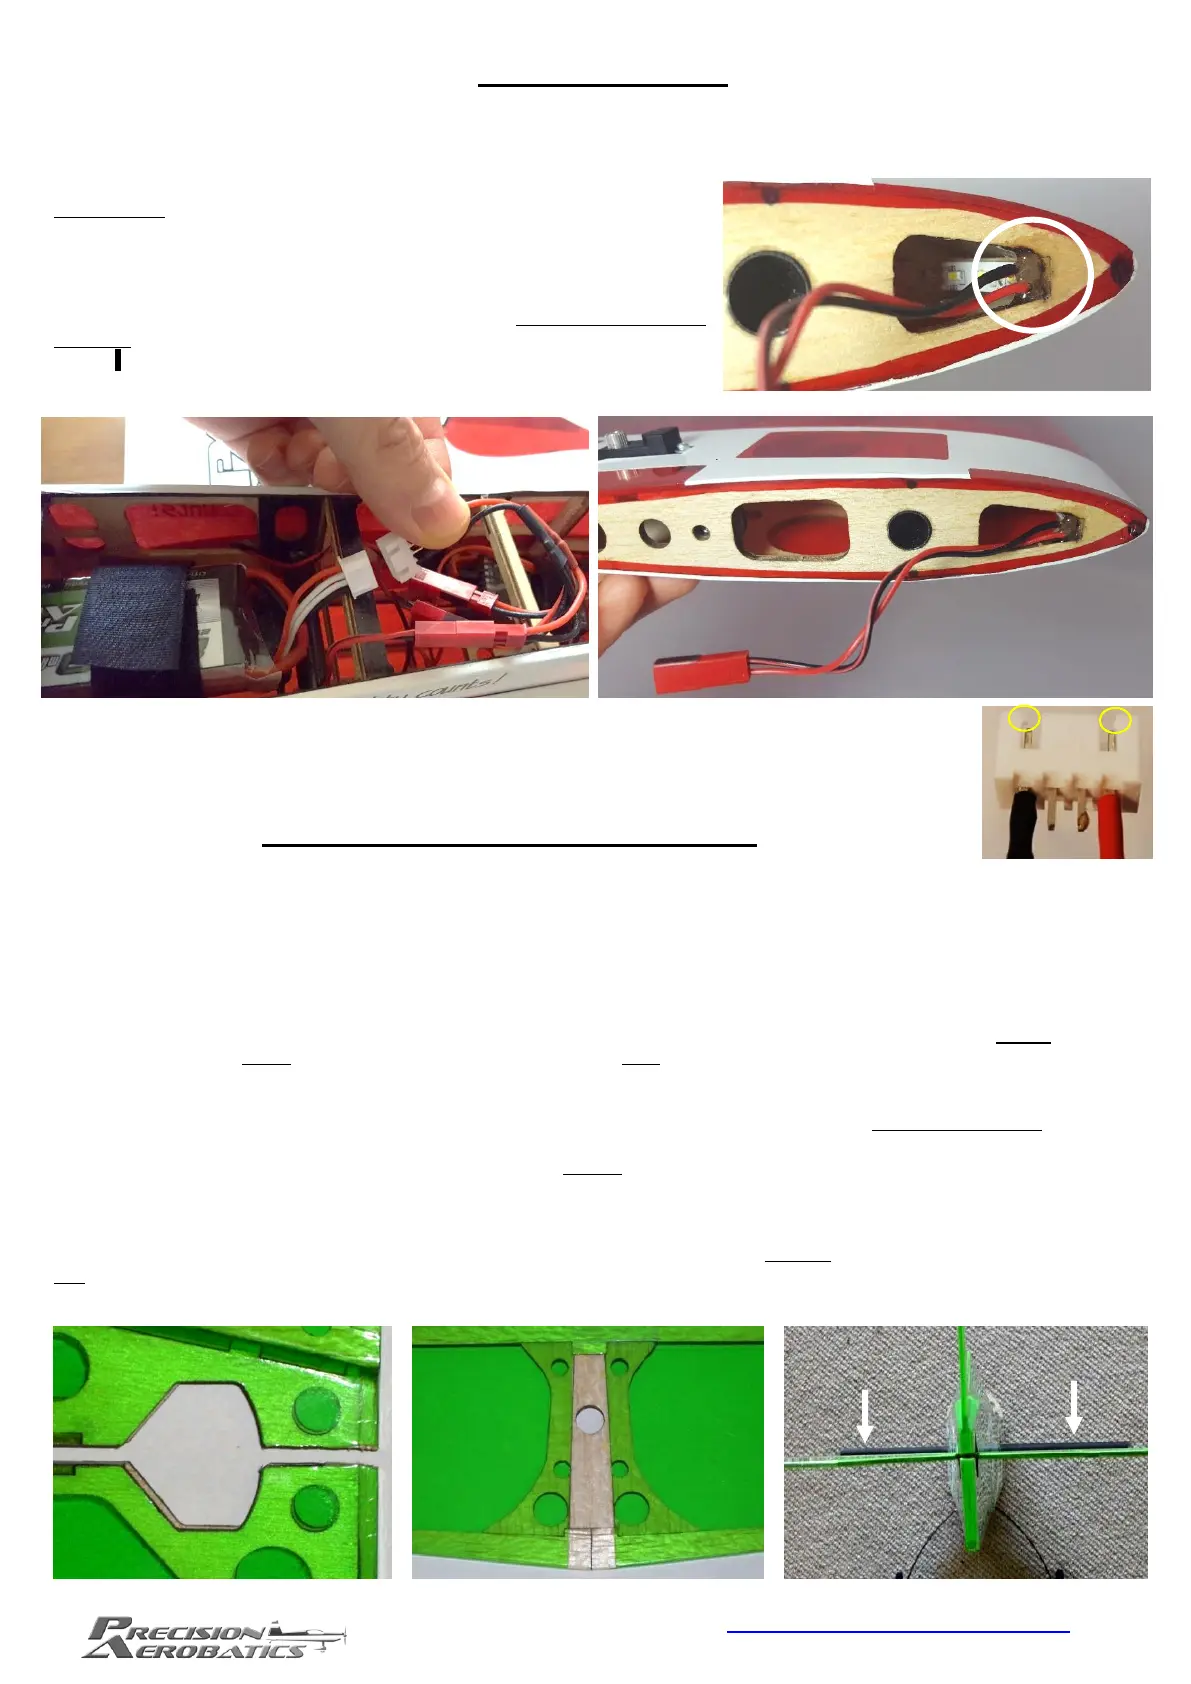
LED night flying
Illuminating your Addiction V2 for night flying is done via main flight battery, therefore, additional battery is not required.
Use the PA light harness to switch on the lights. Plug it into the battery balancer plug before takeoff (leave the three LED
strip plugs permanently plugged in).
WARNING: The installed LED lights should be powered with 3s (11.1V)
pack. Higher voltage will burn the LEDs.
The soldering joints of the LED cables are delicate and can break loose
over time or during transportation. Apply a dab of epoxy over these
joints as precaution to secure them firmly onto the PCB board and to the
airframe. You can do that during one of the manual steps which requires
epoxy. Use a long rod to apply the epoxy on the fuselage LEDs either
through the top of the fuselage or the lower front bulkhead opening.
NOTE: If the balancer plug fits too tight, you can use a fine file to slightly trim the plastic lugs of
the harness plug to allow an easier fit.
Elevator & Horizontal Stabilizer
The stabilizer and elevator come pre-hinged with the hinge gap sealed; all that is required is to glue the stabilizer into the
fuselage slot. The stabilizer inserts into the fuselage slot from the rear which requires the removal of the balsa at the rear
of the slot. This is best done with a sharp hobby knife. Place the fuselage flat on its side on a hard surface and with a
sharp blade, carefully cut the balsa out.
Lightly iron down the center portion of the horizontal stabilizer (both sides) to prevent the covering from peeling off when
you slide it into the fuselage after cutting. Use a sharp blade to carefully cut the covering from the top and bottom center
of the stabilizer along the laser marked lines (lines are visible from one side of the stabilizer only). Note: Apply just
enough pressure to ONLY cut through the covering film and NOT the wood beneath as this can cause a failure of the
stabilizer in flight.
Tape the elevator in neutral position and slide the stabilizer all the way into its slot, until it reaches the stop at the front
end of the stabilizer slot in the fuselage.
If the fit is tight do not use force. Merely widen the slot evenly using a file until the stabilizer slides through.
Next, temporarily insert the wing tube to the fuselage. Looking from the rear check that the stabilizer is parallel to the
wing tube and 90° to the fin. If the stabilizer is not parallel to the wing tube, remove the stabilizer and lightly file the
fuselage slot to achieve perfect alignment. The stabilizer, after filing, must sit parallel to the wing tube.
Tip: If you have difficulty to visually check the stabilizer alignment with the wing tube, temporarily install the wings (with
the ailerons taped in the neutral position) to make the visual reference.

 Loading...