20 www.PrecisionAerobatics.com
7 Copyrights ©2007 Precision Aerobatics. All rights reserved
Check from above that the stabilizer is perfectly aligned in the fuselage slot. Use the laser-cut holes in the stabilizer as a
reference (distance from both sides of fuselage should be equal). The stabilizer can be temporarily pinned to help during
alignment.
Make a final check from all angles that the stabilizer is perfectly aligned then lift the fuselage tail up and apply a few drops
of thin CA in the center of the stabilizer (top and bottom). Holding the fuselage in an angle will allow the thin CA to run
along the seam.
Note: Take care using CA glue as it causes discoloration of the covering film, do not use excessive amount of glue.
Note: While gluing the horizontal stab, it is extremely important not to place any pressure on the fuselage. Doing so can
result in the fuselage being glued with a permanent twist impairing the flight performance.
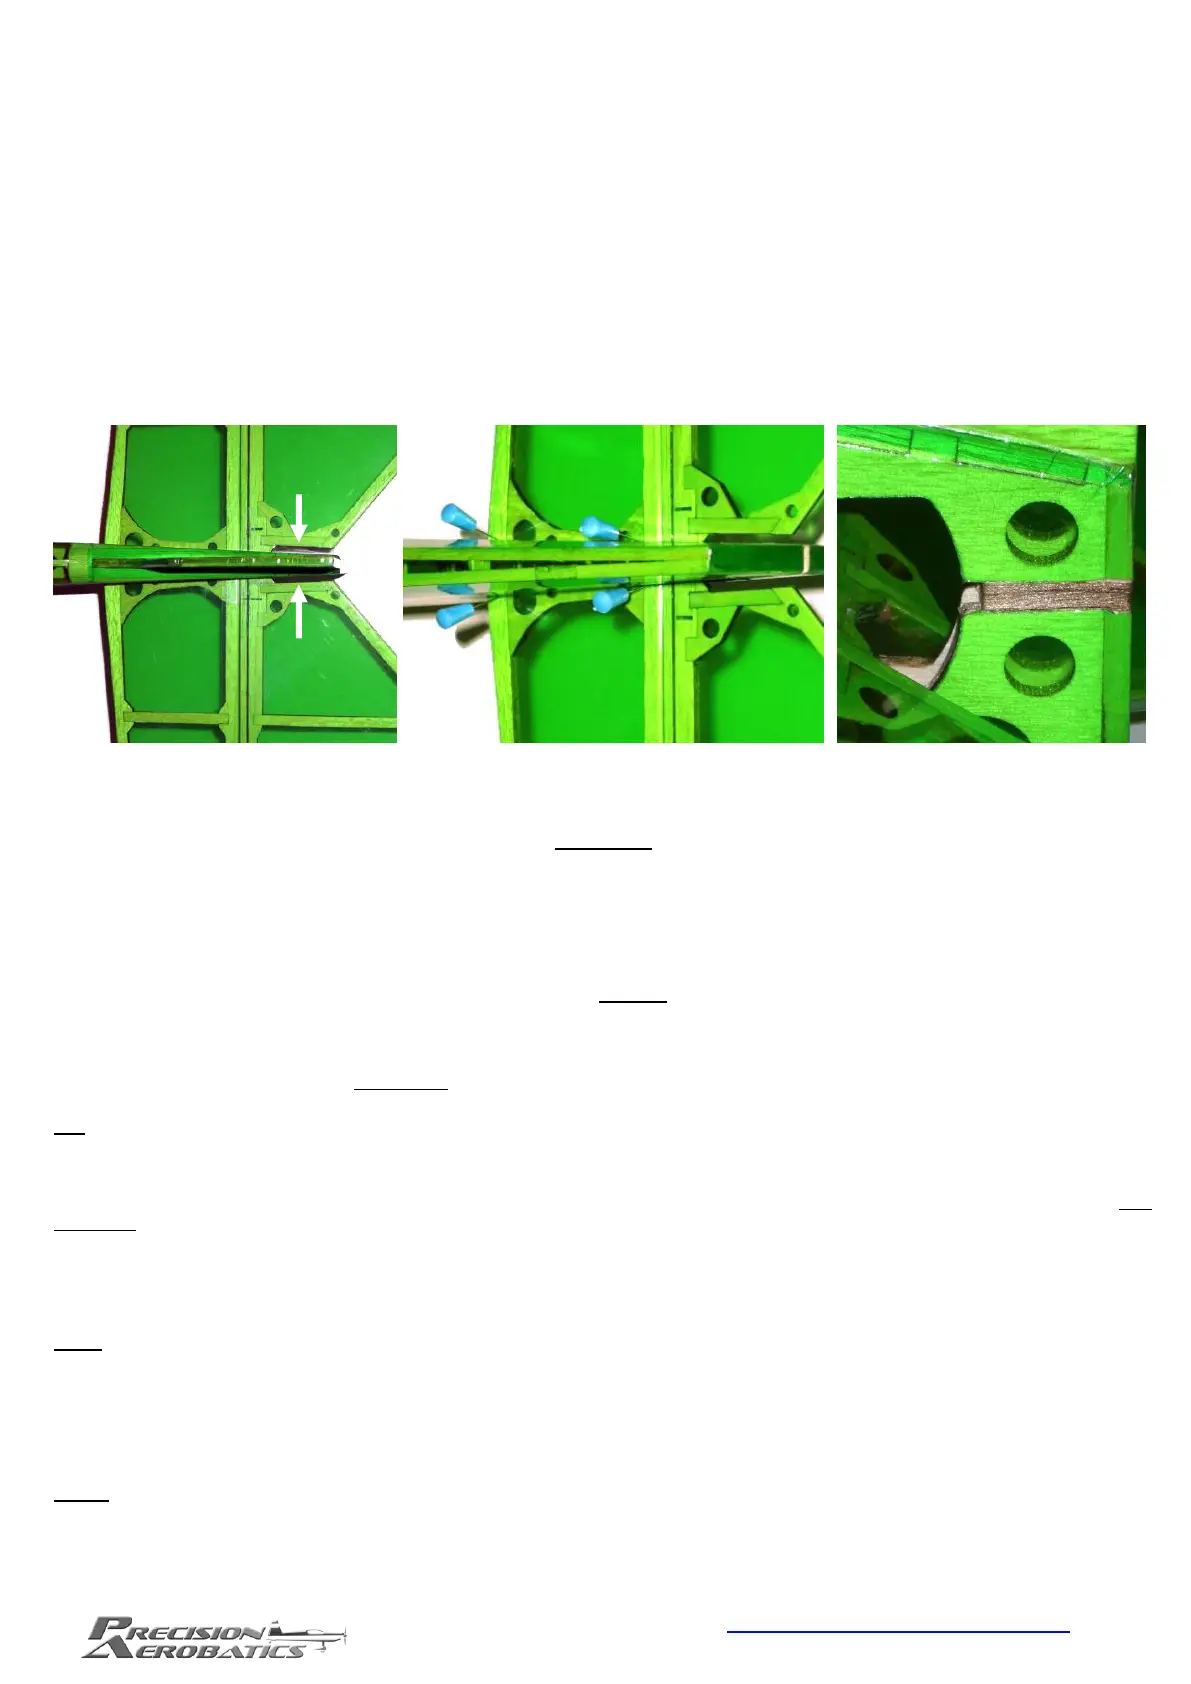
slide the supplied balsa wedge into the gap you previously cut at the rear of the fuselage. Being oversize, you need to
lightly sand the balsa wedge (all around) until it fits flush with the fuselage. Do not attempt to force the wedge in as this
could risk inducing a permanent twist in the fuselage (as with the stabilizer). Once satisfied, glue the wedge in with CA.
You may use scraps of covering material previously cut to cover the balsa wedge.
Rudder
The fuselage/fin and rudder come with the hinge slots pre-cut at the factory. Fit the two hinges into the rudder first
(hinges fitted half way in). If they don’t fit in easily or slightly off centered, use a sharp modeling knife to carefully re-cut
the hinge slots to correct as it will affect the flight performance. Avoid widening them as that can cause them to detach
in flight if thin CA is used to glue them.
Apply a drop of thin CA over each hinge to glue them to the rudder and let it cure. Fit the rudder into the fuselage all the
way in leaving no hinge gap. Align the rudder counter balance with the fin leaving a small gap that allows the rudder to
deflect freely, then place the fuselage on its side and fully deflect the rudder until it hits the elevator (elevator must be in
neutral position. If needed use sticky tape to hold it in neutral).
Apply a few drops of thin CA to both sides of the hinges (while deflected) and repeatedly deflect the rudder in a quick
pace until the CA sets. Try to pull the elevator off the stabilizer to verify the integrity of the hinges gluing.
Tip: It’s recommended to apply thin CA to the hinges with a pipette tip applicator supplied with your CA bottle to avoid
“fogging” the covering. If fogging occurs, it can be easily removed by wiping off with a paper towel dipped in with acetone
or nail polish remover.
Next, seal the hinge gap with the supplied covering strip to match the color scheme. The strip should be applied from one
side only, to your preference, and trimmed to match the color scheme (clear tape can be used over the white flames).
Align the strip along the hinge line and starting at one end, iron it down along the length of the rudder (do not iron to the
fin at this stage). Deflect the control surface to maximum and iron the film into the hinge gap using the point of the iron.
Now iron the strip along the fin/fuselage while fully deflected to maximum. This method ensures the gap is completely
sealed while still allowing full deflection of the control surface.
Note: Peel off the translucent protection backing of the strip before using it, otherwise, it will not stick to the surface. If
you are unable to, it could well be that it was already removed in the factory.
Sealing the elevator hinge gap is an extremely important step and an integral part of the Addiction design. Skipping this
step will have a detrimental effect on the flight characteristics!
Once the rudder is installed, it must be checked for warp (rear pilot view).
Note: although we fix warps on all parts after the covering process, due to the lightweight construction of the rudder it
is normal for it to have some small amount of warp that occurred during the long journey in the container and to your
doorstep. There is no need for concern as this can be easily removed.
Note that to guarantee a warp-free rudder would have meant deliberately beefing up the internal structure of the rudder
which would then result in an unacceptable control surface weight penalty.

 Loading...