EasyManua.ls Logo

Precision Aerobatics ADDICTION - User Manual

Precision Aerobatics ADDICTION
20 pages
Print Icon
To Next Page IconTo Next Page
Loading...
20 www.PrecisionAerobatics.com
1 Copyrights ©2007 Precision Aerobatics. All rights reserved
Congratulations on your purchase of Precision Aerobatics Addiction
Warning This is not a toy!
Be sure you have read and understood this entire manual before you assemble this model
Do not overlook the warnings and instructions enclosed herewith or those provided by other manufacturers, and the official
AMA (Academy of Model Aeronautics) Safety Code (see at the end of this manual). They were designed to assist you in
preventing damage or injury.
The instructions below are our suggestions only on how to assemble this model. There are other ways and methods to do
so.
Precision Aerobatics has no control over the final assembly, the materials and accessories you use when assembling this kit
or the manner in which the assembled model and the installed radio system and electronic parts, are used and maintained.
Thus, no liability is assumed or accepted for any damage resulting from the use of the assembled model aircraft or from this
instruction manual including but not limited to direct, indirect, incidental, special, and consequential damages. In no event
shall Precision Aerobatics’ liability exceed the original purchase price of this kit.
BY THE ACT OF ASSEMBLING AND OPERATING THE ASSEMBLED MODEL YOU ASSUME
AND ACCEPT FULL LIABILITY FOR YOUR ACTIONS.
Radio controlled model aircraft that are not properly assembled, operated and maintained can cause serious damage to body
and property. If you are not an experienced pilot and airplane modeller you must use the help of an experienced pilot or
preferably an authorized flight instructor who will assist you with the assembly and flying of this model.
SAFETY NOTES:
1. Before assembling and flying this model read carefully any instructions and warnings of other manufacturers
for all the products you installed or used on your model (especially radio equipment and power source).
2. Check thoroughly before every flight that the airplanes components are in good shape and function correctly.
If you find a fault do not fly the model until you have corrected it.
3. Radio interference caused by unknown sources can occur at any time without notice. In such a case, your
model will be uncontrollable and completely unpredictable. Make sure to perform a range check before every
flight. lf you detect a control problem or interference during a flight, immediately land the model to prevent
a potential accident
4. Youngsters should only be allowed to assemble and fly these models under the instruction and supervision
of an experienced adult.
5. Do not operate this model in a confined area.
6. Do not stand in line with, or in front of a spinning propeller and never touch it with any object.
Precision Aerobatics quality control team checks each plane before it leaves the factory to ensure that each kit is in fine
condition. We have no bearing on the condition of any component parts damaged by use, modification or assembly of this
model. Inspect the components of this kit upon receipt. If you find any parts damaged or missing, contact the hobby shop
who supplied this kit immediately. All warranty claims to be submitted within 30 days of purchase and include the original
dated receipt. This warranty is extended to the original purchaser only. We do not accept the return or replacement of parts
on which assembly work has already begun. Precision Aerobatics reserves the right to change this warranty at anytime
without notice.
Precision Aerobatics Team
Question and Answer IconNeed help?

Do you have a question about the Precision Aerobatics ADDICTION and is the answer not in the manual?

Summary

Safety and Liability

General Warnings and Liability

Includes "This is not a toy!" warning and the operator's assumption of liability.

Safety Notes

Key safety guidelines for assembly, operation, and handling of the model aircraft.

Equipment Selection

Recommended Drive System Components

Details on the motor, ESC, propeller adapter, battery, and connectors for optimal performance.

Pre-Assembly and Warp Correction

Aileron Servo Installation

Servo Mounting and Hard Mounting

Installing servos, drilling mounting holes, and using hard mounting techniques.

Aileron Linkage Assembly

Installing Pushrods and Z-Bends

Connecting pushrods to servo arms and control horns using heat shrink.

Elevator and Horizontal Stabilizer Installation

Stabilizer and Rudder Installation

Installing and Sealing the Rudder

Attaching, aligning, and sealing the rudder hinge gap.

Tail Landing Gear Installation

Tail Servo and Linkage Installation

Landing Gear and Wheel Pants Installation

Motor Box Installation

Preparing and Inspecting the Motor Box

Pre-assembly checks, inspecting glue joints, and applying epoxy.

Motor Box Installation (Continued)

Motor and ESC Installation

Mounting the Motor

Installing the motor to the motor box firewall with bolts and washers.

Motor and ESC Installation (Continued)

Cowling Attachment

Fitting and Securing the Cowling

Attaching the fiberglass cowl to the fuselage using self-tapping screws.

Propeller and Spinner Installation

Receiver and Battery Placement

Wing Attachment

Preparing and Installing Wings

Preparing wing bolts, fitting wings to the tube, and routing servo leads.

Center of Gravity (CG) Setup

Determining and Adjusting CG

Importance of CG and adjusting battery position for optimal flight performance.

Transmitter and Control Setup

Initial Transmitter Setup

Precautions, servo centering, directional checks, and sub-trim adjustments.

Overview

This document is a user manual for the Precision Aerobatics Addiction V2, a radio-controlled (RC) model aircraft designed for extreme aerobatics and 3D maneuvers. The manual provides detailed instructions for assembly, equipment selection, and setup, emphasizing safety and optimal flight performance.

Function Description:

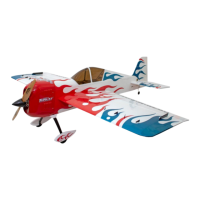
The Precision Aerobatics Addiction V2 is a high-performance RC model aircraft designed for advanced aerobatic and 3D flying. It is characterized by its lightweight construction, strong airframe, and advanced aerodynamic design, including extensive use of carbon fiber. The model is intended for experienced pilots and modelers, with a strong emphasis on precise control and maneuverability. It supports various optional features like LED lights for night flying and Carbon Fiber Vortex Generators (VGs) to enhance slow, high-angle-of-attack (AOA) flight and knife-edge tracking. The aircraft is part of Precision Aerobatics' Integrated Performance Airframe-Drive Systems® (iPAs®), which recommends specific equipment for optimal performance.

Important Technical Specifications:

The Addiction V2 is designed to operate with a specific set of components to achieve its advertised performance.

  • Motor: PA Thrust 25 outrunner motor with Rotorkool® technology (PA Item #AC-1889), weighing 95gr. Using a larger or more powerful motor than specified can damage the motor box or airframe.
  • ESC: PA Quantum 30 Pro HV ESC (PA Item # AC-2188HV) with a built-in user-selectable Switching BEC (6V/7.4V/8V). It is crucial to verify the BEC voltage output matches the servo brand and specifications (e.g., 7.4V for NXT70-HV servos).
  • Prop Adapter: CNC machined precision prop adapter for the Thrust 25 (PA Item # AC-2123). A good quality prop adapter is essential to prevent thrust and efficiency loss and vibrations.
  • Battery: PA 2200mAh V4 25-50c 3S (11.1V) Lithium Polymer (Item #AC-1992 or AC-2146 for 2pak special). Different batteries may vary motor output and amp draw; a watt meter is recommended for non-PA packs to verify performance within Thrust 25 range.
  • Connectors: Original Ultra Deans plugs are recommended to avoid conductivity problems and power loss.
  • Servos: 4x NXT-70HV digital High Voltage servos (PA item # AC-2333) or similar quality digital micro servos are recommended.
  • Extension Lead: German-made, thin gauge flexible extension lead for EP models 2M/ 6.5ft (PA item # AC-1713) for tail servos.
  • Micro Receiver: Four or more channels full 2.4Ghz (e.g., Spektrum AR6210 /610/620 receiver).
  • Propeller: VOX 12x5 wood prop, provided in the iPAs Pro package, is recommended for fast aerobatics and 3D, offering good flight speed, roll rate, tumbles, and waterfalls.
  • Center of Gravity (CG): The "sweet spot" CG is 112mm measured aft from the leading edge at the wing root. Adjustments are made by sliding the battery.
  • Control Surface Deflection (Approximate):
    • Ailerons: High rates: Approx 45° Up and Down, Expo: 60%. Low rates: 15° Up and Down, Expo: 30%.
    • Rudder: High rates: Left and Right (maximum), Expo: 60%. Low rates: 25° Left and Right, Expo: 35%.
    • Elevator: High rates: 50°-55° Up and Down, Expo: 60%. Low rates: 15° Up and Down, Expo: 35%.
  • LED Lights (Optional): Powered by the main 3S (11.1V) flight battery. Higher voltage will burn the LEDs.

Usage Features:

  • Assembly: The manual provides step-by-step instructions for pre-assembly checks (warp inspection, film sealing), making openings for servos and slots, aileron servo installation, LED night flying light installation, elevator and horizontal stabilizer installation, rudder installation, tail landing gear installation, main landing gear struts and wheel pants installation, motor box assembly and installation, motor and ESC installation, cowling attachment, propeller and spinner installation, receiver and battery placement, wing attachment, and optional Carbon Fiber Vortex Generators installation.
  • Control Linkage: Carbon pushrods with pre-glued Z-bends are used. Proper Z-bend orientation and secure gluing are emphasized to prevent play and ensure reliability under flight loads.
  • CG Adjustment: Critical for flight performance. The manual recommends using a CG machine for accuracy and provides guidance on adjusting battery position to achieve the ideal 112mm CG.
  • Transmitter Setup: Instructions include removing servo arms and propeller before initial power-up, resetting servos to neutral, verifying control surface directions, adjusting sub-trims, and setting servo travel to avoid binding.
  • Control Setup: Recommended deflection angles and expo settings for ailerons, rudder, and elevator are provided as starting points.
  • Optional Features:
    • Spoilerons: 10°-12° UP and Down aileron deflection on a 3-position switch for faster descending "Elevators," spins, and slower high AOA harriers.
    • Ailerons/Elevator Mix: TX mix for both ailerons and elevator to deflect fully in the same direction, useful for tight waterfalls, super tight loops, and fast KE spins.
    • LED Night Flying: Integrated LED lights for night flying, powered by the main flight battery.
    • Carbon Fiber Vortex Generators (VGs): Enhance slow high AOA flight, 3D, and knife-edge tracking.
  • Safety: Emphasizes reading the entire manual, checking components before every flight, performing range checks, avoiding confined areas, keeping clear of spinning propellers, and adult supervision for youngsters. Warns against using excessive force during assembly, improper motor/propeller combinations, and manual operation of servos.

Maintenance Features:

  • Warp/Wrinkle Removal: Instructions for removing warps and wrinkles from covering film using a hobby iron, emphasizing caution to avoid damage.
  • Covering Film Sealing: Ironing down edges of openings and covering trims to prevent peeling.
  • Hinge Gap Sealing: Applying supplied covering strips to seal elevator hinge gaps, crucial for flight characteristics.
  • Epoxy Application: Detailed steps for applying epoxy to control horns, motor box joints, and VG tabs to ensure strong bonds and prevent failure.
  • Z-bend Integrity: Verification of Z-bend gluing integrity by attempting to rotate and pull them out.
  • Motor Box Inspection: After a crash, propeller ground strike, or hard landing, inspect all joints for cracks and repair with epoxy. Do not repair a broken motor box; replace it.
  • Propeller Balance: Emphasizes accurately balancing the propeller to prevent vibrations that can damage the model and motor.
  • Battery Security: Using Velcro strap, foamed double-sided sticky tape, and rubber foam to prevent battery sliding.
  • Decal Application: Guide for decorating the model with supplied PA decals.
  • Covering Trim Security: Suggests applying small pieces of clear tape over sharp edges of covering trim to prevent peeling.
  • Replacement Parts: A comprehensive list of replacement parts is provided, including motor cage, control horns, wheel pants, fuselage, tail set, wings, landing gear, servo arms, and air scoops, to facilitate repairs.
  • Warranty: All warranty claims must be submitted within 30 days of purchase with the original dated receipt. Warranty is extended to the original purchaser only. Precision Aerobatics reserves the right to change the warranty without notice.
  • Motor/ESC Warranty: 2 years warranty for all Thrust motors and Quantum ESCs.

Precision Aerobatics ADDICTION Specifications

General IconGeneral
BrandPrecision Aerobatics
ModelADDICTION
CategoryToy
LanguageEnglish

Related product manuals