6 Specific characteristics of the 3D version
D 159195 © Precitec GmbH & Co. KG • EN 09/2019
6-61
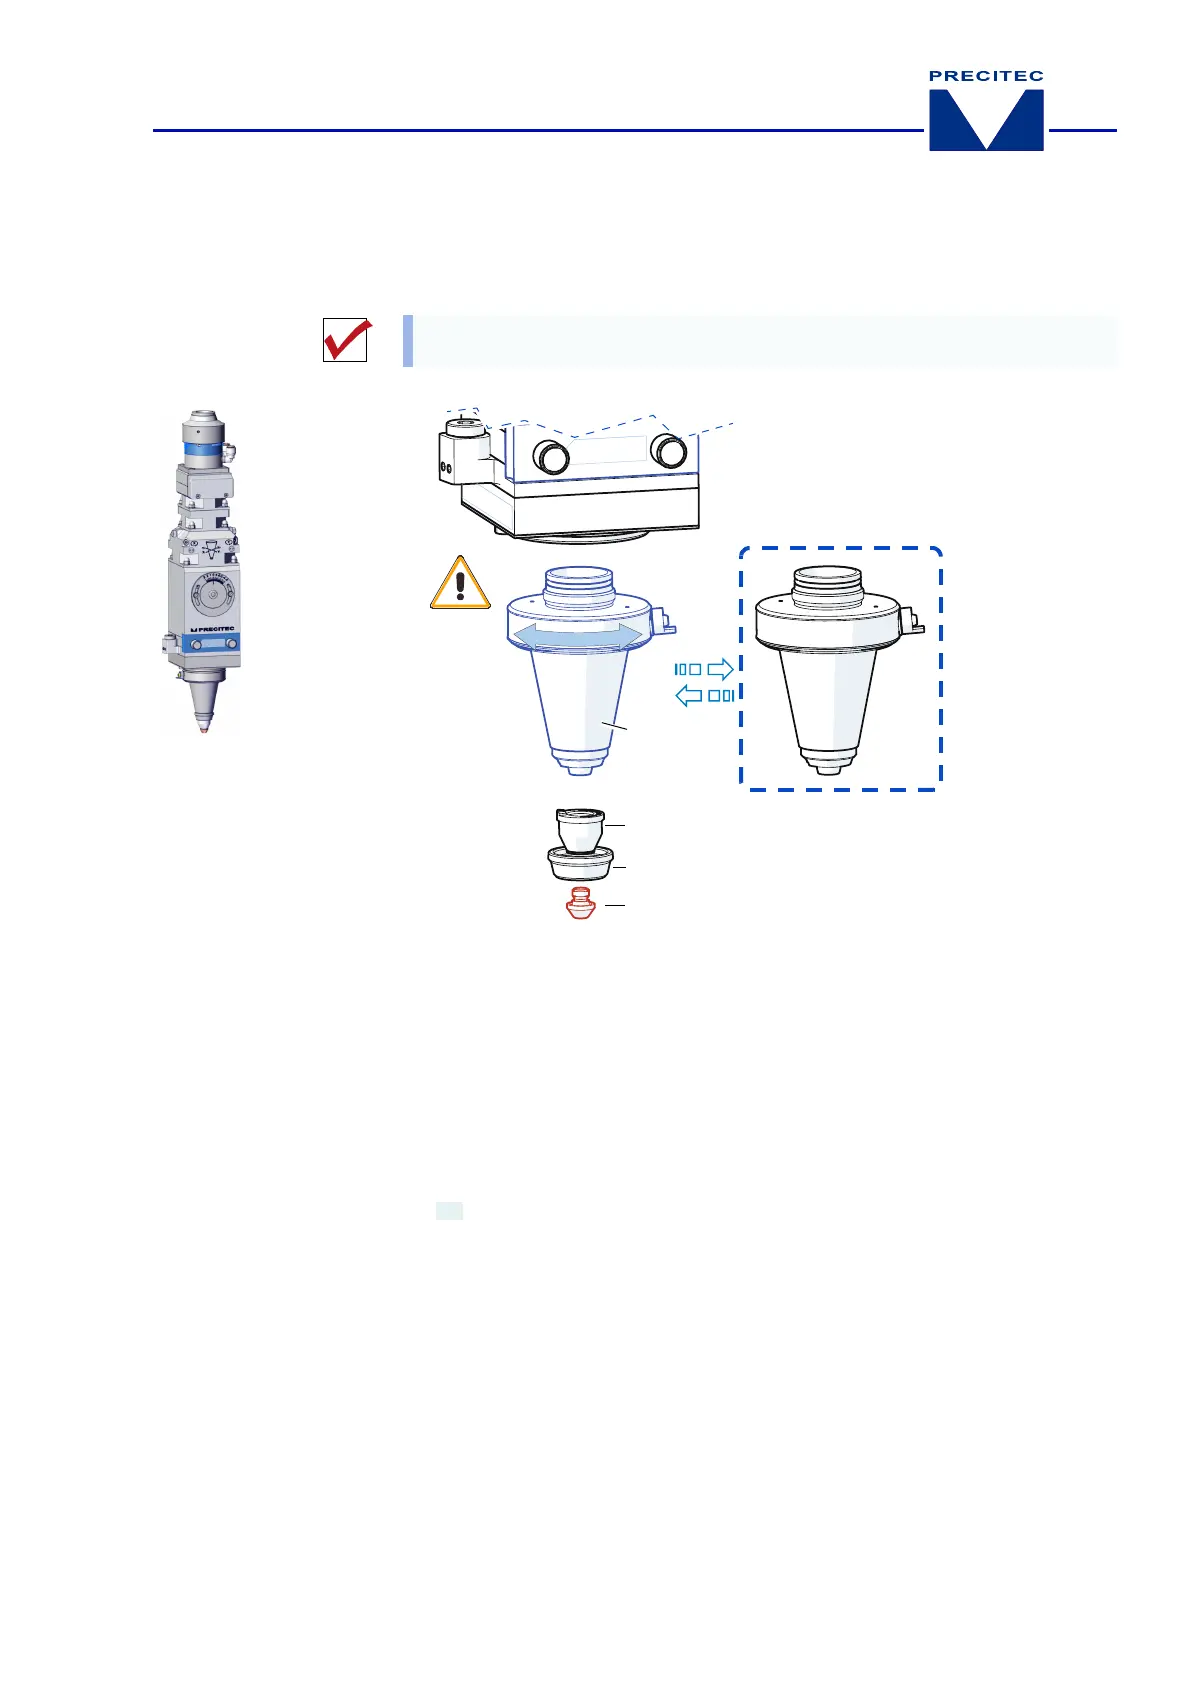
6.3.2 Maintaining and replacing the sensor insert (SE)
Replacing the sensor insert
Fig. 6-11 Maintenance: Sensor insert
(replacement,
3D version
)
Removing and installing the sensor insert
You
must
have a replacement sensor insert
(SE)
ready at hand before you start
removing the old one.
1
Nozzle
DE KN
3
Nut
MU
2
Ceramic part
KT KN
4
Sensor insert
SE
Unscrew the nozzle, undo the nut and remove the ceramic part.
Unscrew the sensor insert and screw in the spare sensor insert.
Tip:
If the HF connection
(sensor system)
position on the machine is not suitable, the
sensor insert can be aligned 4 x 90° using the connecting holes on the laser head
(bottom)
(see
Fig. 6-8, page 6-59
).
 Loading...