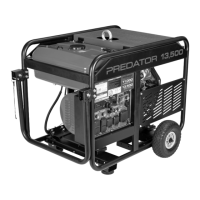
Page 23For technical questions, please call 1-888-866-5797.ITEM 63078
SAFETYOPERATIONMAINTENANCE SETUP
Engine Oil Change
CAUTION! Oil is very hot during operation and can
cause burns. Wait for engine to cool before changing oil.
1. Make sure the engine is stopped and is level.
2. Close the Fuel Valve.
3. Place a drain pan (not included) underneath
the crankcase’s Oil Drain Plug.
4. Remove the Drain Plug and allow the
oil to drain out. Recycle used oil.
5. Replace the Drain Plug and tighten it.
6. Move the drain pan underneath the Oil Filter.
7. Unthread and remove the Oil Filter. Allow the oil to
drain out of the filter completely before disposal.
8. Install a new oil filter of the same size and
type, either STP S4967 or Fram PH4967.
Dipstick
Oil Fill Plug
Oil Drain Plug
Oil Filter
Figure W: Oil Drain and Oil Filter Location
9. On the back of the Generator, pull the Dipstick out,
and wipe its end off with a clean, lint free rag.
Oil Fill Plug
(yellow)
Dipstick
Figure X: Oil Fill Plug and Dipstick
(on back of Generator)
10. Clean the top of the yellow Oil Fill Plug
and the area around it. Remove the Oil Fill
Plug by turning it counterclockwise.
11. Add the appropriate type of oil until the oil level is at
the proper level. SAE 10W-30 oil is recommended
for general use. The SAE Viscosity Grade chart
shows other viscosities to use in different average
temperatures. Replace the Oil Fill Plug.
10W-30
30
5W-30
-20 0 20 40 60 80 100°F
Average outdoor temperature
Table A: SAE Viscosity Grades
12. Reinsert the Dipstick fully and remove it to
check the oil level. The oil level should be
up to the full level as shown in Figure Y.
Dipstick
Engine
Crankcase
Full Level
Figure Y: Oil Fill Level
NOTICE: Do not run the engine with too little oil.
Engine will not start with low or no engine oil.