iRIDE 31
VI. DISASSEMBLY AND ASSEMBLY
DISASSEMBLY
For your convenience, the iRIDE can be dissassembled for storage and transport.
WARNING! Do not lift weight beyond your physical capability. Ask for assistance when needed
while disassembling or assembling your scooter.
SEAT REPLACEMENT
1. While holding the seat, align the adjustment holes on the seat and lower seat
post slot and insert post. See gure 19.
2. Insert the detent pin into the lower seat post.
3. Tighten cam lever.
BATTERY REMOVAL
1. Ensure the battery pack is turned “OFF.”
2. Unplug the battery connector from the battery pack.
3. Remove the battery strap and lift upward and remove the battery.
FOLDING FOR TRANSIT
1. Loosen the tiller release knob until the tiller loosens and slowly folds down.
2. Tighten the tiller release knob.
3. Wrap the tiller strap rmly around the main beam using the reusable
hook and loop fastener to secure the straps. See gure 21.
BATTERY POWER DOWN
Ensure the battery pack is turned “OFF.” See gure 12.
SEAT REMOVAL
1. Loosen the cam lever.
2. Remove the seat by lifting it straight up and o of the scooter.
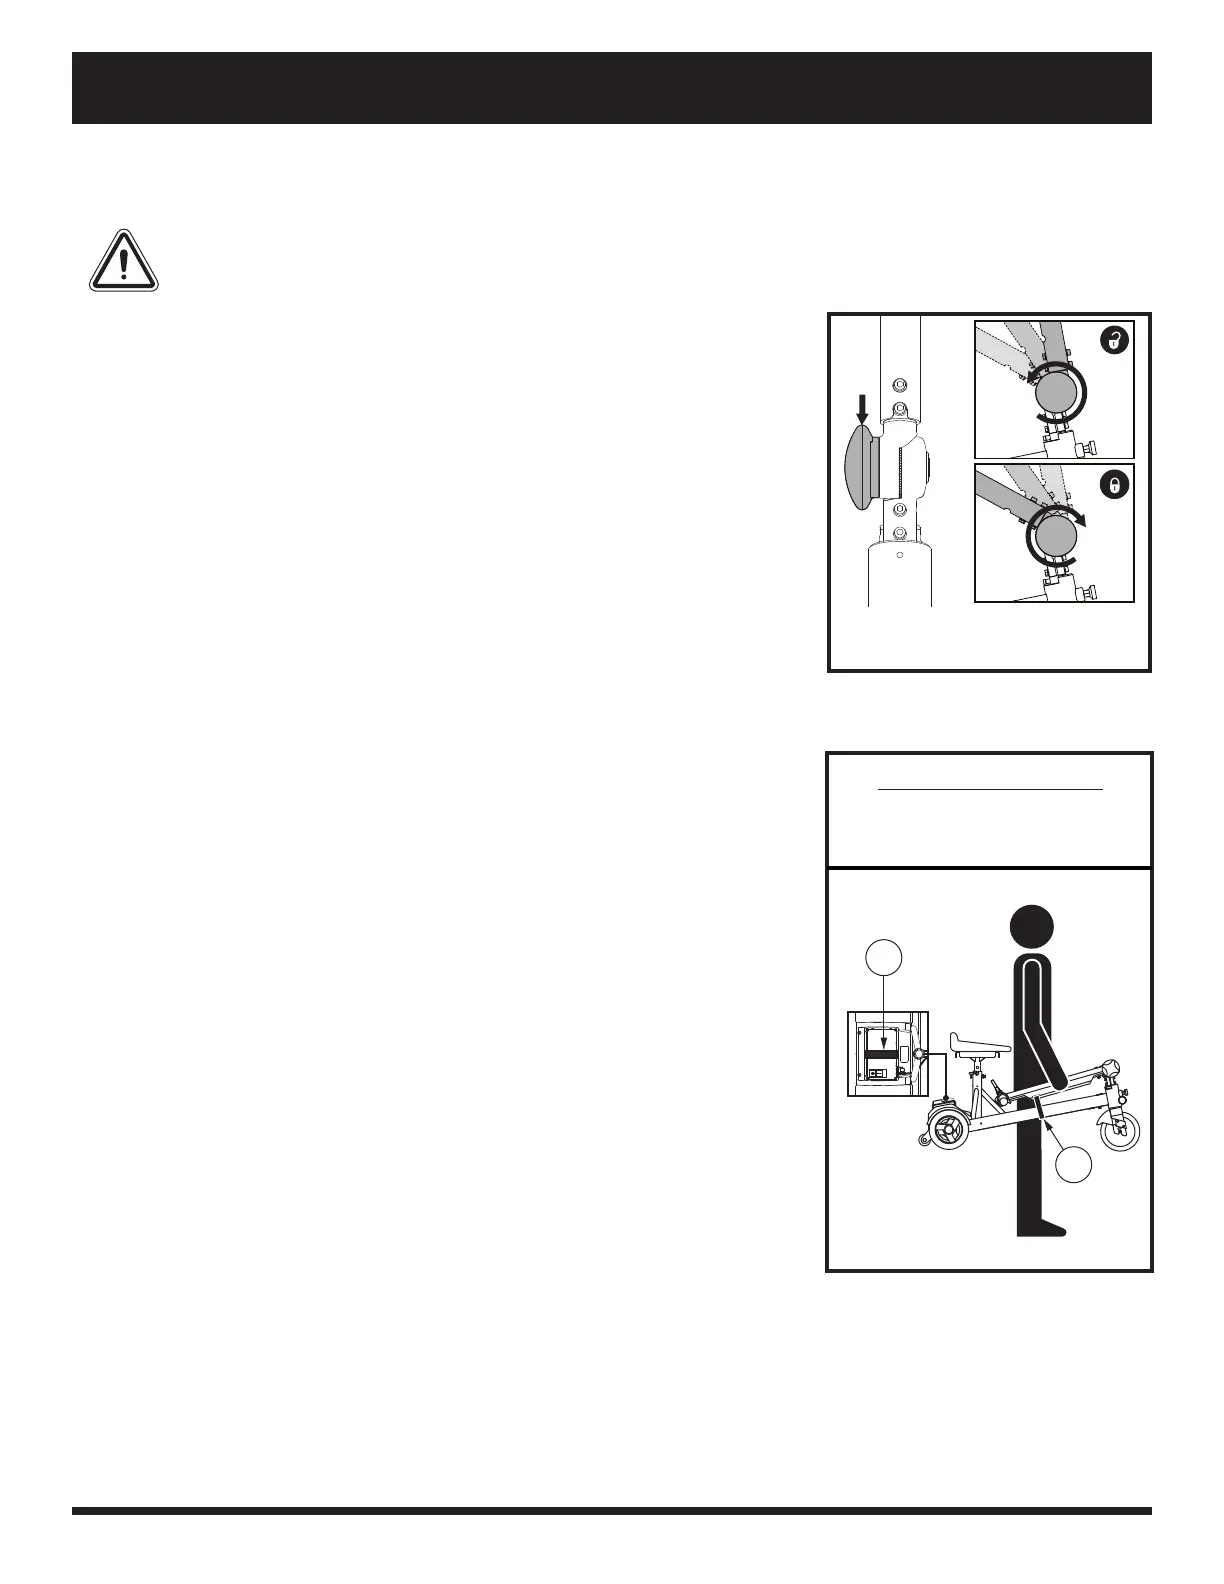
TILLER RELEASE
To release the tiller, loosen the Tiller Release Knob until the tiller loosens and
slowly folds down. See gure 20. If you encounter resistance when folding the
tiller down, rmly grasp the center of the tiller and apply slight pressure to the
tiller while pushing it downward.
NOTE: In order to fully lower the tiller, you must rst remove the seat.
To secure the tiller in the vertical position, hold the tiller fully upright while
tightening the Tiller Release Knob.
Figure 20. Tiller Release Knob
Figure 21. Folding for Transport
IDENTIFICATION KEY
1. Tiller Strap
2. Battery Strap
1
2