57289
REVISED
2.1.06
5
INSTRUCTIONS:
PLEASE NOTE:
⇒ This is a mechanical change of 4”
in front, 3” in rear.
⇒ Front end alignment is needed after
installation, set to factory specs.
⇒ Do not adjust torsion bars; leave at
factory specs.
BEFORE YOU BEGIN:
⇒ Read the instructions and study
the illustrations before attempting in-
stallation. Separating parts according
to the areas where they will be used
and placing the hardware with the
brackets before you begin will save
installation time.
⇒ Check the parts and hardware
against the parts list to assure that
your kit is complete.
⇒ Secure and properly block vehicle
prior to beginning installation.
⇒ Always wear safety glasses when
using power tools.
FRONT:
1) Place floor jack under front axle and
raise vehicle. Place jack stands under frame
to support vehicle. Set emergency brake
and block rear wheels, in front and behind
tires. Remove front wheels.
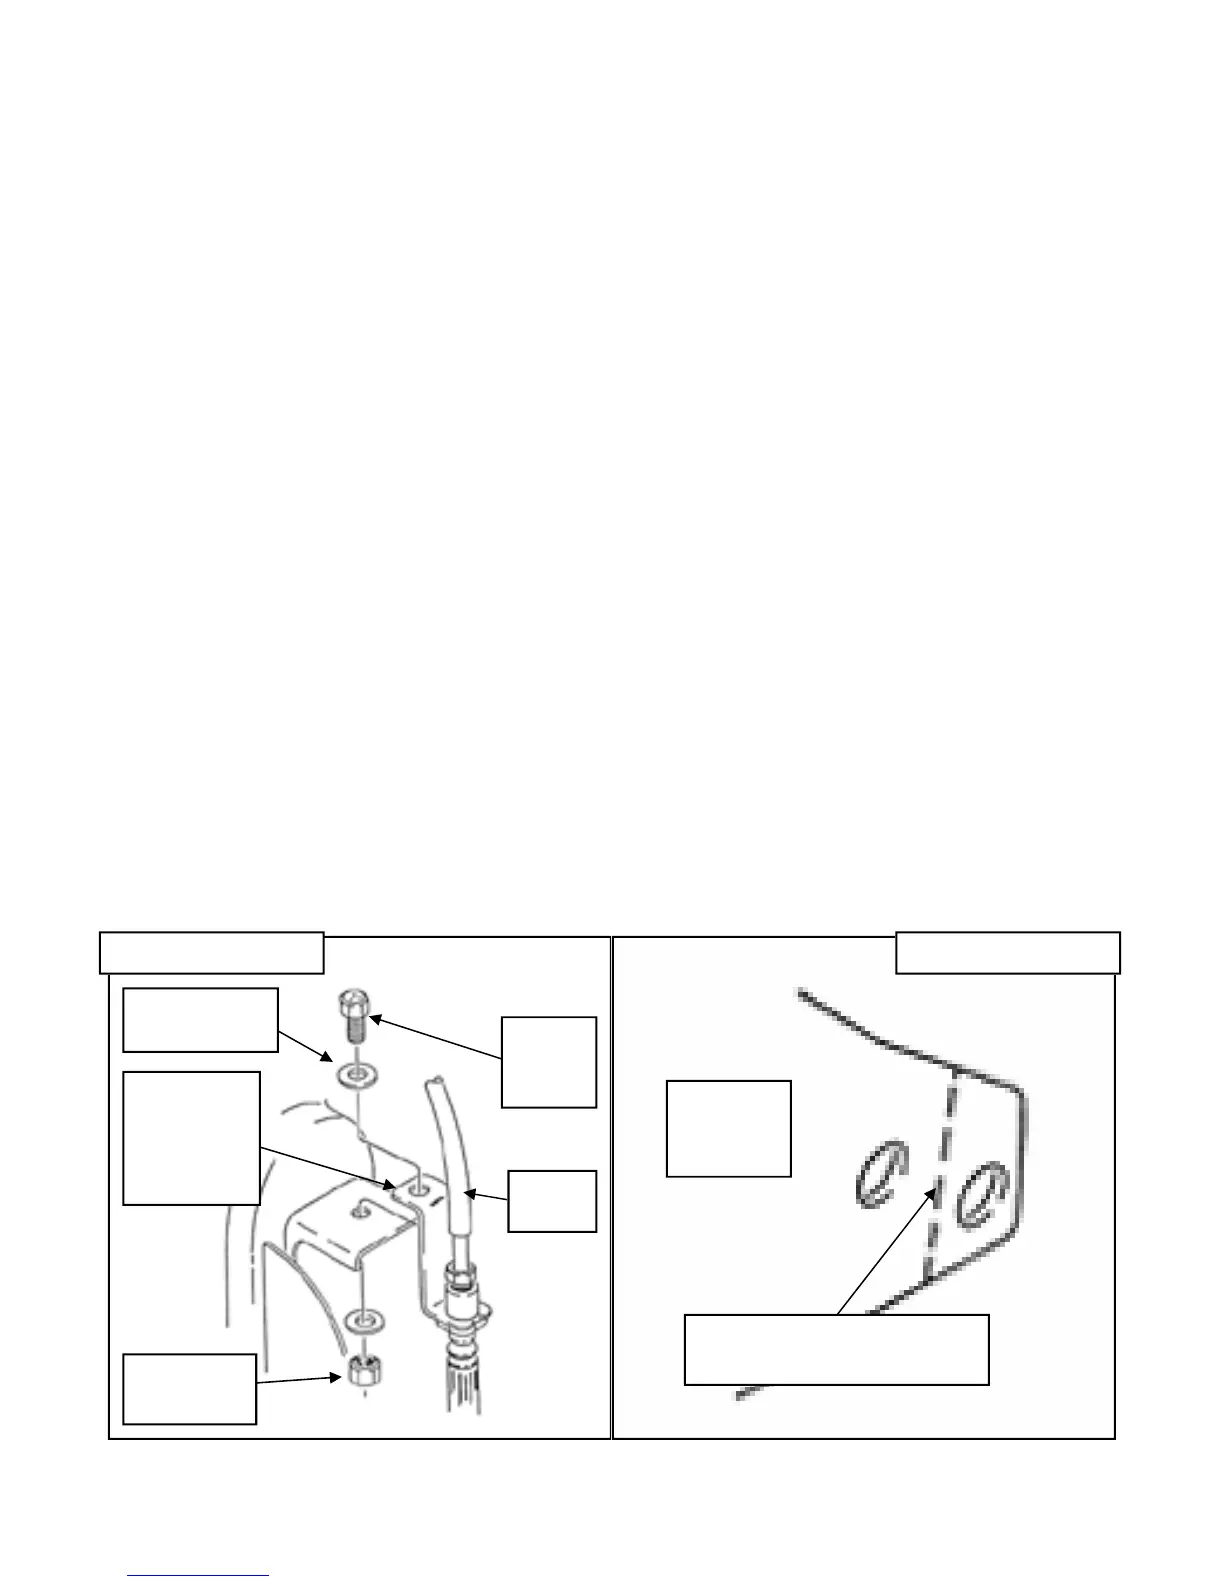
2) Remove clip from front of brake line
and bracket. Cut bracket to center of hole to
remove brake line of bracket. Install new
brake line drop down bracket to OEM
bracket and put 3/8” flat washer on top. In-
sert 3/8” x 1” hex bolt through both brackets
and tighten with 3/8” nyloc nut on bottom.
You may need to reform line slightly. Be
sure not kink or cause any interference of
line. Reinstall OEM brake line clip to hose at
bracket. See ILLUSTRATION 1.
3) Remove the shocks, sway bar, and
bump stops on each side (4 bump stops to-
tal). Remove eccentric bolt and nut front and
rear. Remove front crossmember from
mounting bracket. On passenger side only,
cut the mounting bracket tabs off of the exist-
HEX BOLT,
3/8” X 1” LG.
BRAKE
LINE DROP
DOWN
BRACKET
90-55089-5
FLAT
WASHER, 3/8”
NYLOC
NUT,
3/8”
BRAKE
LINE
ILLUSTRATION 1
EXISTING
OEM
BRACKET
CUT HERE FOR
DIFFERENTIAL CLEARANCE
ILLUSTRATION 2
 Loading...