14
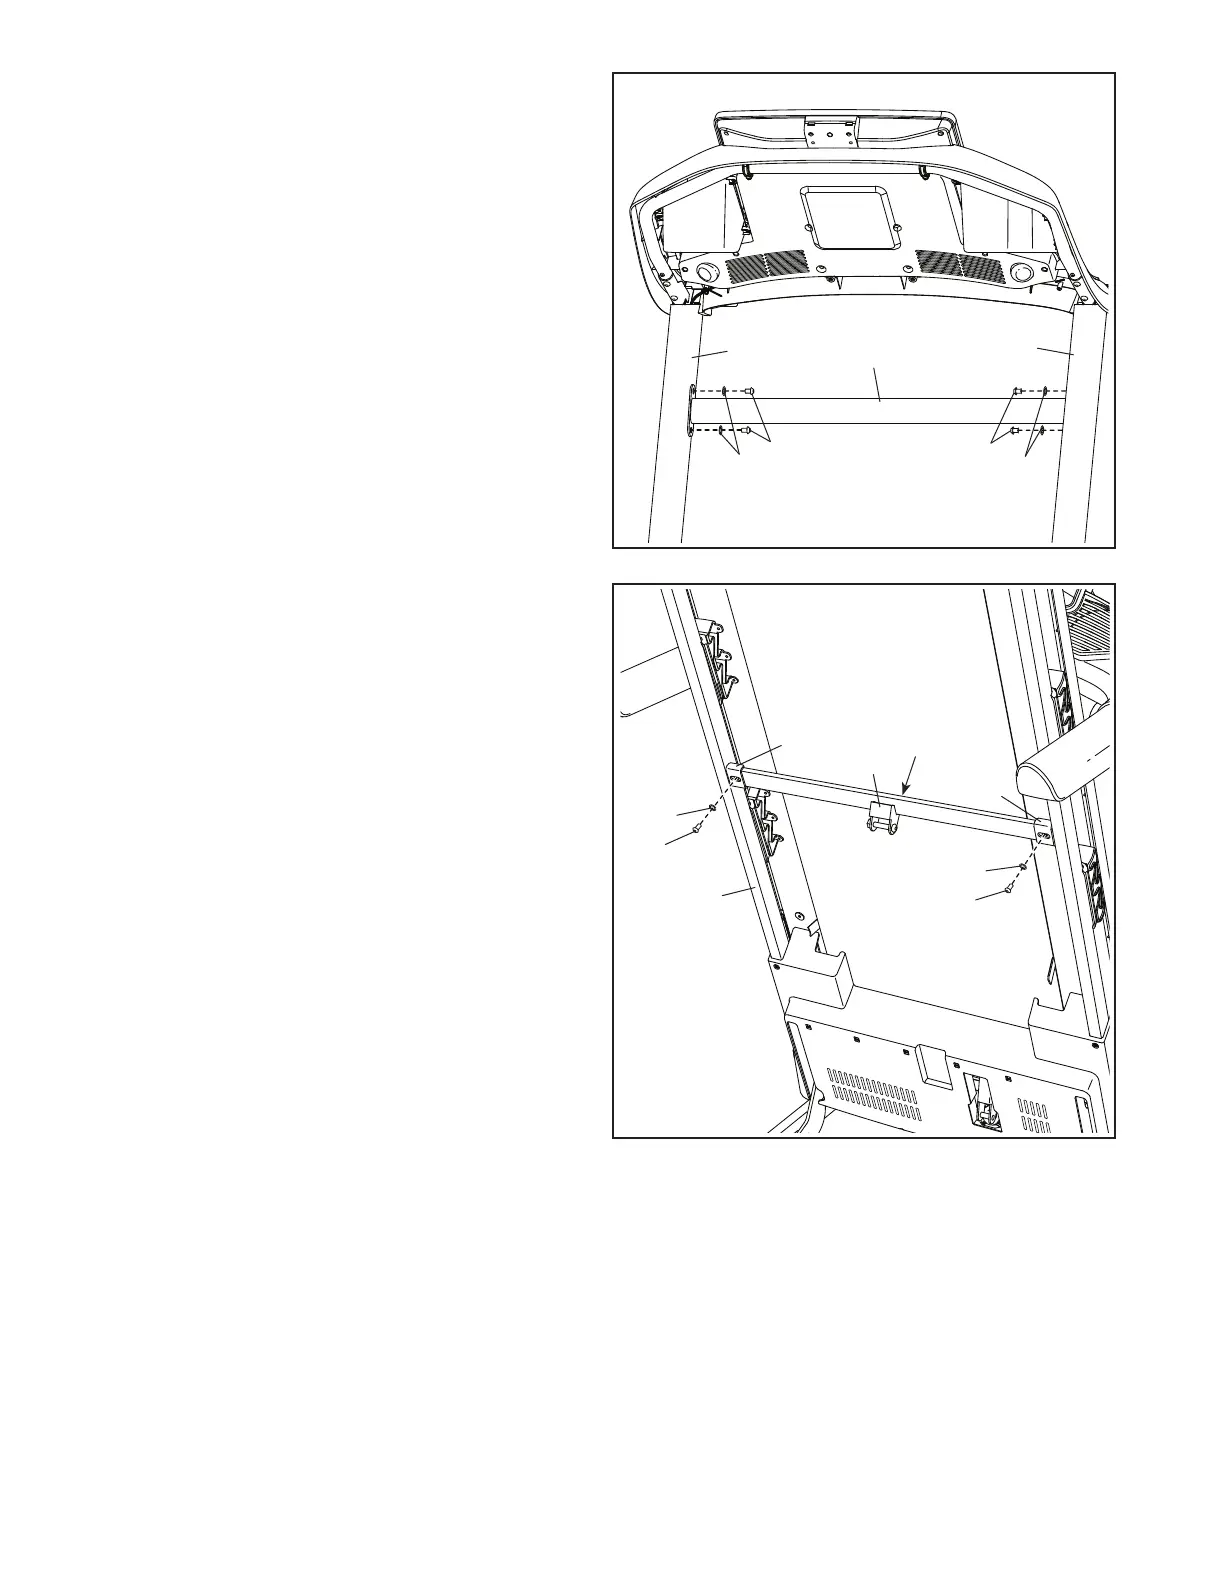
12. Carefully slide the Upright Crossbar (104)
between the Left and Right Uprights (85, 86).
Attach the Upright Crossbar with the four
5/16" x 3/4" Screws (8) that you removed in step
5, and four 5/16" Star Washers (12); start all
four Screws, and then tighten them.
12
85
104
12
12
8
8
86
13. Raise the Frame (60) to the upright position.
IMPORTANT: Do not raise the Frame past the
vertical position. Have a second person hold
the Frame until step 15 is completed.
Remove the two 5/16" x 3/4" Screws (8) from the
Latch Crossbar (103).
Orient the Latch Crossbar (103) as shown. Make
sure that the “This side toward belt” sticker
(I) is facing the treadmill. Attach the Latch
Crossbar to the brackets (J) on the Frame (60)
with the two 5/16" x 3/4" Screws (8) and two
5/16" Star Washers (12).
60
103
I
12
12
8
8
13
J
J
 Loading...