Do you have a question about the Pro-Ject Audio Systems 1.2 and is the answer not in the manual?
Initial assembly, placement, and securing of the turntable components for safe operation.
Instructions for mounting and wiring a cartridge to the headshell for audio playback.
Procedure for setting the correct vertical tracking force for the cartridge on the tonearm.
How to adjust the tonearm pillar for correct vertical tracking angle relative to the record.
Fine-tuning the tonearm height for optimal groove tracking and sound fidelity.
Setting the anti-skating bias to counteract lateral tracking force in the record groove.
Instructions for switching between 33 1/3 and 45 RPM playback speeds.
Guide for connecting the turntable's audio output to an amplifier's phono input.
Connecting the power supply and operating the main power switch for the turntable.
Instructions for attaching and adjusting the turntable dust cover for proper function.
Guidelines for cleaning and maintaining the turntable for optimal performance.
Recommendations for optimizing sound quality and turntable usability.
Specifications and performance metrics for the PRO-JECT 1.2 record player.
Common issues and their likely causes for the record player.
Procedure for seeking professional repair and support for product issues.
Information regarding the product's warranty coverage, duration, and claims.
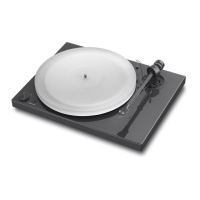
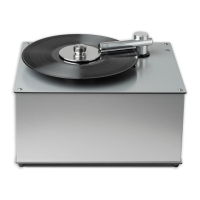
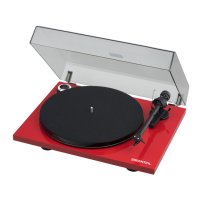
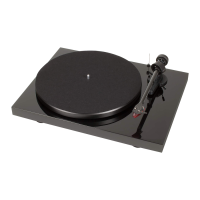
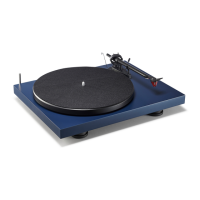
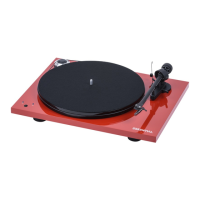
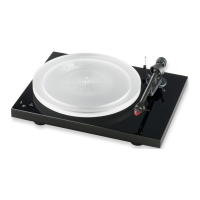
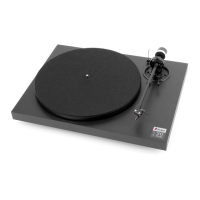
The Pro-Ject 1.2 is a high-quality record player designed for audiophile-grade analogue reproduction. It builds upon the success of previous Pro-Ject models, incorporating a higher quality tonearm for enhanced performance. The turntable is supplied partially disassembled and carefully packaged to ensure safe transport.
The Pro-Ject 1.2 functions as a record player, designed to reproduce audio from vinyl records. It features a motor-driven platter that spins records at either 33.33 or 45 revolutions per minute (r.p.m.), with an optional pulley available for 78 r.p.m. playback. The tonearm, equipped with a counterweight and anti-skating mechanism, holds a cartridge that reads the grooves of the record. The signal from the cartridge is then sent via a captive signal output cable to an amplifier, ideally a phono input, for amplification and playback through loudspeakers. The turntable is designed to deliver excellent sound quality through its precise mechanical and electrical components.
To set up the Pro-Ject 1.2, first ensure the surface it rests on is level. Remove the two red motor transportation screws and fit the drive belt around the hub and motor pulley. Care should be taken to avoid getting sweat or grease on the belt, as this can degrade performance and reduce its lifespan. The platter and felt mat are then placed over the spindle of the hub. The tonearm transport lock should be removed and stored with the motor transport screws for future transportation.
The record player accommodates cartridges with half-inch mounting holes. When fitting a cartridge, leave the needle's protection cover on and secure the cartridge to the headshell using the supplied screws, without fully tightening the nuts initially. Connect the tonearm wires to the cartridge pins following the specified color code: white for left channel positive (L+), red for right channel positive (R+), green for right channel return (R-), and blue for left channel return (L-). Achieving the full sound quality requires correct cartridge adjustment, which may necessitate specialized tools and expertise. If unsure, it is recommended to seek assistance from a Pro-Ject dealer to avoid damaging the cartridge or tonearm bearings.
Cartridge downforce adjustment is crucial for optimal playback. The supplied counterweight is suitable for cartridges up to 7g, with a heavier one available for heavier cartridges. The counterweight is pushed onto the rear end of the tonearm tube, with the downforce scale facing the front. After removing the anti-skating weight and needle cover, the tonearm is balanced by adjusting the counterweight until it floats level. Once balanced, the downforce scale is rotated to align its zero with the anti-skating thread stub. The recommended downforce for the cartridge can then be set by rotating the arm and scale together. This procedure should be repeated after the cartridge has been correctly aligned.
Tonearm height adjustment (VTA) ensures the needle is vertical in the record groove. With a record on the platter, and the needle lowered into the groove (not resting on the lift arm), the tonearm tube should be parallel to the record surface. If not, loosen the allen screws in the tonearm base just enough to allow vertical movement of the arm pillar. Adjust the arm up or down until it is parallel, then carefully retighten the allen screws without excessive force. For fine-tuning the VTA, a small screw at the bearing end of the arm can be adjusted. This requires removing the anti-skating weight thread stub and carefully tilting the tonearm up to slacken the screw. The needle should then be adjusted with a magnifying glass until it is vertical in the groove. It is critical to lift the arm before making any adjustments to avoid damaging the cantilever suspension.
Anti-skating force adjustment is performed by hanging the loop of the anti-skating weight's thread in the groove of the anti-skating stub (15) that corresponds to the applied downforce. The thread is then fed through the wire support, which is gently bent until the anti-skating weight hangs exactly over the specified spot. For very heavy cartridges, a heavier anti-skating weight may be required.
To change replay speed, remove the platter and hook the drive belt over the larger diameter part of the motor pulley for 45 r.p.m. playback. To revert to 33.33 r.p.m., use the smaller step on the pulley.
The turntable connects to an amplifier via its captive tonearm signal lead. It should be connected to a Phono input (often labeled gram, disc, or RIAA) that matches the cartridge type (MM/MC). Line inputs are not suitable. Ensure correct left and right channel connections (red for right, black/white for left). The earthing wire should be connected to the amplifier's earth terminal if available. If the amplifier lacks a suitable phono input, a separate phono amplifier stage, such as the Pro-Ject Phono Box, will be needed between the record player and a free line-level input.
The lid (dust cover) is fitted over the hinge prongs, and the screws are adjusted so the lid stays open as desired without being too stiff. The mains power lead connects to the country's mains supply, and the power switch alternately starts or stops the motor.
The Pro-Ject 1.2 requires minimal regular maintenance. Dust can be removed with a slightly moistened antistatic cloth; a dry cloth should be avoided as it can generate static electricity. Antistatic cleaning fluids can be used sparingly to prevent damage to rubber parts. It is advisable to fit the needle cover before any cleaning or maintenance to protect the stylus. If the record player is not used for an extended period, the drive belt can be removed to prevent unequal stretching. Always disconnect the record player from the mains power supply as a safety precaution before performing any maintenance.
For optimal sound quality, it is recommended to remove the lid during playback, as it can act as a resonant structure that transmits acoustic energy from loudspeakers into the plinth. The optional finger lift on the headshell, while easing arm placement, may impair sound quality by adding resonances and can be omitted. The record player should be placed on a low-resonance surface, such as wood or a multiple-layer ply board, to prevent structural vibrations from disturbing playback.
In case of problems, consult the troubleshooting guide for common fault symptoms such as the platter not turning, no signal on one or both channels, strong hum, or distorted sound. If issues persist, contact your dealer for advice. For warranty repairs, the unit must be safely disassembled and correctly packaged in its original packaging according to the diagrams provided. This includes removing the lid, counterweight, anti-skating weight, platter, cartridge, and belt, and inserting the transport screws for the motor and the transport lock for the tonearm and tonearm bearing. The manufacturer accepts no responsibility for damage caused by not adhering to these instructions or by transportation without the original packaging. Unauthorized modifications to the product will void the warranty.
| input sensitivity MM | 5mV/1kHz |
|---|---|
| input sensitivity MC | 0.45mV/1kHz |
| input impedance MM | 47kΩ/100pF |
| input impedance MC | 100Ω/100pF |
| output voltage | 200mV/1kHz |
|---|---|
| output voltage for power supply | 15-16V/50mA AC |
| noise floor MM | -88dB |
|---|---|
| noise floor MC | -79dB |
| THD | 0.005% |
| dimension W x D x H | 112 x 115 x 30mm |
|---|---|
| weight without power supply | 280g |