Programming Programming
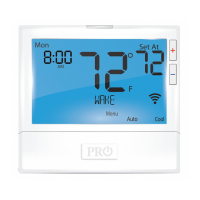
Set Time
Follow the steps below to set the day of the week and current time:
1. Press the MENU button.
2. Press SET TIME.
3. Day of the week will be ashing. Use the or key to
select the current day of the week.
4. Press NEXT.
5. The current hour is ashing. Use the or key to
select the current hour. When using 12-hour time, make sure
the correct a.m. or p.m. choice is selected.
6. Press NEXT.
7. Minutes are now ashing. Use the or key to
select current minutes.
8. Press DONE when completed.
(If using programming)
You will see a TECH SETUP option after the MENU key is pressed.
This TECH SETUP key is for installer conguration and should NOT
be changed unless you consult your professional heating and air
conditioning technician.
Important:
10
11
1. Select HEAT or COOL with the SYSTEM key.
Note: You have to program heat and cool each separately.
2. Press the MENU button (If menu does not appear rst, press
RUN SCHED).
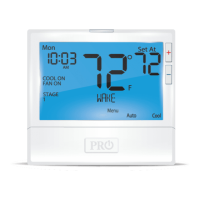
3. Press SET SCHED. Note: Monday is displayed and the
WAKE/OCC1 icon is shown. You are now programming the
WAKE/OCC1 time period for that day.
4. Time is ashing. Use the or key to make your time
selection for that day’s WAKE/OCC1 time period.
Note: If you want the fan to run continuously during this time
period, select ON with the FAN key. If you want to use IAQ
mode during this time period, select IAQ with the FAN key.
5. Press NEXT.
6. The setpoint temperature is ashing. Use the or key
to make your setpoint selection for that day’s WAKE/OCC1
period.
7. Press NEXT.
8. Repeat steps 4 through 7 for that day’s LEAVE/UNOCC1
time period, for that day’s RETURN/OCC2 time period,
and for that day’s SLEEP/UNOCC2 time period.
To customize your 7 day 4 time period Program schedule, follow
these steps:
Monday:
Repeat steps 4 through 8 for the remaining days of the week.
 Loading...